
OGMRip
|
OGMRip is an application used for ripping and encoding DVDs. It uses a wide variety of codecs, so it is capable of encoding your video file into AVI, OGM, MP4, or MKV (Matroska). It relies on mplayer, mencoder, ogmtools, mkvtoolnix, oggenc, lame and faac to perform its tasks.
Features:
This little tool is very simple and effective and it's easy to use. OGMRip has an excellent interface that gives you a lot of control without being too complicated. Recommended: I highly recommend that you install all of the necessary codecs that is required to play encoded DVDs and that you install MPlayer. |
How to Install OGMRip:
1. Open the Terminal (Shortcut: Ctrl + Alt + T)
2. Type the following command: sudo apt-get update
4. Press Enter or Return and type in your password
5. Type the following command: sudo apt-get install ogmrip ogmrip-doc
6. Type Y and press Enter or Return
How to Uninstall OGMRip:
1. Open the Terminal (Shortcut: Ctrl + Alt + T)
2. Type the following command: sudo apt remove ogmrip ogmrip-doc
3. Type Y and press Enter or Return
1. Open the Terminal (Shortcut: Ctrl + Alt + T)
2. Type the following command: sudo apt-get update
4. Press Enter or Return and type in your password
5. Type the following command: sudo apt-get install ogmrip ogmrip-doc
6. Type Y and press Enter or Return
How to Uninstall OGMRip:
1. Open the Terminal (Shortcut: Ctrl + Alt + T)
2. Type the following command: sudo apt remove ogmrip ogmrip-doc
3. Type Y and press Enter or Return
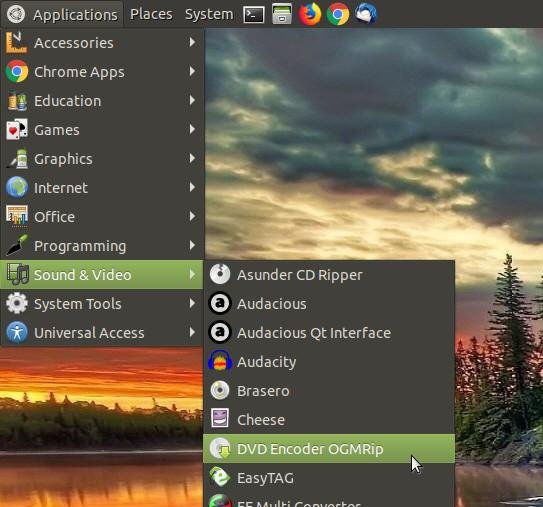
To start OGMRip click on th Applications menu, then highlight Sound & Video, then click on DVD Encoder OGMRip.
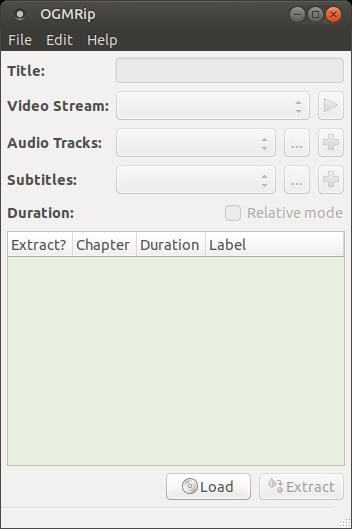
After a few seconds the main OGMRip window will load and wait for you to clik the File menu and Load a DVD.
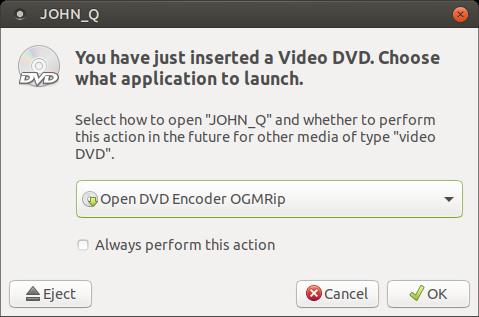
My system is setup to display a message each time that I put a CD or DVD into the DVD Player/Burner. I just select the program that I want to use from the drop-down list. At that point, I selected to open my DVD with OGMRip. Do Not check Always perform this action or OGMRip will load everytime you insert a DVD into your DVD Player/Burner.
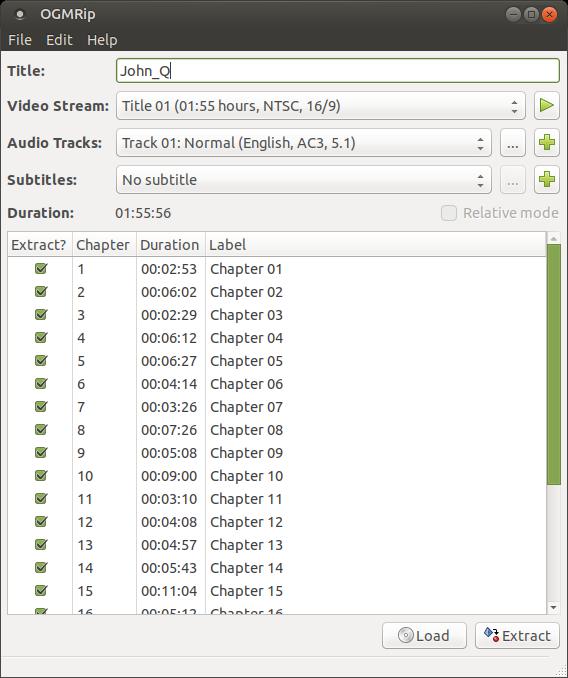
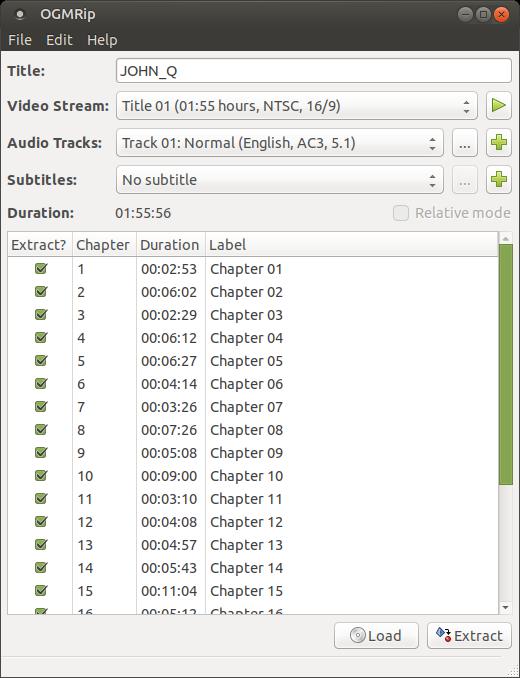
After the program loaded bringing up the contents from my DVD, I changed the title from Unknown to the title of my movie.
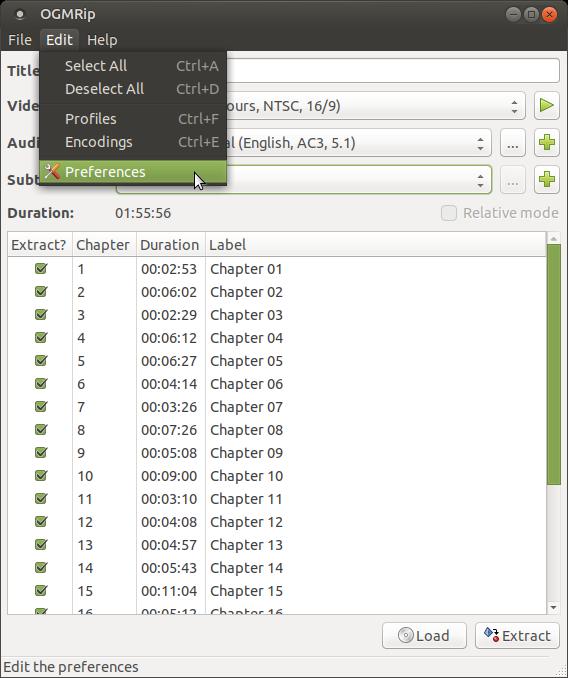
If this is the first time using the program, you will want to select your preferred settings. Click the Edit menu and then click Preferences.
The Preferences dialog box will appear with the default settings. The General tab is opened first. In this section, you can change the path your output file will be placed in and the naming scheme of your encoded file. You can also change your preferred language of your audio and subtitles.
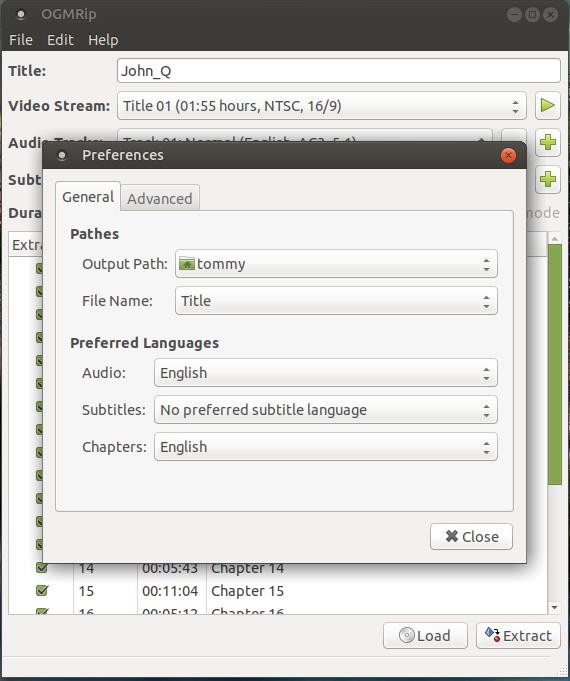
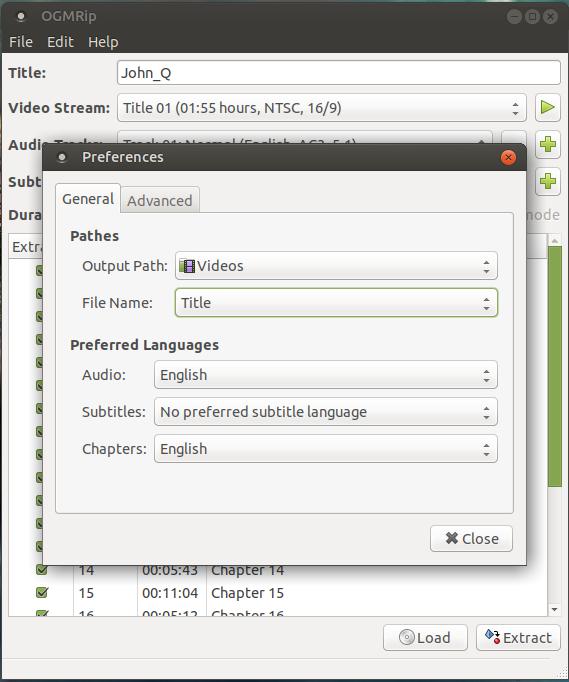
By default, OGMRip will place your newly encoded file into your Home (your name or computer's name) folder. I prefer to save them into my Videos folder to help keep my files organized, so I clicked on the drop-down arrow and selected Videos next to Output Path.
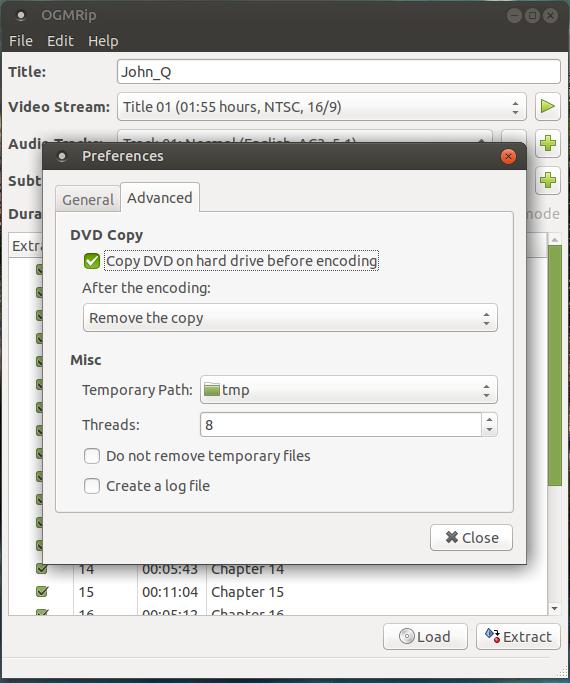
The next tab in the Preferences dialoag box is the Advanced tab. In this tab you have the options of copying the contents from the DVD before it starts the encoding process and whether or not if you want to remove these files after the encoding process is completed. Make sure your hard drive has at least 10 GB of space, if you have Copy DVD on hard drive before encoding. Having this option selected accelerates the encoding process. You also have the choice to the location of the temporary files that are created during the ripping process. I leave these at the default settings. However, if you start experiencing trouble during the ripping process, you might want to check Create a log file to help you locate where the problem occured. Click the Close button when you are finished.
Profiles
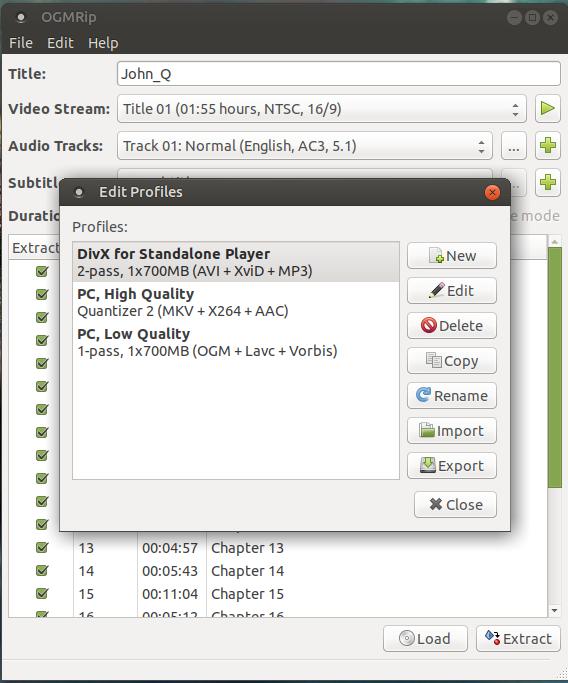
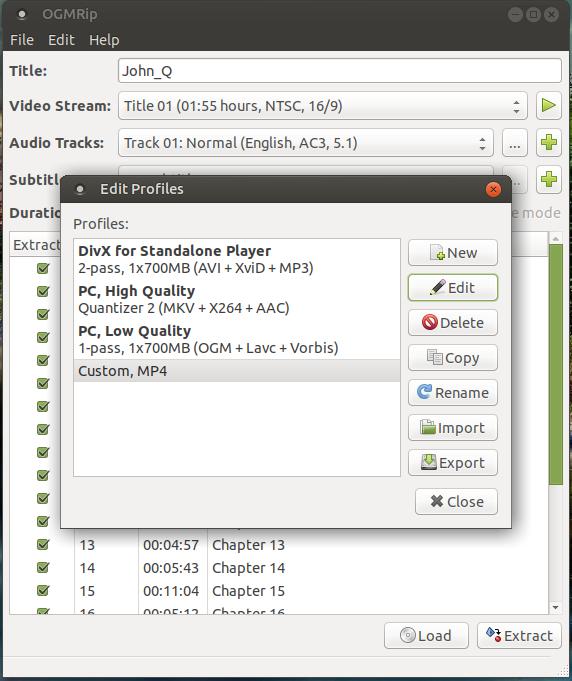
You must select a profile before you rip your first DVD. A profile contains the information of your configuration, such as the codecs used and type of container you prefer you file to saved in. By default, OGMRip comes with three profile settings: DivX for Standalone Player, PC, High Quality, and PC, Low Quality.
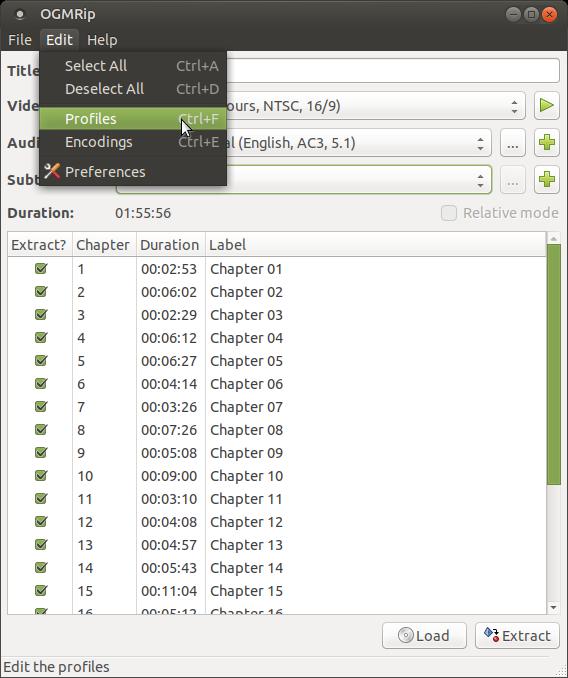
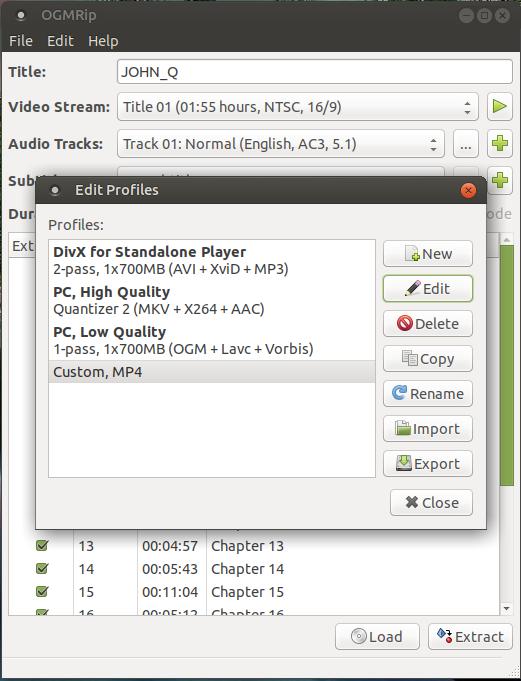
To access your Profiles click on the Edit menu and click on Profiles.
You must select a profile before you rip your first DVD. A profile contains the information of your configuration, such as the codecs used and type of container you prefer you file to saved in. By default, OGMRip comes with three profile settings: DivX for Standalone Player, PC, High Quality, and PC, Low Quality.
- DivX for Standalone Player: Encodes the video in Xvid and the audio in MP3, in an AVI container, with options improving compatibility with standalone players, for an output size of 700 MB.
- PC, High Quality: Encodes the video in X264 and the audio in AAC, in a Matroska container, with options improving quality over speed, for an output size of 700 MB.
- PC, Low Quality: Encodes the video in Mpeg-4 and the audio in Vorbis, in an Ogg Media container, with options improving speed over quality, for an output size of 700 MB.
To access your Profiles click on the Edit menu and click on Profiles.
The Edit Profiles dialog box will appear that with the three default profile settings.
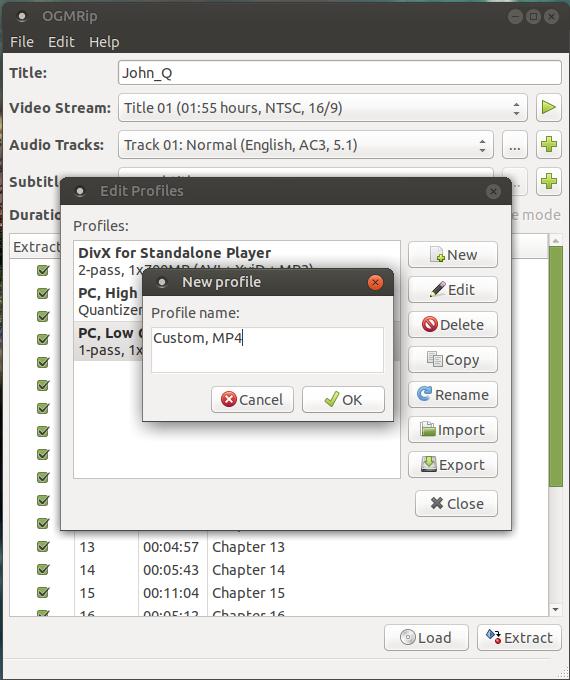
Let's create a new custom profile setting. Click the New button in the Edit Profiles dialog box. When the New profile dialog box appears, type in a unique name that will help you identify your new custom setting. In my example, I typed Custom, MP4. Press the OK button after you name the new profile.
Click on the name of your new profile and then click the Edit button.
You are now ready to make changes in the Editing profile dialog box. The General tab is displayed first. This tab contains the options related to the container and the encoding method.
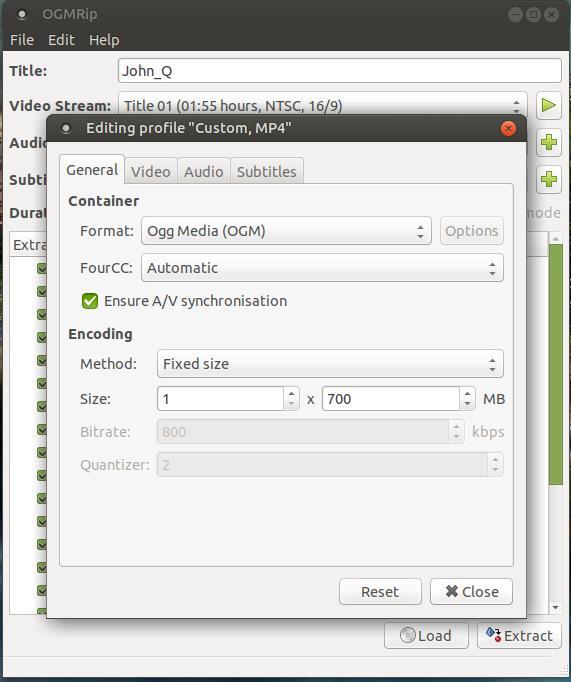
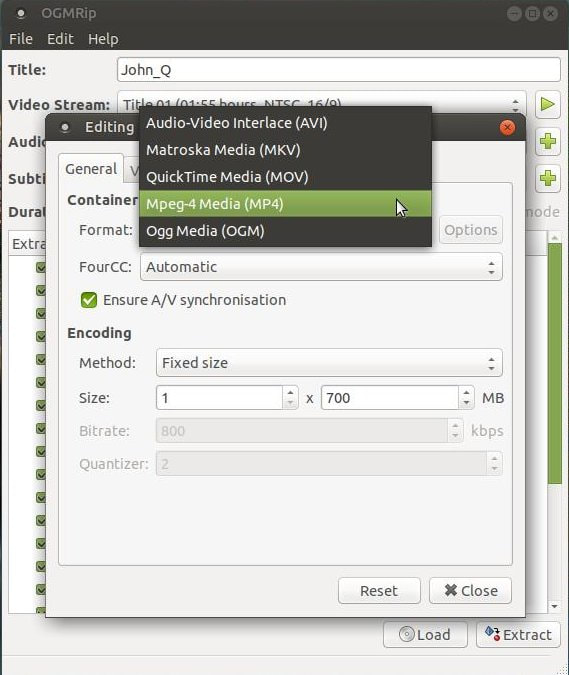
You can click the drop-down arrow next to the Format option to see the different output formats. I changed from OGM to MP4. You can select the format that you are more comfortable working with. I kept the default setting for FourCC and Ensure A/V synchronisation. I will provide a link to the online User Manual at the bottom of this webpage in case you want more information on any of these settings.
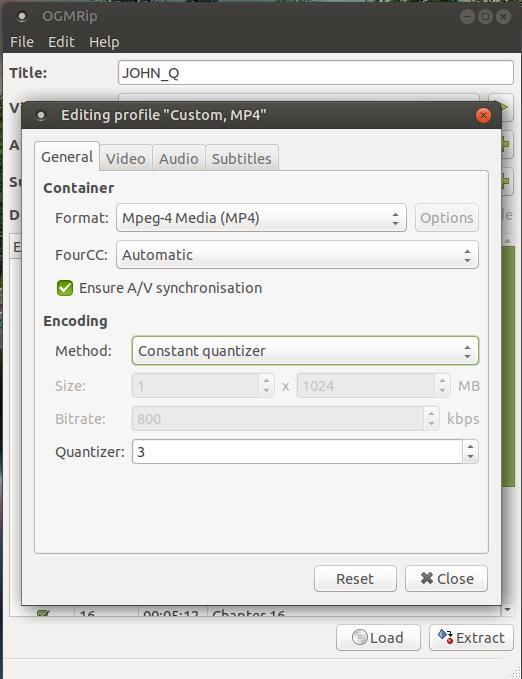
For Encoding, here are my settings: I changed 700 to 1024 while the Metho was still Fixed size then I changed Method: Constant quantizer and Quantizer: 3. The file could also be split in several tracks by changing the number one to indicate the number of files you want to split your files into. This was a highly used feature when 700 MB CDs were popular. OGMRip gives you the ability to rip a DVD and burn it to multple CDs. For higher quality videos, you can increase the file size from 700 to a higher number. That's why I changed 700 MB to 1024. "Constant quantizer: Also called constant quality, this encoding method gives very high quality videos but very big files."
The lower the quantizer number, the higher the quality and the larger the file size. The higher the number, the lower the quality and the smaller the file size.
The lower the quantizer number, the higher the quality and the larger the file size. The higher the number, the lower the quality and the smaller the file size.
- 0 to 2 = higher quality, larger file size.
- 3 or 4 = good quality, medium file size
- 5 or 6 = lower quality, smaller file size
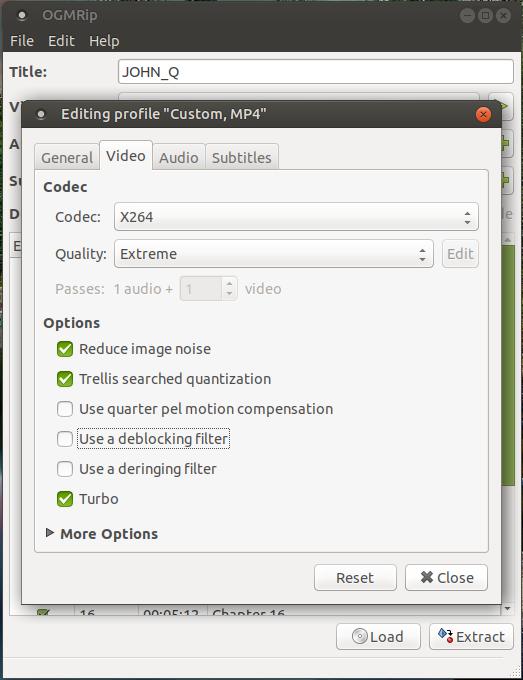
Next is the Video tab. This tab groups all the options related to the encoding of the video stream. I changed the Codec from Lavc MPeg-4 to X264. I kept the Extreme quality and I kept the default Options of Reduce image noise, Trellis searched quantization, and Turbo.
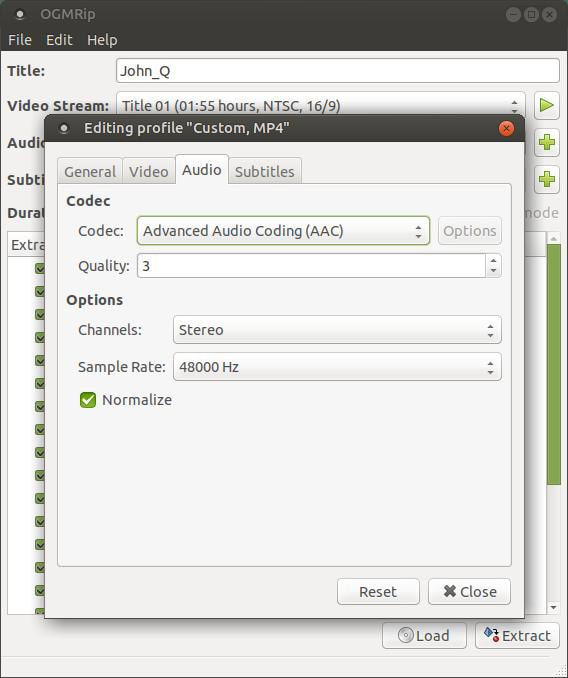
Next is the Audio tab. I changed the default Codec from Ogg Vorbis to Advanced Audio Coding (AAC). I kept a quality of 3 and Stereo for Channels and a Sample Rate of 48000 Hz and kept a check next to Normalize.
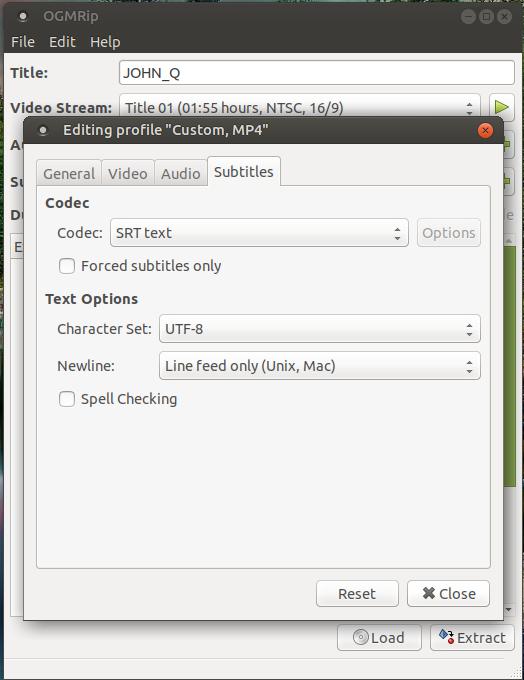
The last tab is Subtitles. You can select to hardcode subititles or force subtitles. I chenged the subtitles codec to SRT text (simple text) because I have used it before and it works well. Click the Close button when you finish.
All of those settings will now be saved in the Custom, MP4 profile. You can select this new profile and it will apply all of those settings without having to go through all of that work again.
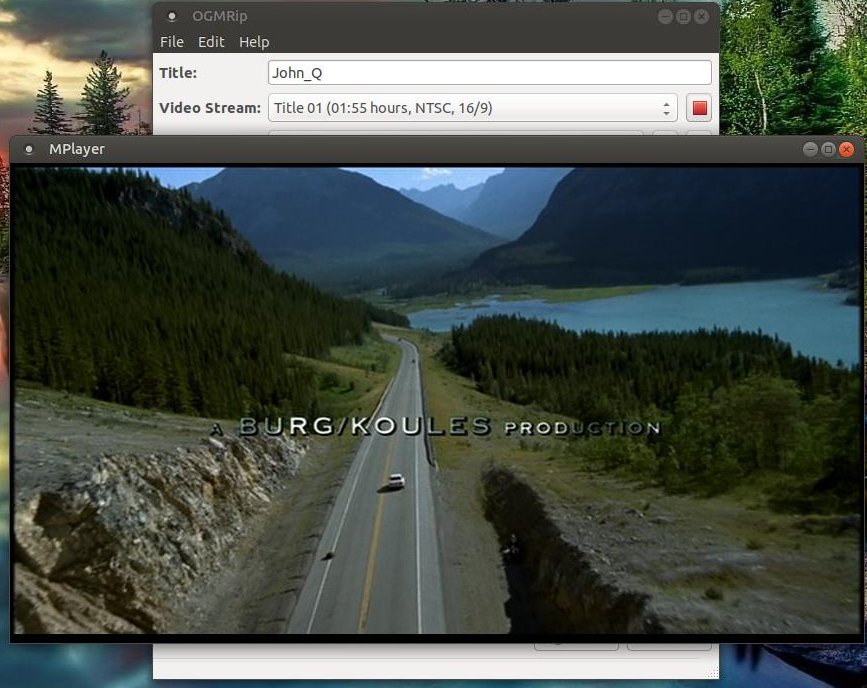
If you are not sure that you have the correct Video Stream and Audio Track, click the Play icon to the right of Video Stream to play your selection in MPlayer. You can close MPlayer once that you've determined that you selected the correct video and audio.
You are now ready to Extract or Rip your movie from your DVD to your hard drive. Click the Extract button to start the process.
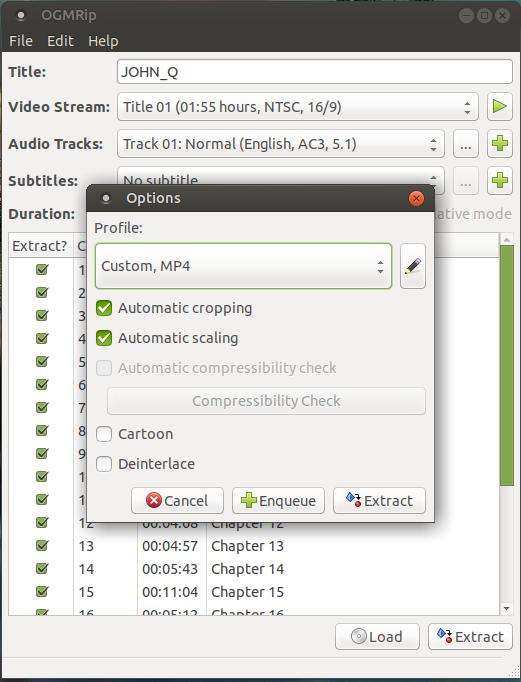
When the Extract Options dialog box appears, click on the Profile area and select your new Custom, MP4 profile.

You can leave Automatically cropping and Automatically scaling checked.
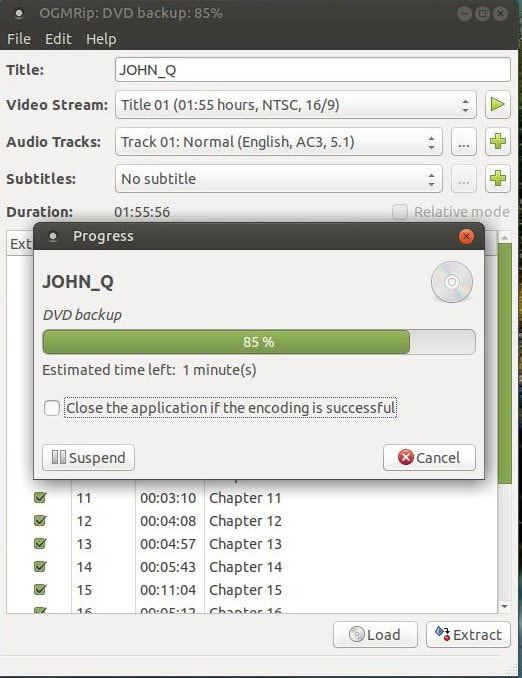
You are now ready to click the Extract button to start the ripping process. It will go through and make a backup of your DVD.
***** I ran into a slight problem with OGMRip. *****
PROBLEM
Message: "Extracting audio stream 1"
Progress is stuck at 0%. Doesn't ever move.
https://sourceforge.net/p/ogmrip/discussion/258034/thread/8d87ebef/
A guy name Mike, on the website above, provides a patch for the fix. However, you have to know how to apply a patch and recompile the
program in order to fix the problem. That goes beyond the scope of point and click or copy and paste to install software. I will try to find an
easy fix or another program that can Rip DVDs as easy as OGMRip.
If you are looking for a simple way to rip a DVD then I highly recommend that you install HandBrake. You can do so much more with HandBrake.
I was going to delete this webpage, since it requres more than the basic knoweledge of Linux; however, I think OGMRip is a great tool and has an easy to use interface. I decided to leave it here for those that want to try to apply a patch to a program and recompile a program (this requires more advanced knowledge of Linux). Maybe someday the creators of OGMRip will update their sodtware to work with the newer vesions of Ubuntu and Ubuntu derivatives.

