
How-To Burn an ISO Image File to a DVD
|
ImgBurn allows you to burn CDs, DVDs, HD-DVDs, and Blu-ray discs. It can also transform a disc or series of files into an image file or ISO file, but the feature I will focus on in this section is its ability to convert an image file or ISO file to a usable disc or DVD.
If you are using a Microsoft Windows operating system, you have the ability to burn an ISO file to a DVD; however, the instructions are different for the different versions of MS Windows. To keep things simple and consistent, ImgBurn works on older versions of MS Windows up-to the newest MS Windows 10. In my examples below, I am demonstrating it with MS Windows 10. This guide will help you create an Ubuntu MATE boot disc that you can use to install Ubuntu MATE on your computer. |
Download & Install ImgBurn
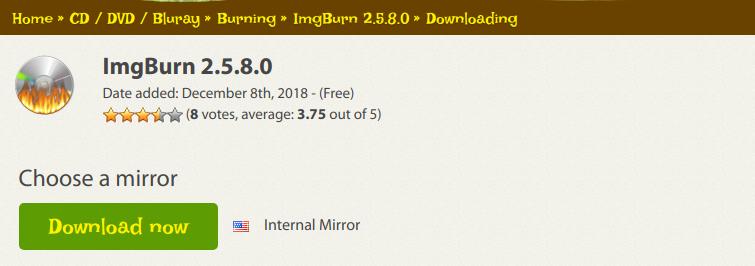
You can download and install ImgBurn 2.5.8.0 from https://www.filecroco.com/download-imgburn/. Click on the free download button
You can download and install ImgBurn 2.5.8.0 from https://www.filecroco.com/download-imgburn/. Click on the free download button

You will be taken to another page that will start your download. If your download doesn't start automatically after a few seconds, click the big green Download now button.
When the download completes, go to the location you downloaded it to and double-click it to install the program on your computer. Be aware that it may try to install some Potentially Unwanted Programs (PUPs) on your system, however, you can choose to not install these by opting out during the installation process.
Burn an ISO Image to a DVD
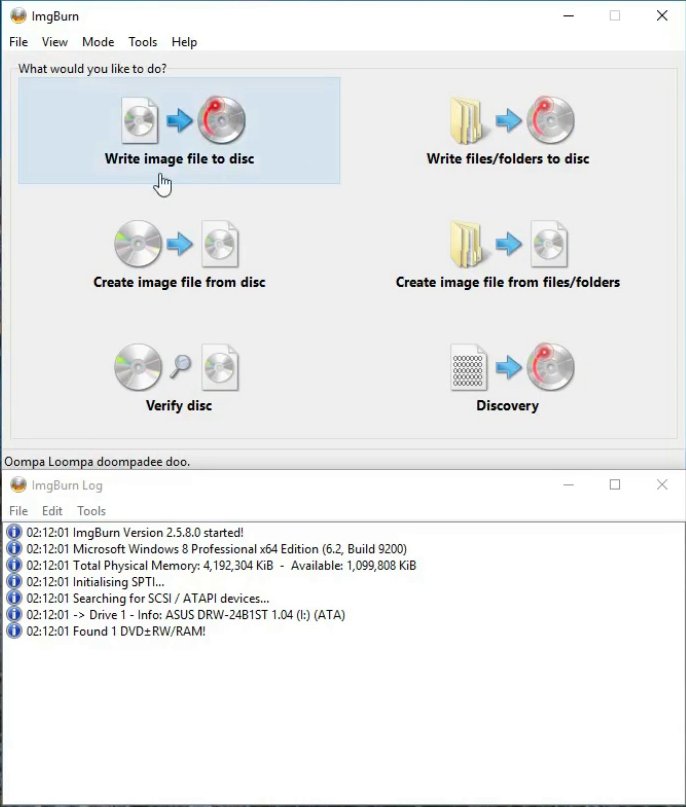
If you have an ImgBurn icon on your desktop, double-click it to start the program. If not, you can use Windows search feature to find and execute ImgBurn. After the program loads, click on the Write Image file to disc.
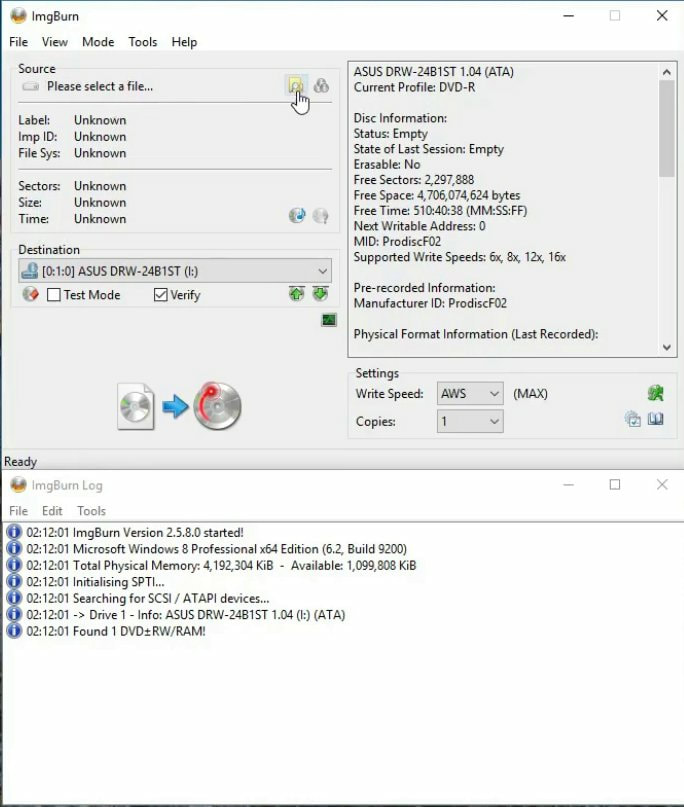
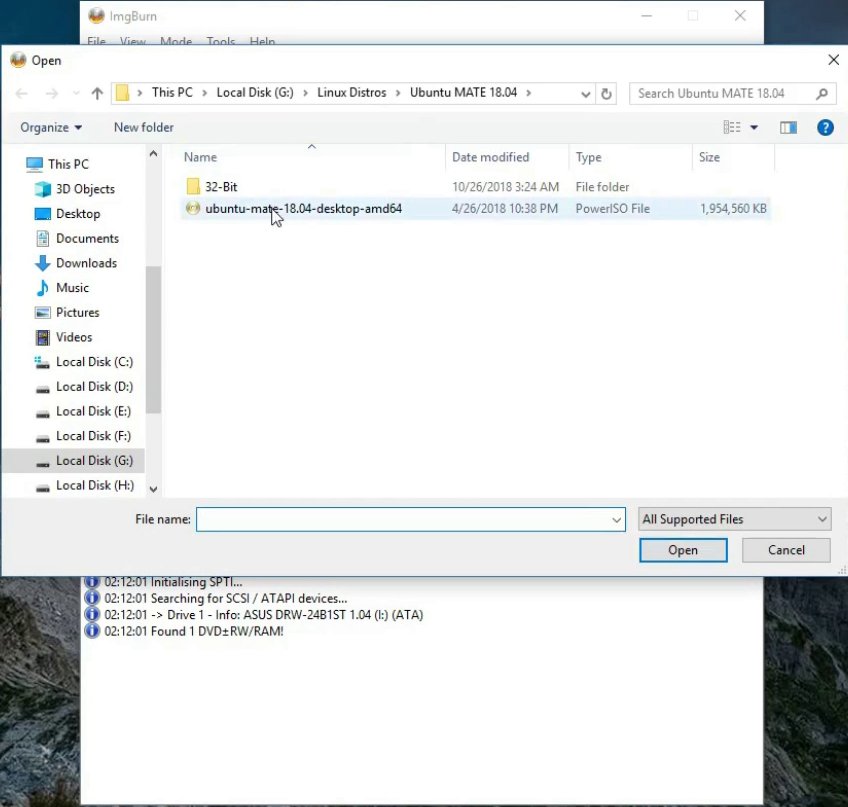
You will notice in the upper left corner that you can click on the folder icon to allow you to select an ISO file from your hard drive.
An Open dialog box will appear that will allow you to locate your ISO file. Click on the ISO file, in my example it's the ubuntu-mate-18.04-desktop-amd64.iso file, and the click on the Open button.
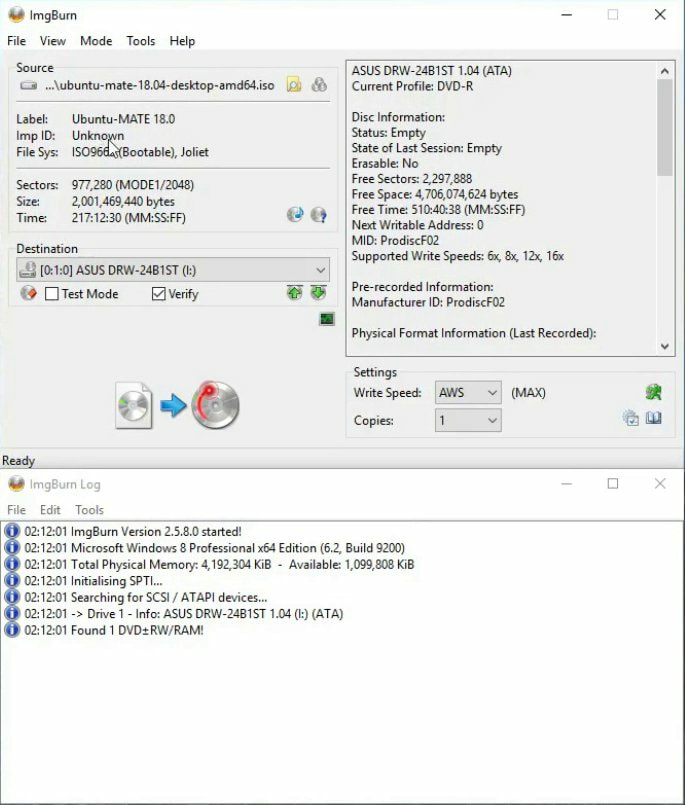
You will now see the name of your ISO file under Source in the upper left corner of the ImgBurn dialog box. I recommend that you select the Verify option to confirm that all the files inside the ISO were burned to your DVD. Make sure that your DVD burner is selected as the Destination.
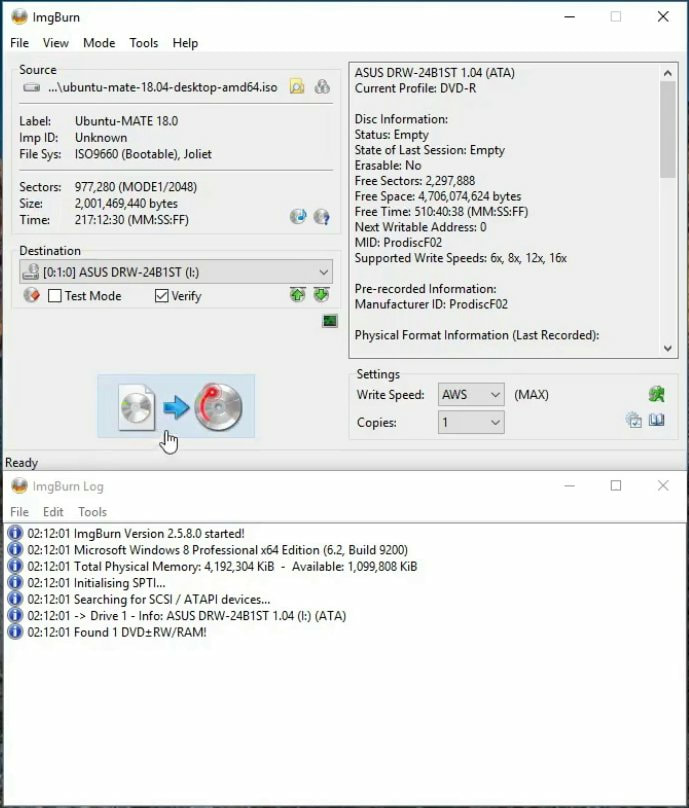
Make sure that you have a blank DVD in your DVD Burner and then click on the Write button.
The Write or Burn process will start and during that time you have several options in the upper right corner of the ImgBurn dialog box. I have the option set to Verify my files after the burner process completes. You can have it to eject your DVD after the process completes by clicking on the Eject Tray option. You can have it to Close Program, Delete Image, and/or Shut Down Computer when the process completes.
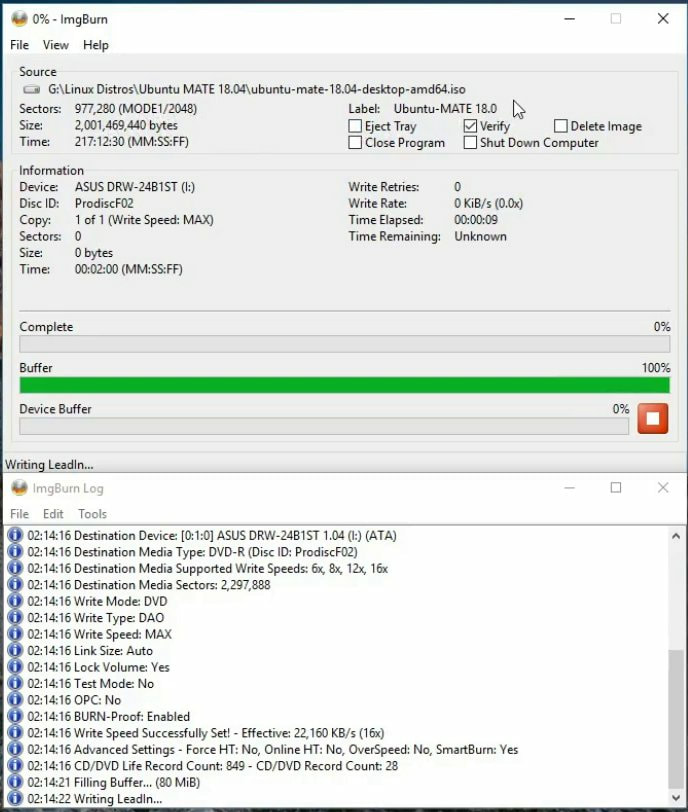
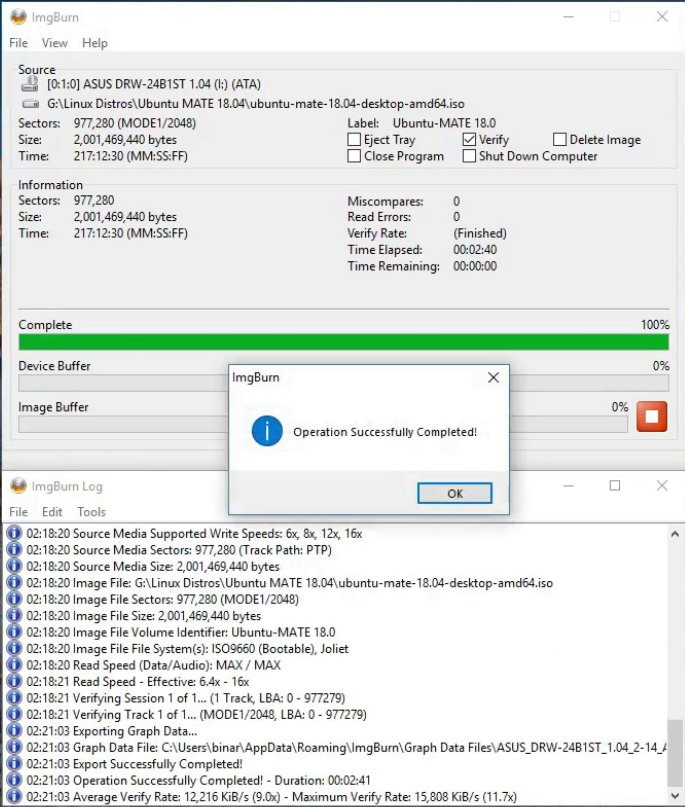
It will take several minutes to burn to your DVD, so be patient. When the burn process completes, your DVD tray will open for a few seconds and then close and start the verification process. When the burn process and the verifying process completes, a dialog box will pop-up saying, "Operation Successfully Completed!" You can now remove your DVD from your DVD Burner and label your DVD. Then click the OK button to close the ImgBurn dialog box. You can also close the ImgBurn program unless you want to burn more DVDs.
You now have an Ubuntu MATE 18.04.1 LTS bootable DVD. You can now use this DVD to install the latest long term support version of Ubuntu MATE on your computer.

