
Pinta: Resize Image vs. Resize Canvas

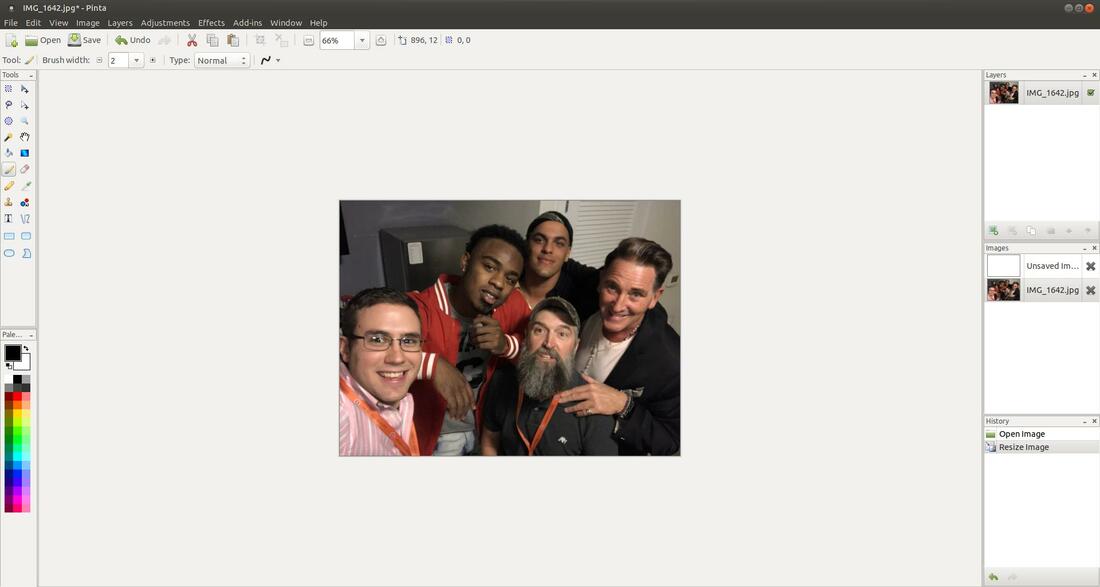
Steve Moses (BB17 US winner), Swaggy C (BB20 US), Donny Thompson (BB16 US AFP - My brother), Josh Martinez (BB19 US winner), & Kevin Schlehuber (BB19 US)
An area of major confusion affecting Pinta beginners is knowing the difference between resizing the canvas and resizing an image. On this site I will compare the two and describe how to perform each function. Lets start with canvas size.
Canvas Resize
To resize the your canvas in Pinta, is to change the current size of the document your working on, but not the image itself. Think of it like you would a painter painting on his/her paint canvas. The canvas is what the painting is put on, so without a canvas there would be no painting.
You can resize your canvas and your image will stay the same size. However, if you make the canvas smaller than the image it will appear the your image was cropped. When you resize your canvas you are simply making your canvas bigger or smaller, allowing for more or less room.
Example: Click on the Image menu and then click on Resize Canvas...

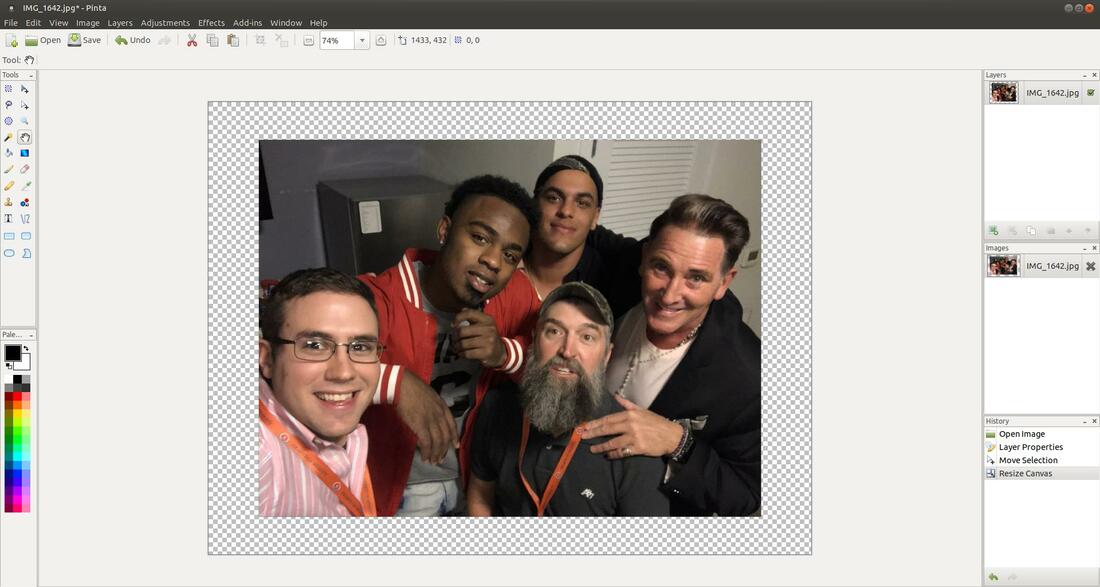
You can increase or decrease the image Canvas size by chaning the number in the By percentage box. A number less than 100 will decrease the Canvas size and a number great than 100 will increase the Canvas size. If you select the By absolute size it will allow you to change the width and/or height of the canvas. The buttons under Anchor allow you position your image on your new canvas size. I changed the Canvas to 120% and then clicked the OK button.
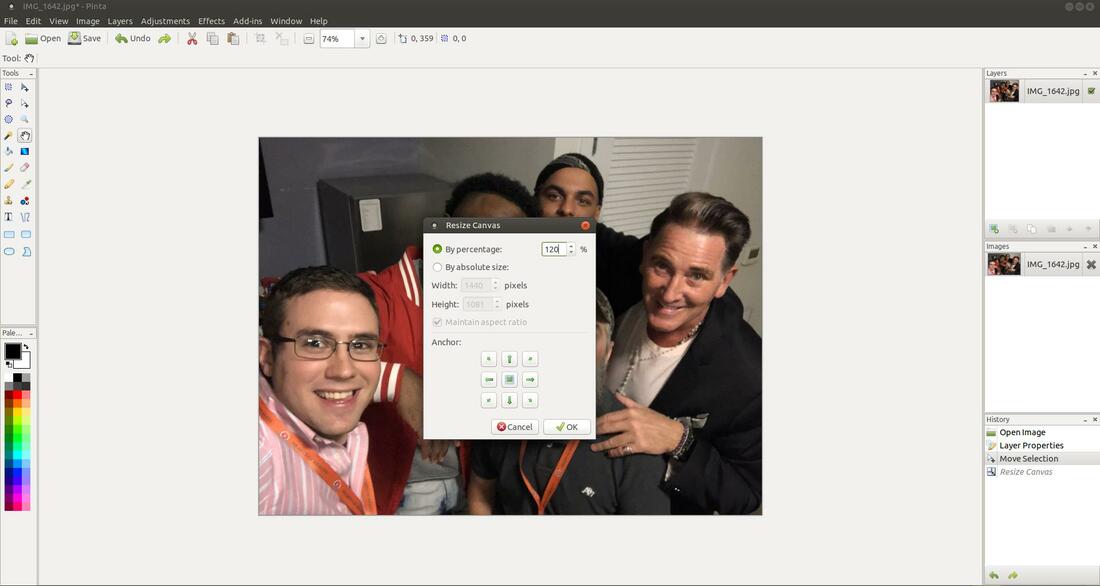
The default setting of Resize Canvas will add space around all four sides of the current document. This can be modified by adjusting the arrows on the Resize Canvas dialog box. (The gray and white lattice pattern indicates the area is transparent. A background image, if one is present, will display in this area.)
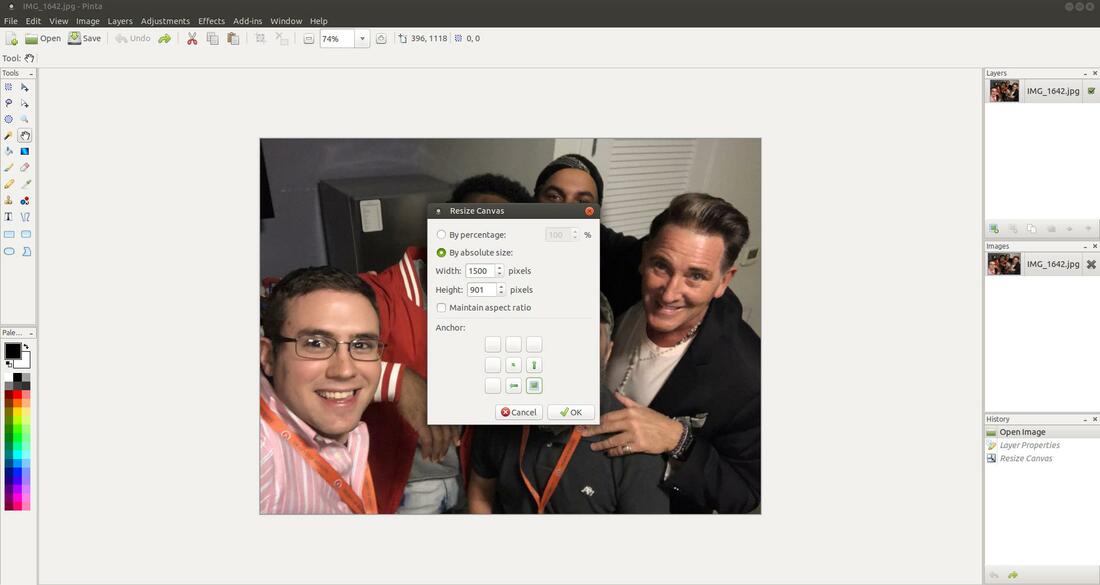
Now lets change the Canvas Size by using the absolute option. I first press the Undo button until I'm back to my original image. Then bring back the Resize Canvas dialog box by clicking on the Image menu and then click on Resize Canvas... Then click the option By absolute size and then I changed the Width from 1200 pixels to 1500 pixels. Then I clicked the OK button.
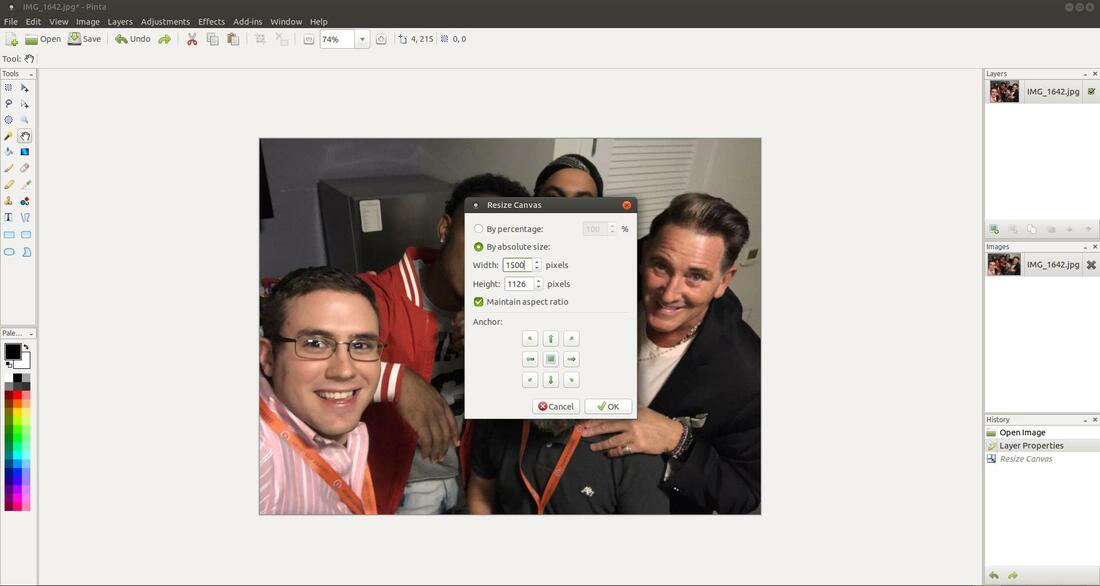
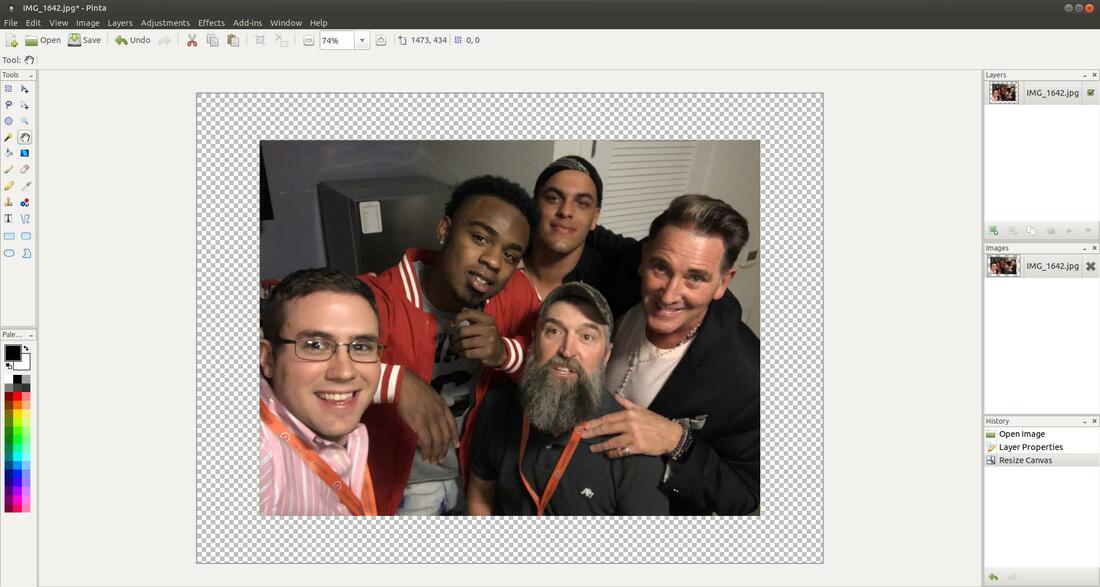
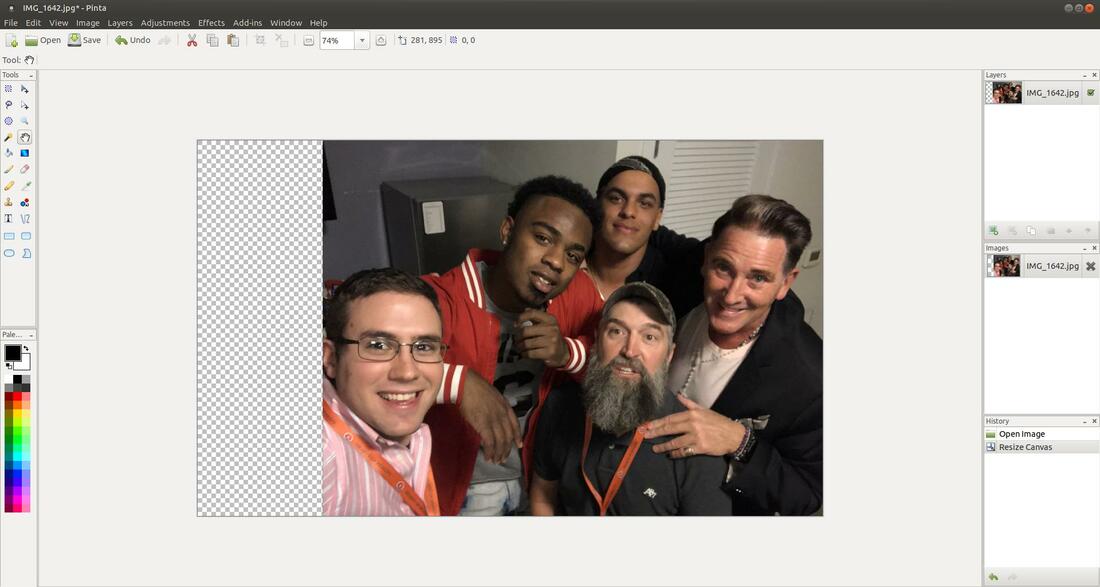
As you can see in the image below, the image will be placed in the middle of the Canvas just as it was with the changing the percentage. If I had unchecked Maintain aspect ratio then the transparecy sections on the sides or top/bottom would not be the same aspect ratio as the image below.
In the example below, I selected By absolute size and unchecked Maintain aspect ratio then changed the Width from 1200 to 1500 and selected the lower right Anchor. Then I clecked the OK button.
Below is the result from those settings. As you can see the only thing that changed was the Canvas width. Instead of splitting the transparency on both sides of the image, the right Anchor ensured that my image stayed to the right of the Canvas.
Resize Image
To resize the your image in Pinta will increase or decrease the actual image.
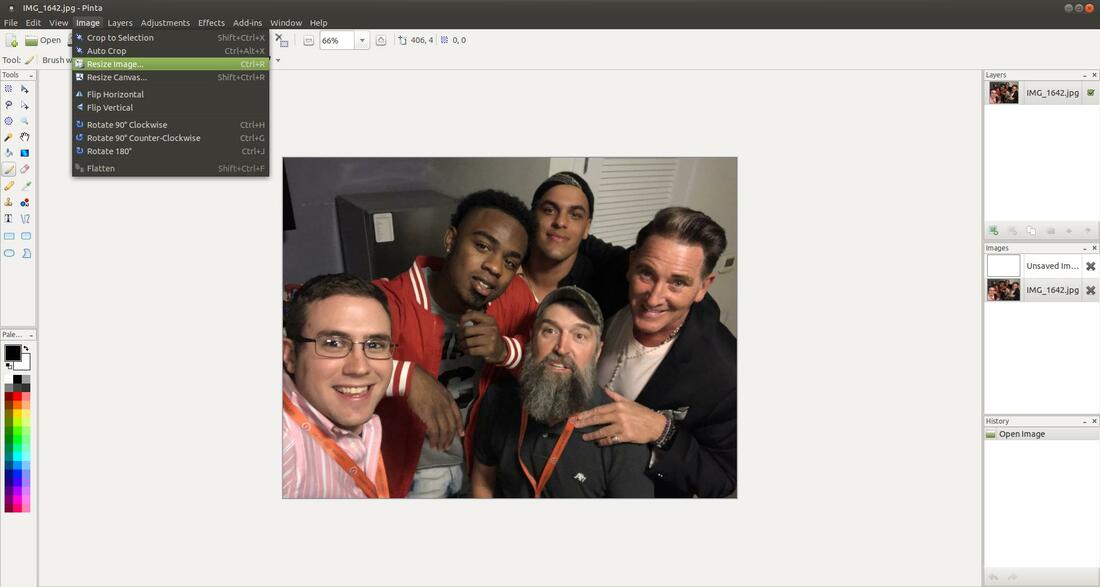
Example: Click on the Image menu and then click on Resize Image...
To resize the your image in Pinta will increase or decrease the actual image.
Example: Click on the Image menu and then click on Resize Image...
Resize Image dialog box will appear to allow you to change the size of your image.

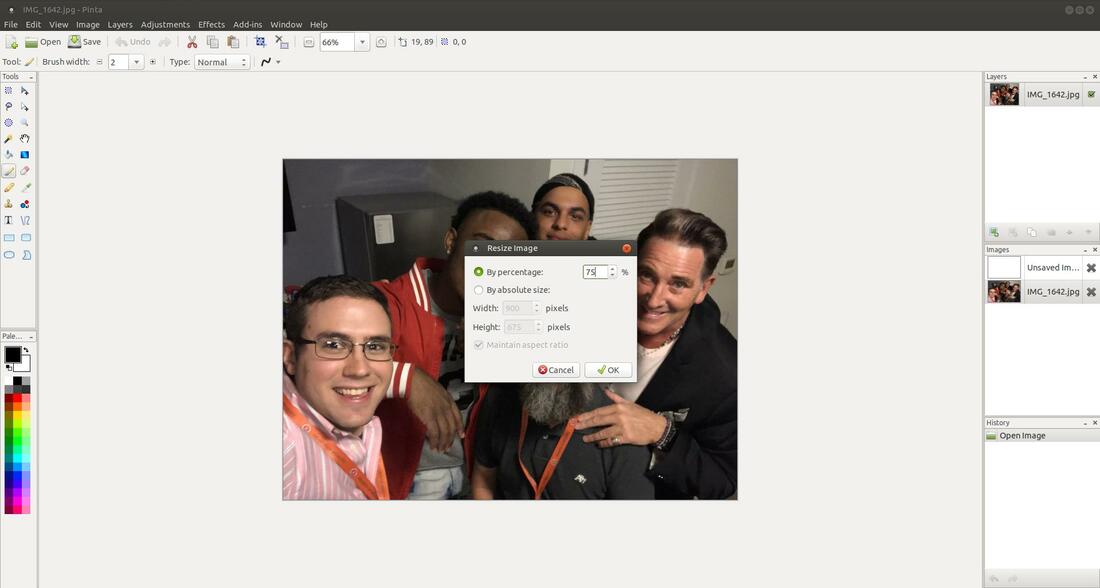
You can change the size of your image by percentage or by absolute (change the width and/or height). I could decrease my image size to 75% of its original size by entering 75 in the By percentage box and clicking the OK button.
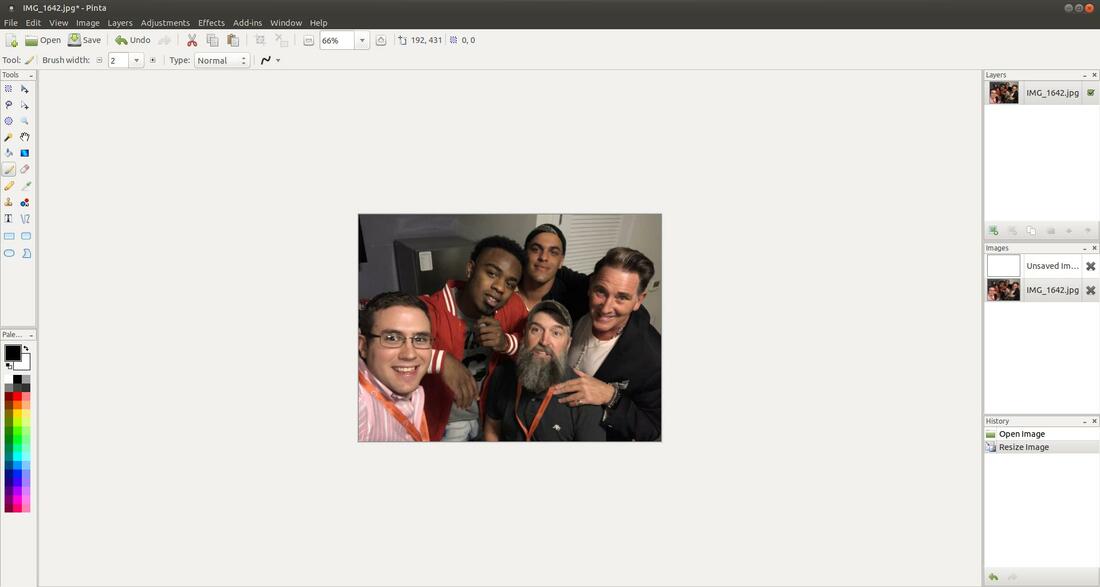
You will notice that your image is now 75% of its original size.
If you click on the option By absolute size, in the Resize image dialog box, you'll notice the numbers next to Width and Height will change from dim to bold numbers. This means that you can now make changes to them. Notice in my example that the current dimensions of 1200 pixels by 901 pixels are shown. We can decrease the size of the mage by reducing those numbers. Notice the Maintain aspect ratio checkbox is check. Make sure that it reamins checked when you make your changes. By doing so, you can change the value of the width, and Pinta will automatically calculate the correct value for the height (or vice versa) so the photo won't get distorted.
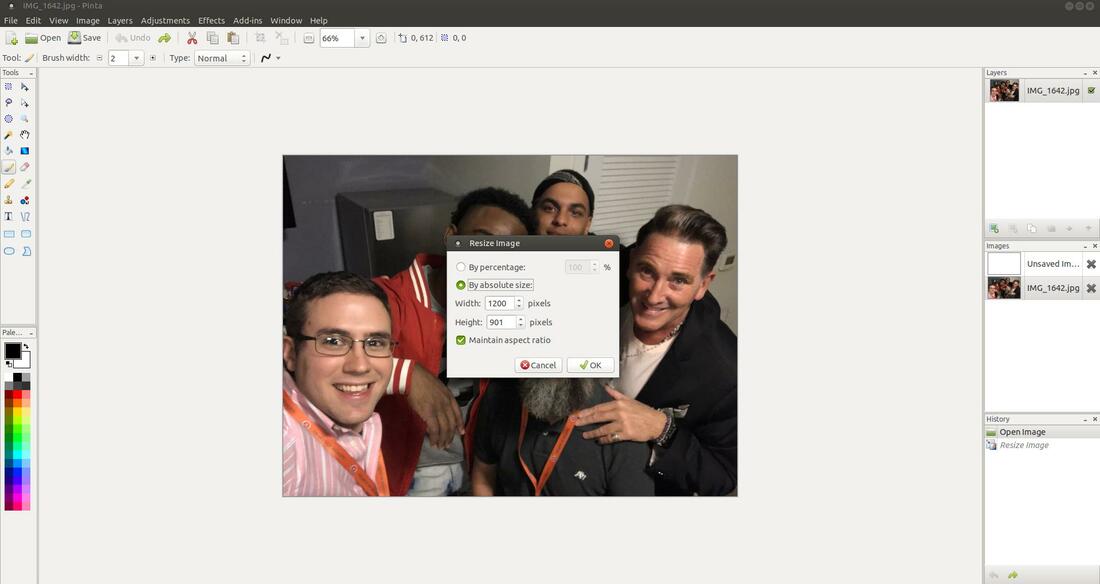
As I change my width from 1200 to 800 Pinta will automatically adjust the height from 901 to 600 pixels. Pinta calculates to keep your aspect ration of your image. The original size was 1200 ÷ 901 = 1.33 and when I changed 1200 to 800 Pinta automatically calculated to keep the aspect of 1.33. (800 ÷ 600 - 1.33) Aspect ratio is simply a term to describe the proportional relationship between the width and height of any image. Most computer monitors and TV screens have an aspect have an aspect of 1.33:1.

The new image size will take effect after you click the OK button. Don't be afraid to experiment! Pinta has a nice undo function that will quickly restore your photo to its original size if you mess up. One of the best ways to understand how something works is to experiment.
If I unchecked the option Maintain aspect ration and then change 1200 to 800 pixels, Pinta will not calculate and make changes to the Height.

This will create a distorted image when you click the OK button.
Keeping the aspect ratio of an image is important. Changing the aspect ratio of an image will usually create a distorted image.
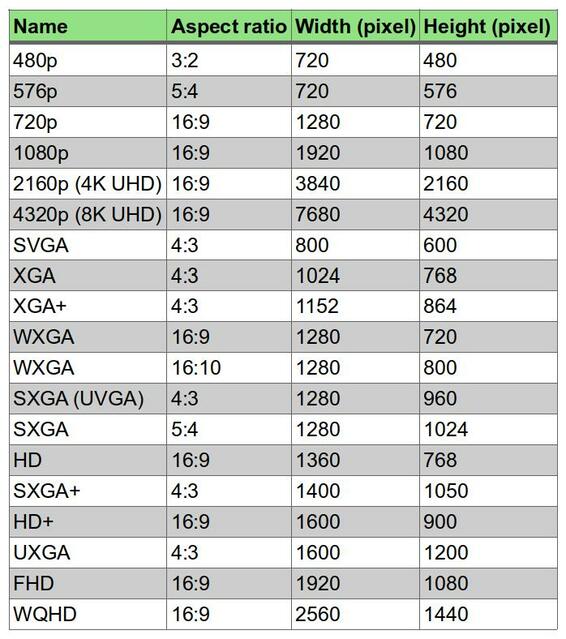
Here is a table that lists typical computer screens resolutions and aspect ratios.
Here is a table that lists typical computer screens resolutions and aspect ratios.
You can use Pinta to create a thumbnail image for a YouTube video if you upload videos to YouTube. Here's some guidelines if you do, YouTube thumbnails use a 16:9 aspect ratio, so it’s recommended that they have a resolution of 1280x720. Your thumbnails can also be 1920x1080 as long as they remain under the 2MB limit. They must be uploaded as .JPG, .GIF, .BMP, or .PNG.
I hope this helped you understand the difference between resizing your image and resizing your canvas.
Take care!
Take care!
Mar 14, 2019
