
Pinta: Layers Menu (Introduction to Layers)
Pinta uses layers to create a composite image. Think of layers as a stack of transparent slides. Each individual slide can contain a seperate element which will form part of the overall image.
The stacked layers in Pinta are organized as if they are viewed from above.
The stacked layers in Pinta are organized as if they are viewed from above.
Therefore, the arrangement or order of the layers in the Layers Window is important. An opaque image on a layer higher up the stack will block or obscure the image or images in the layers lower in the stack.
The Active Layer
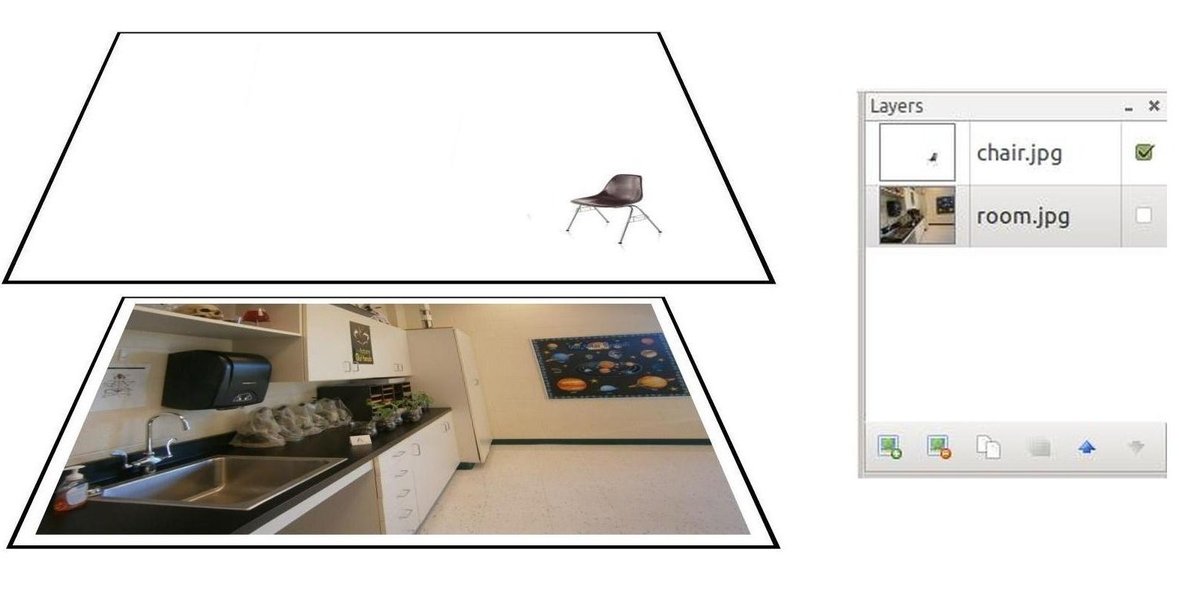
In Pinta, there is always an active layer. It is identified by the highlighted thumbnail in the Layers Window. In the image above, the layer named "room.jpg" is the active layer. You can only edit or manipulate the image that is active. No other layer will be affected or changed. This is great if you are making a lot of changes to an image and you make a mistake. If you were using layers then you wouldn't have messed up an entire image, you could delete the messed up layer and start that layer over again.
A common mistake made when using layers is trying to edit an image that is not active. So keep in mind as you are learning to use Pinta that image manipulations only affect the active layer. You can always tell which image is active by looking at the selected thumbnail in the Layers Window.
You can easily change the active layer by clicking on another thumbnail in the Layers Window.
Changing the active layer.
In my example above, I switched the active layer from "room.jpg" to "chair.jpg." Now I can only edit or make changes to the image with the chair. Keep in mind that only one layer mave have the active layer status at a time.
The Layers Window
The Layers Window provides access to all the individual images or layers which make up an image.
The Layers Window provides access to all the individual images or layers which make up an image.
Layers Window
Parts of the Layers Window
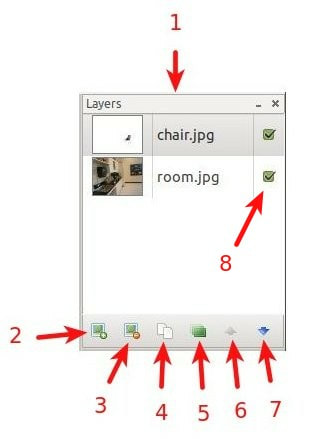
1. Title Bar - Contains the name of the Window (Layers), Auto Hide (_), and Close (x).
2. Add New Layer - Clicking this button will add a new layer to the top of the layer stack.
3. Delete Layer - Clicking this button will delete the selected layer.
4. Duplicate Layer - Clicking this button allows you to make a copy of the selected layer.
5. Merge Layer Down - Clicking this button takes the active layer and combines it with the layer immediately below it.
6. Move Layer Up - Clicking this button moves the active layer up one place higher in the layer order.
7. Move Layer Down - Clicking this button moves the active layer down one position in the layer order.
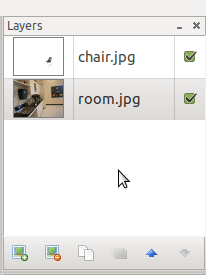
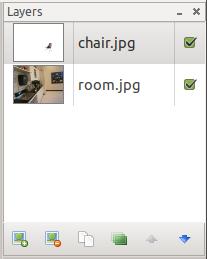
8. Check Box - If a check is in a box next to a layer, it means that layer will be part of your final product. For example, If I were to make the
white background in the "chair" image transparent then you would see the image in the next layer, if the next layer has a check in the check
box. If I remove the check in next to the "room" image, the "chair" image would have the gray and white checked boxes that indicates that
area will be transparent. Clicking on a check box will remove a check from the box and clicking it again will place the check back in the box.
If you double-click on a layer, it will bring up a Layer Properties dialog box.
2. Add New Layer - Clicking this button will add a new layer to the top of the layer stack.
3. Delete Layer - Clicking this button will delete the selected layer.
4. Duplicate Layer - Clicking this button allows you to make a copy of the selected layer.
5. Merge Layer Down - Clicking this button takes the active layer and combines it with the layer immediately below it.
6. Move Layer Up - Clicking this button moves the active layer up one place higher in the layer order.
7. Move Layer Down - Clicking this button moves the active layer down one position in the layer order.
8. Check Box - If a check is in a box next to a layer, it means that layer will be part of your final product. For example, If I were to make the
white background in the "chair" image transparent then you would see the image in the next layer, if the next layer has a check in the check
box. If I remove the check in next to the "room" image, the "chair" image would have the gray and white checked boxes that indicates that
area will be transparent. Clicking on a check box will remove a check from the box and clicking it again will place the check back in the box.
If you double-click on a layer, it will bring up a Layer Properties dialog box.
Parts of the Layer Properties Dialog Box
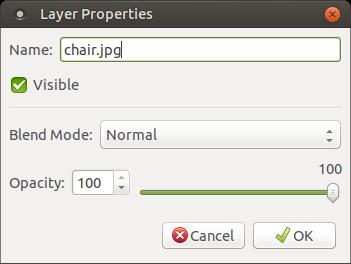
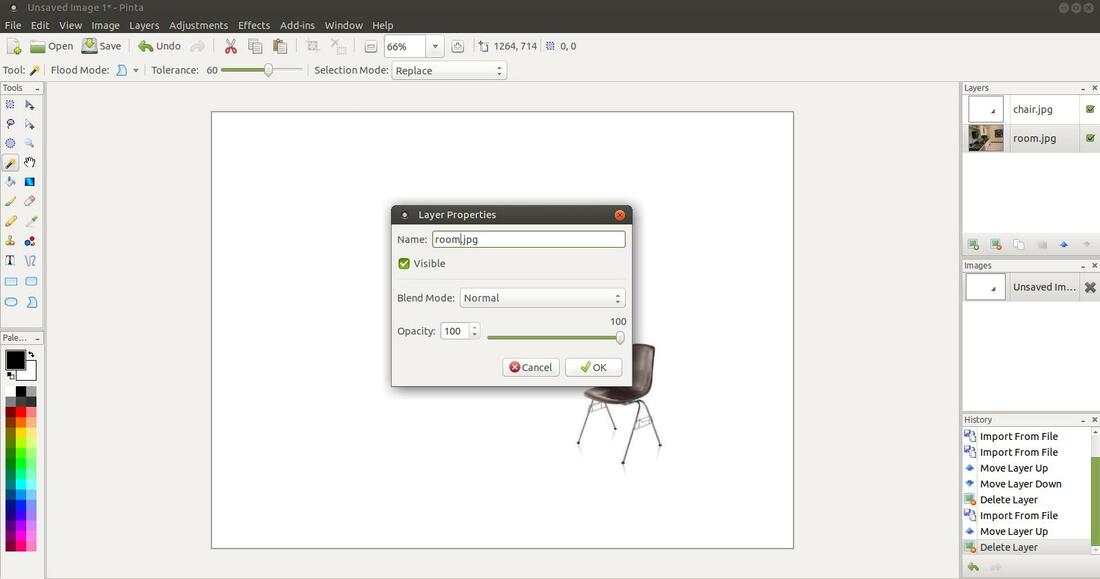
- Name - You can change the name of your layer in the Name: section of the dialog box. This helps you remember what the image represents. For example, "chair.jpg" is a better way to describe the image compared to "chair003.jpg."
- Visible Check Box - does the same as Check Box in the Layers Window.
- Blend Mode - You can click the drop-down arrow and select a different blend mode for an individual layer. Normal is the default blend mode. (Types of Blend Modes: Normal, Multiply, Additive, Color Burn, Color Dodge, Reflect, Glow, Overlay, Difference, Negation, Lighten, Darken, Screen, and Xor. I will develope a section to go over the fourteen different blend modes.)
- Opacity - the degree to which light is not allowed to travel through an object. A layer can have its own opacity setting. The opacity ranges from 0 (completely transparent) to 100 (completely opaque). You can change the value one of two methods: 1. click and drag the slider control 2. type a new value into the numerical value box.
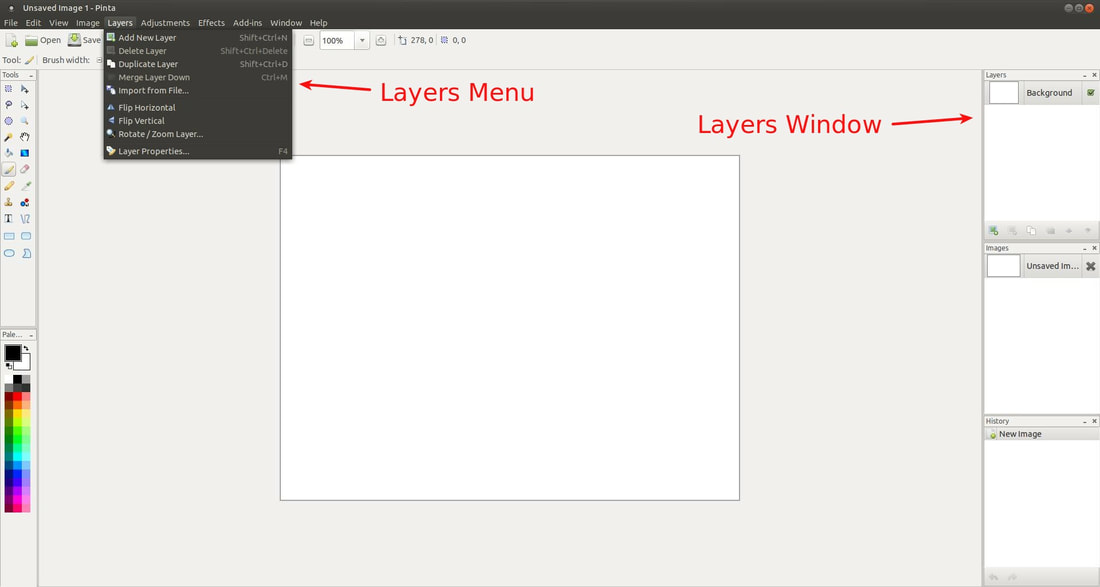
The Layers Menu
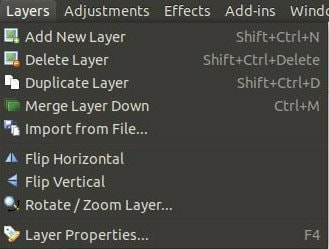
The commands in the Layers Menu only affect the active layer. That is the layer selected or highlighted in the Layers Window.
- Add New Layer - This command will add a new layer to the top of the layer stack. (Shortcut Keys: Shift+Ctrl+N)
- Delete Layer - This command will delete the selected layer. (Shortcut Keys: Shift+Ctrl+Delete)
- Duplicate Layer - This command allows you to make a copy of the selected layer. (Shortcut Keys: Shift+Ctrl+D)
- Merge Layer Down - This command takes the active layer and combines it with the layer immediately below it. (Shortcut Keys: Ctrl+M)
- Import from File... - This command allows an external image to be imported as a new layer.
- Flip Horizontal - This command horizontally flips the entire active layer.
- Flip Vertical - This command vertically flips the entire active layer.
- Rotate / Zoom Layer... - This command allows you to rotate, zoom in, or zoom out the active layer.
- Layer Properties - This command opens the Layer Properties Dialog Box for the active layer.
Working with Layers
I will be working with a picture of my 6th grade science lab on Phototropism as my background layer and a picture of a chair I found online as my top layer.
I will be working with a picture of my 6th grade science lab on Phototropism as my background layer and a picture of a chair I found online as my top layer.
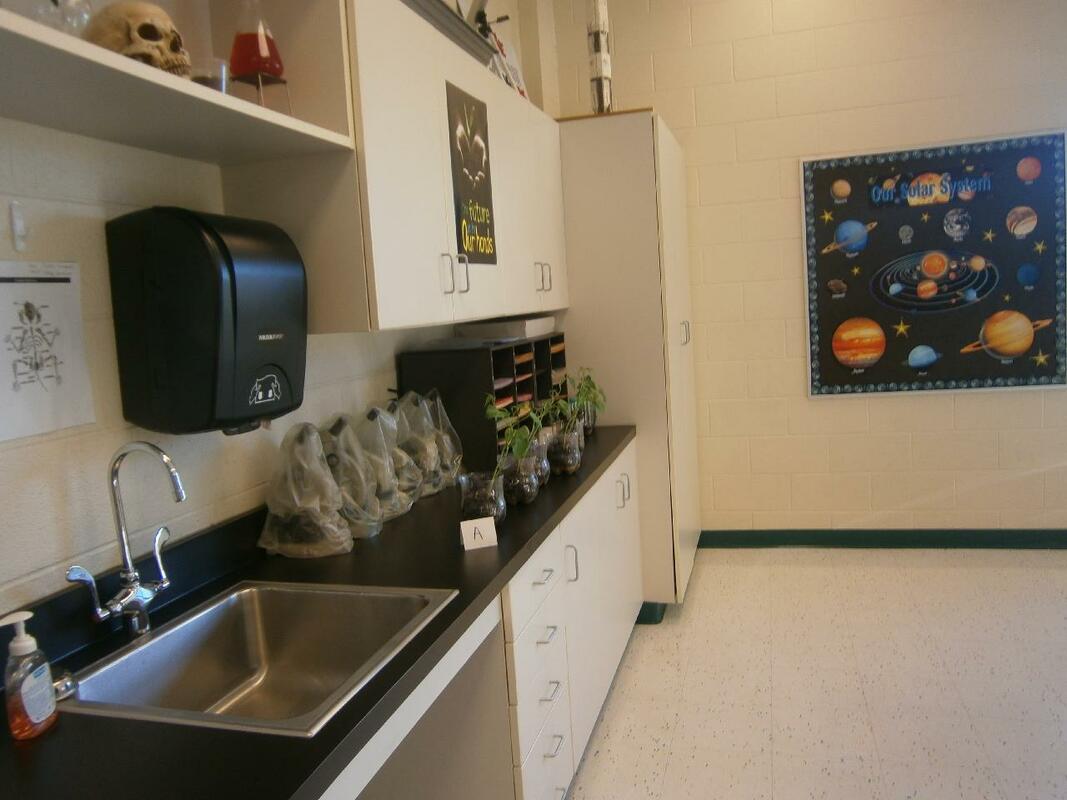
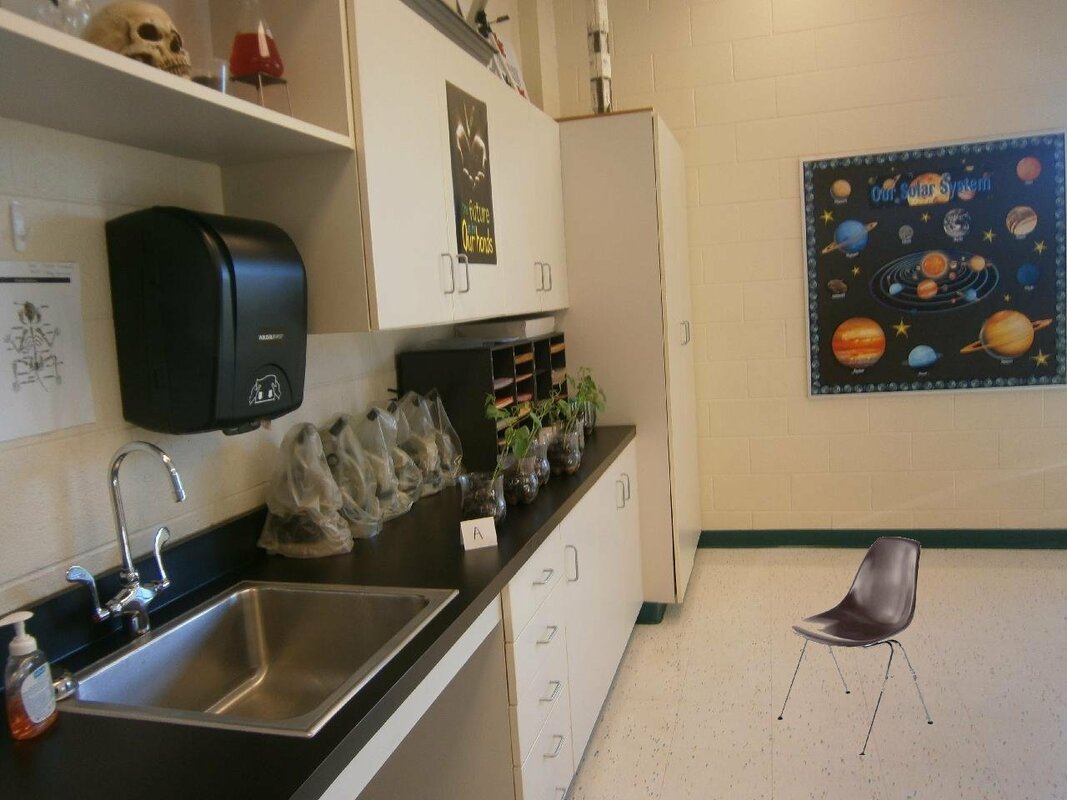
Background Layer - Science Lab (1280x960)
|
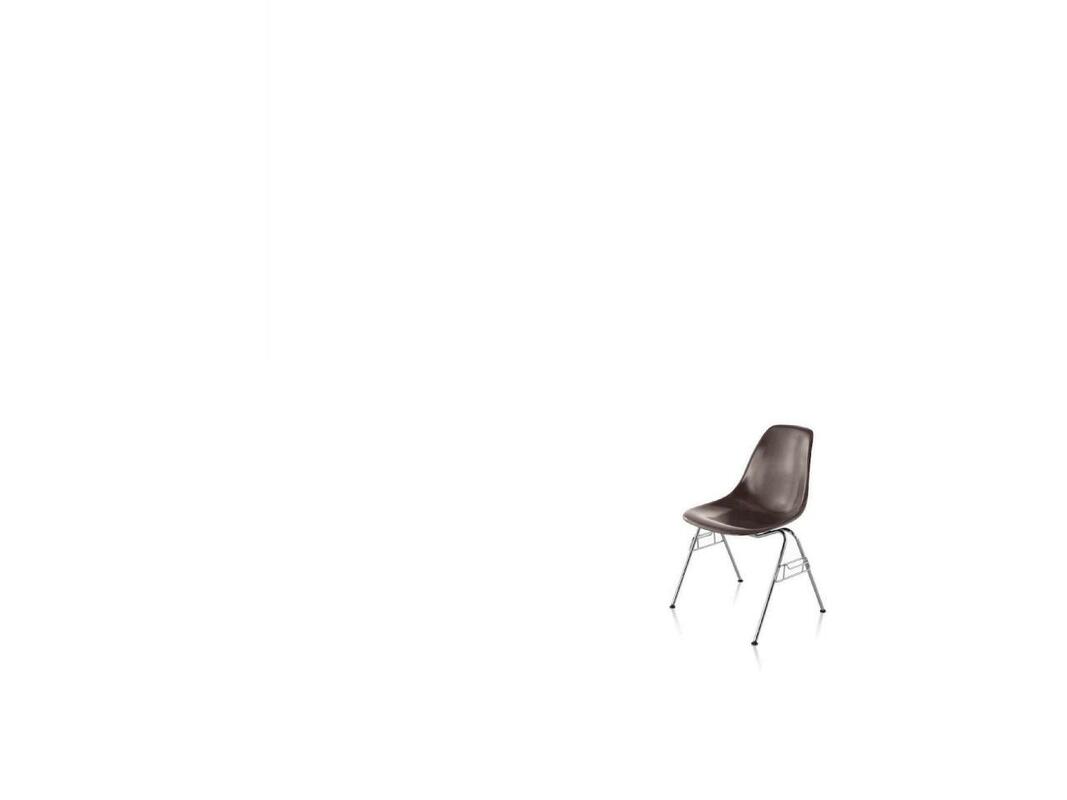
Top Layer - Chair (1280x960)
|
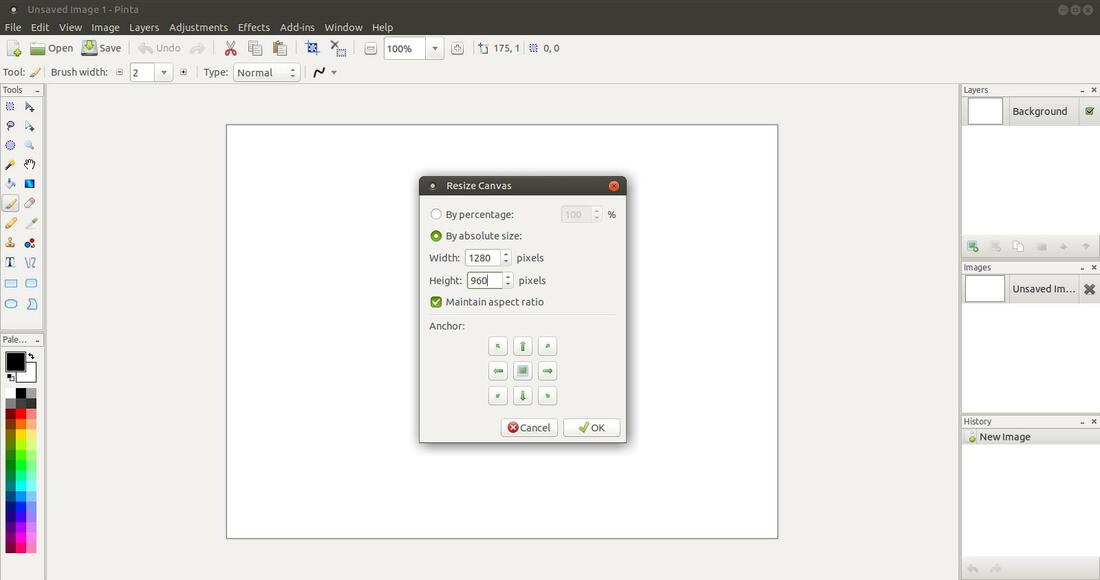
To begin with, start Pinta and then change the canvas size to match the size of the largest image. The default canvas size of Pinta is 800x600, so inserting a larger image than the canvas size will make it appear that your image is cropped. To change the canvas size, click on the Image menu and then click on the Resize Canvas... command. When the Resize Canvas dialog box appears, click on the By absolute size option and enter the Width and Height of your largest image. For my example, I entered 1280 for my Width and 960 for my Height and then I clicked the OK button.
Then I inserted my science lab image as my Background Layer. I clicked on the Layers menu, then I clicked on the Import from File... option and then I located and selected my background image.
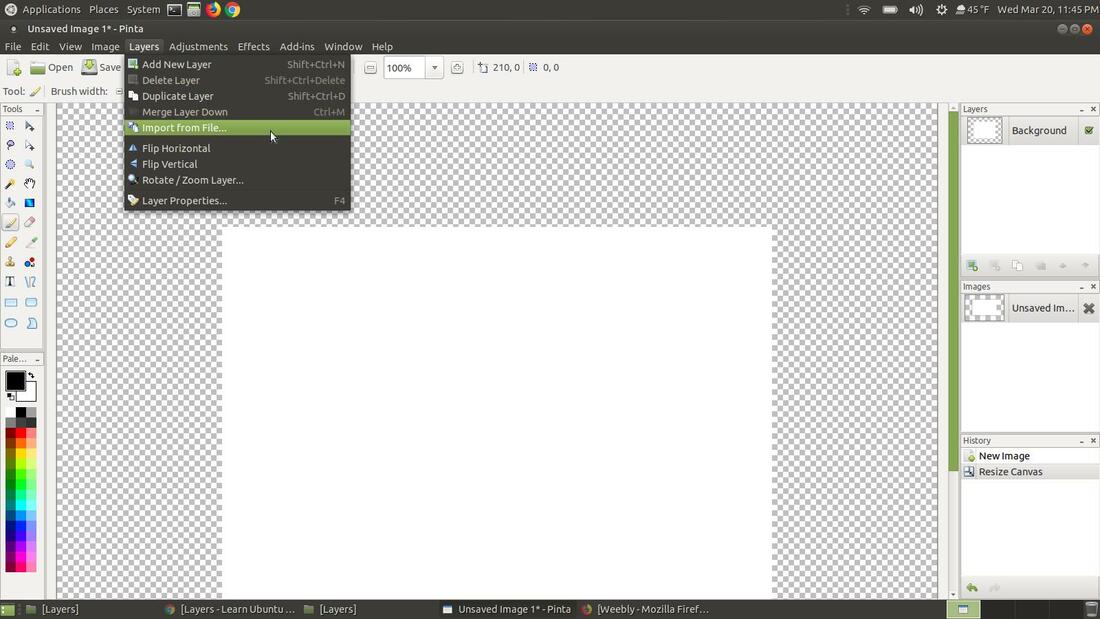
My background image of my science lab picture loaded on the top of the layer stack. Then I clicked on the original Background layer so that I can insert my top layer image.

Then I inserted my chair image as my Top Layer. I clicked on the Layers menu, then I clicked on the Import from File... option and then I located and selected my top image.
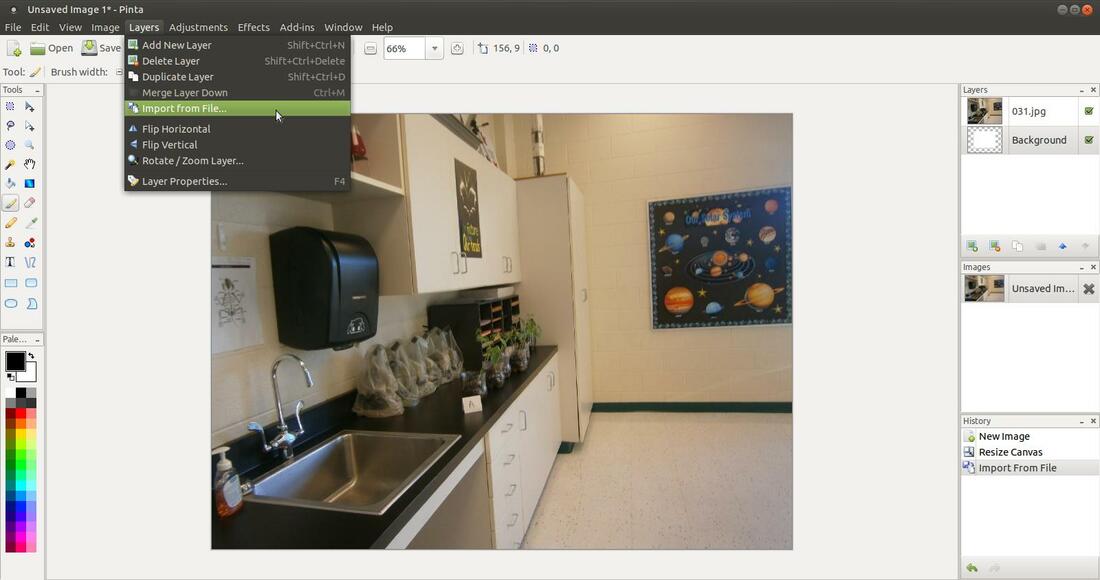
The chair image loaded in the middle of the layer stack, so I clicked the Move Layer Up button to place it at the top of the stack.
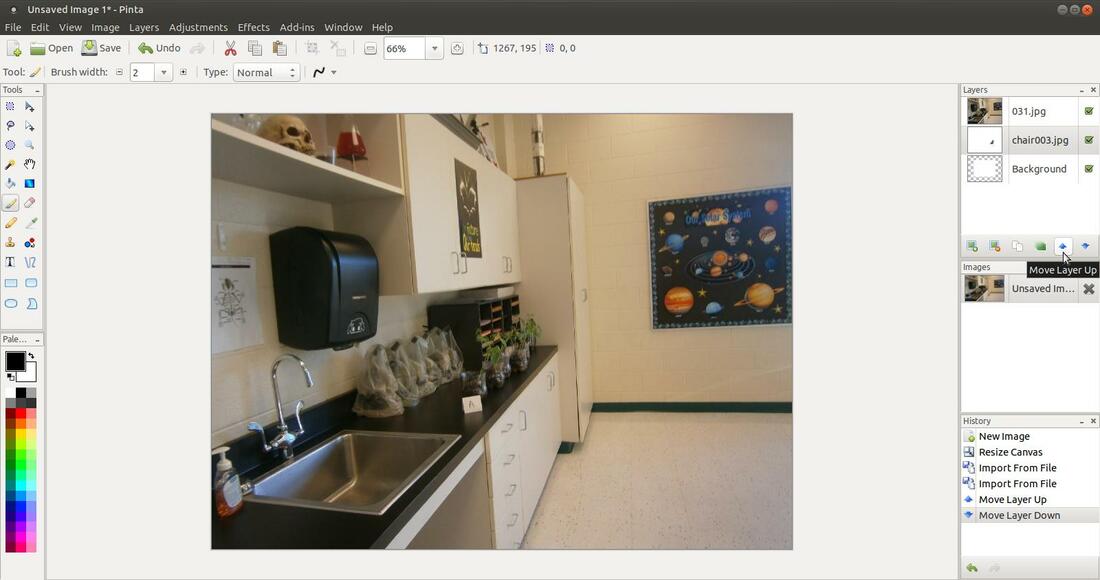
Then I selected the layer called Background and clicked the Delete Layer button to remove it from the stack.
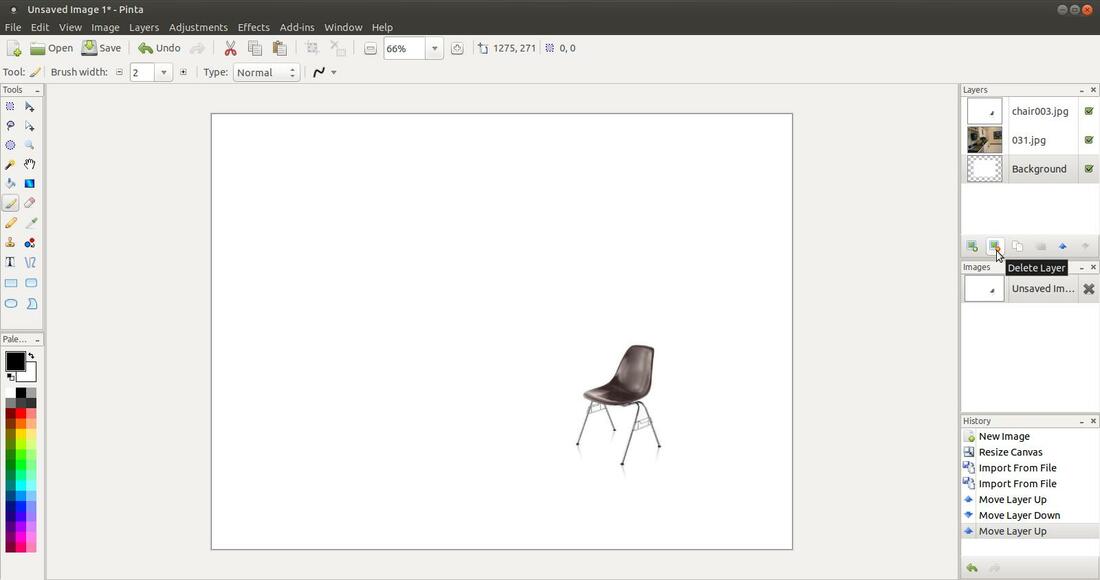
Then I double-clicked on each image in the Layers Window to bring up the Layers Properties dialog box so that I could rename each image.
I then clicked on the "chair.jpg" layer from the Layers Window to select it. Then I clicked on the Magic Wand Select from the Tool Palette and changed my Tolerance to 60 and then clicked in the white background.
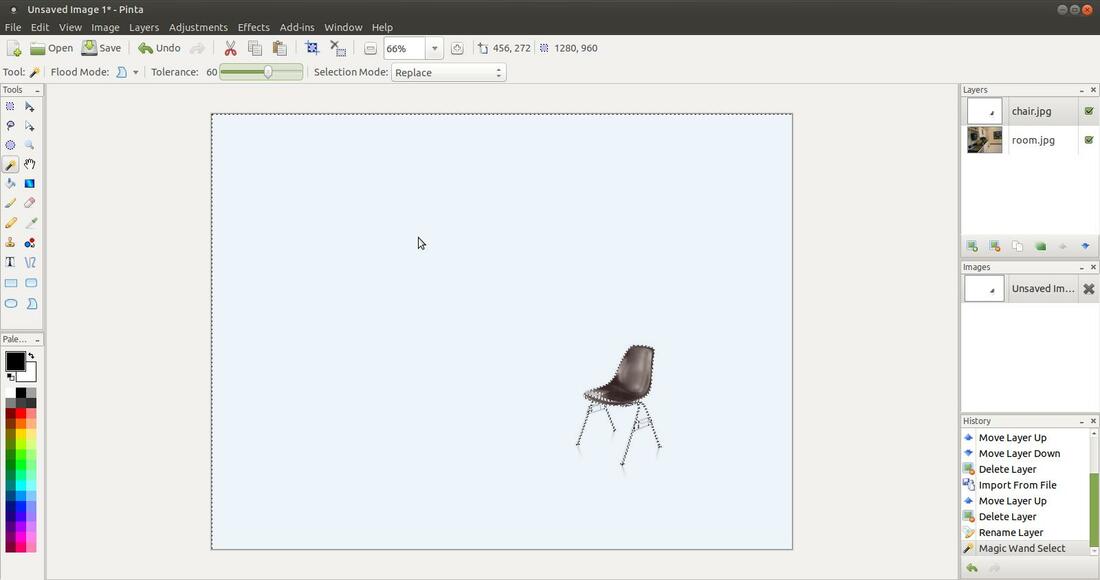
The top layer background became transparent and the chair was the only object in the "chair.jpg" file. However, it wasn't in the best location.
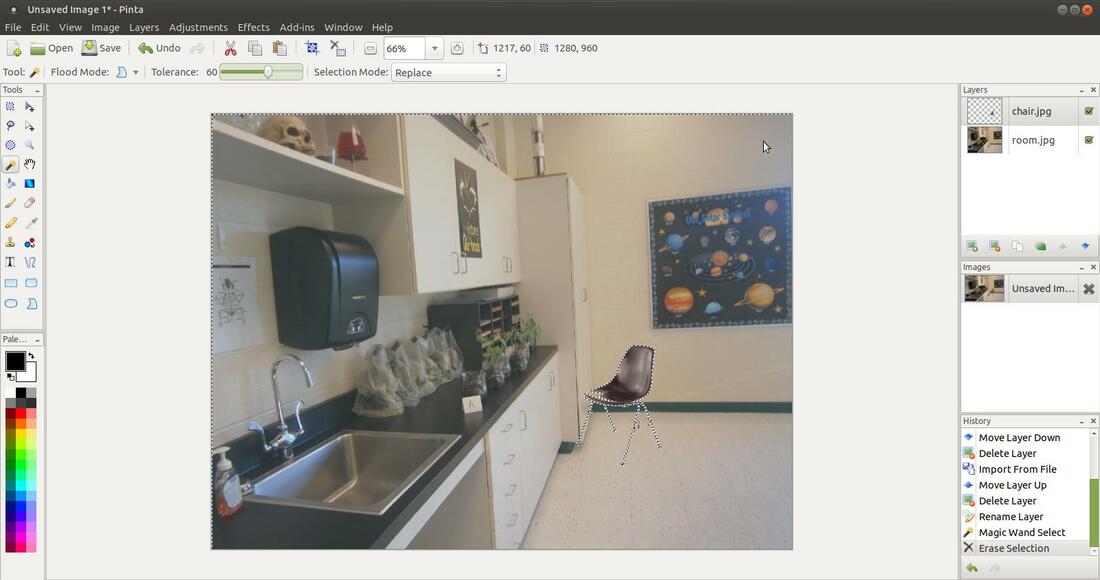
I clicked on the Rectangle Select option on the Tool Palette and selected the chair. Then I clicked on the Move Selected Pixels option on the Tool Palette and I moved the chair to another location.

I clicked the top layer in the Layers Window to select it and then I clicked the Merge Layer Down button to combine the two images.
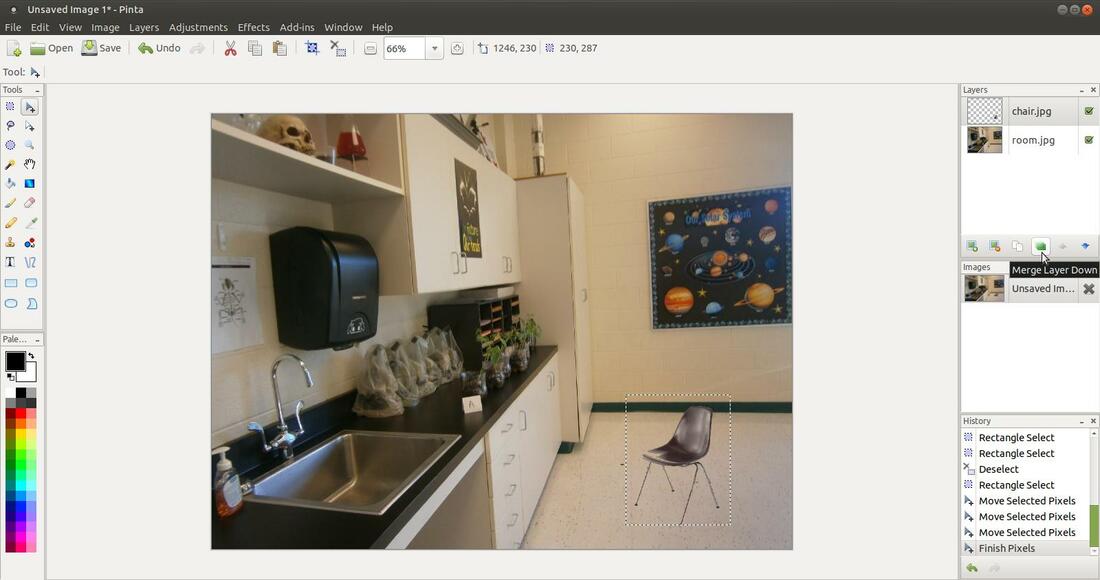
You will notice only one layer in the Layers Window because they were combined together. I clicked the Save button to save the new image.
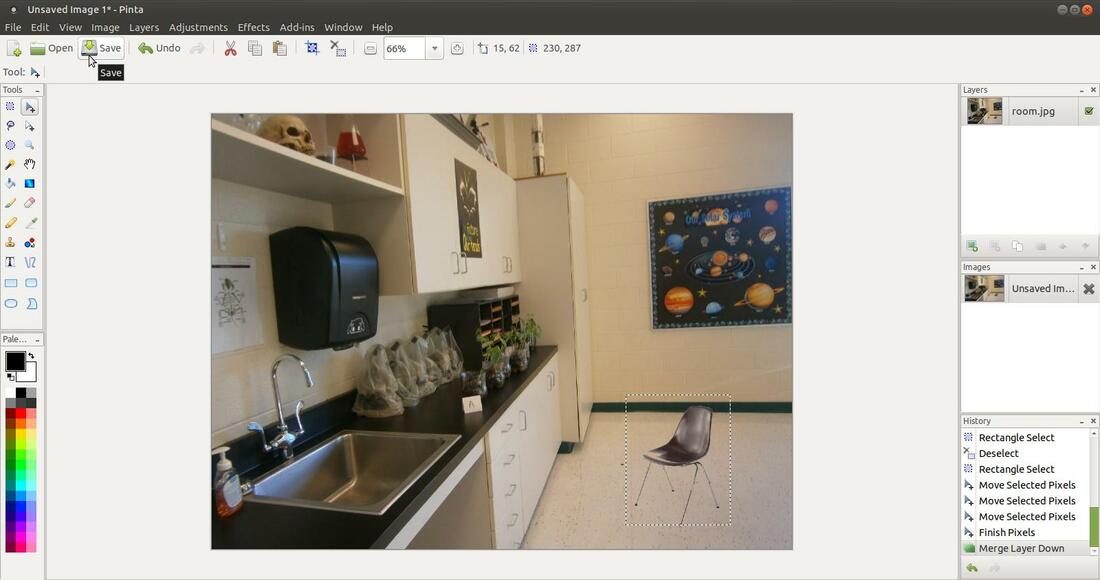
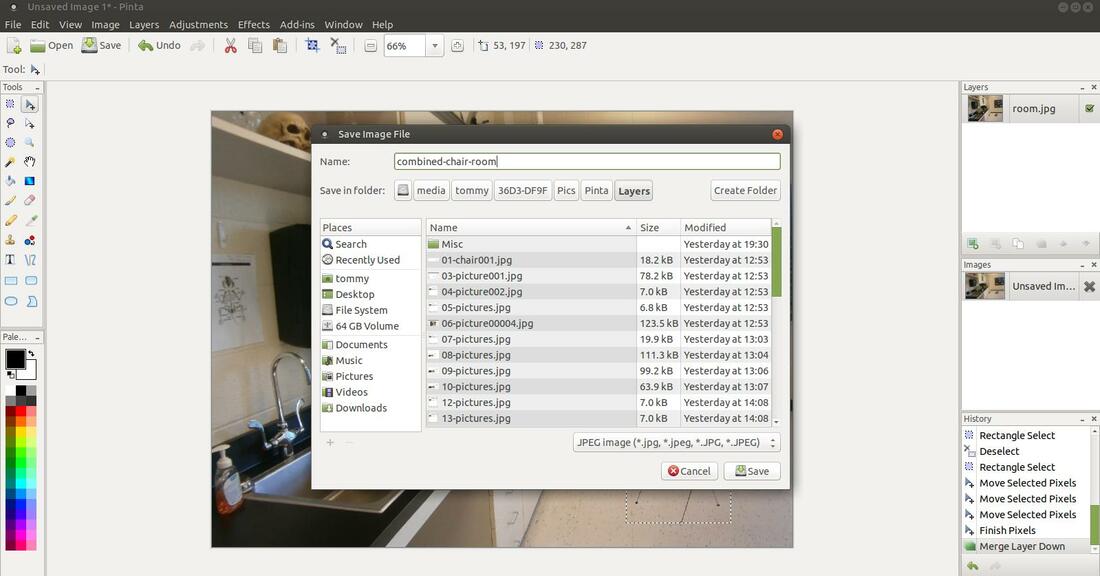
When the Save Image File dialog box appeared, I saved the image as "combined-chair-room.jpg."
Here's the result of the combined images created by using layers in Pinta.
Mar 22, 2019
