
Quod Libet
Quod Libet is a cross-platform free and open-source audio player, tag editor and library organizer.
Features
- Multiple audio back-ends (GStreamer, xine-lib)
- Replay Gain support
- Bookmarks within files (or playlists, with a plugin)
- Tag files based on their filenames with configurable formats
- Rename files based on their tags
- Watch directories and automatically add/remove new music
- Hide songs on removable devices that may not always be there
- Simple user interface to Just Play Music if you want
- Album cover display
- Album list with cover art
- Simple or regular-expression based search
- Automatic tagging via MusicBrainz and CDDB
- On-screen display popups
- MP3, Ogg Vorbis / Speex / Opus, FLAC, Musepack, MOD/XM/IT, Wavpack, MPEG-4 AAC, WMA, MIDI, Monkey’s Audio
How To Install Quod Libet
Open your Terminal and enter the following:
sudo add-apt-repository ppa:lazka/ppa
sudo apt-get update
sudo apt-get install quodlibet
You can also download the install file from pkgs.org, GitHub, or the developer's website.
To remove the program enter the following:
sudo apt-get remove quodlibet
sudo add-apt-repository --remove ppa:lazka/ppa
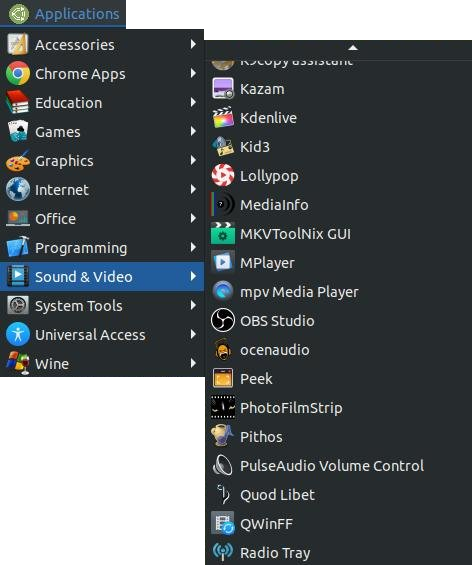
You can access the program in your menu after you get the program installed. I am using Ubuntu MATE 18.04.4 LTS with the traditional menu, so I access it by clicking on the Applications menu, highlight Sound & Video, and then click on Quod Libet.
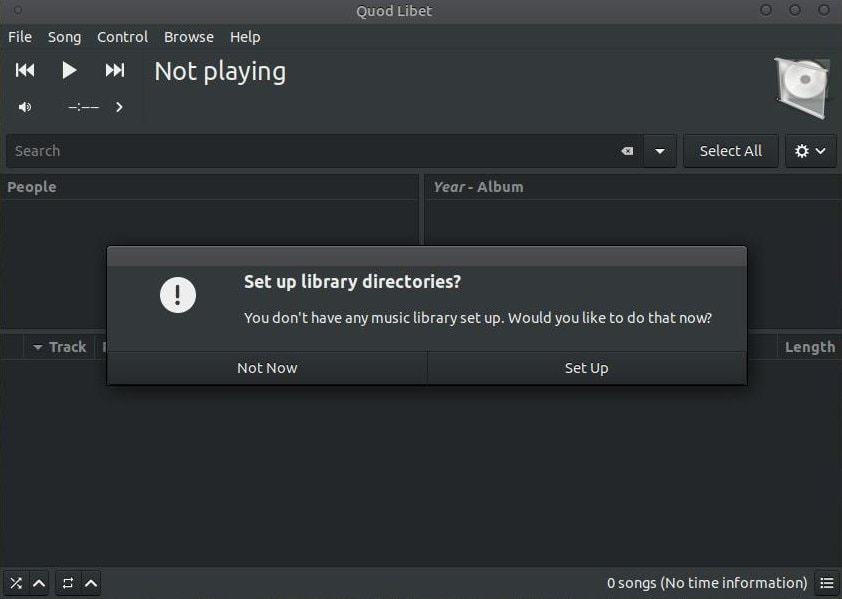
When you first open the program you will be prompted to set up your library directories. I recommend that you click the Set Up button to start adding your music or albums.
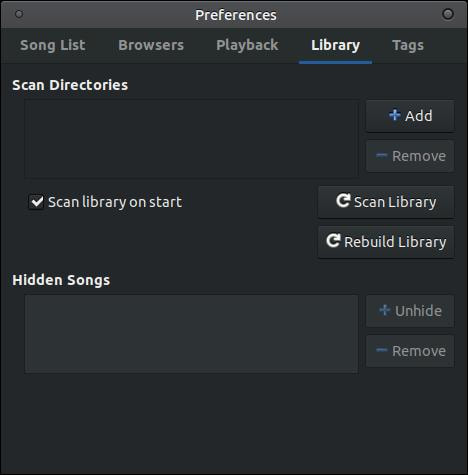
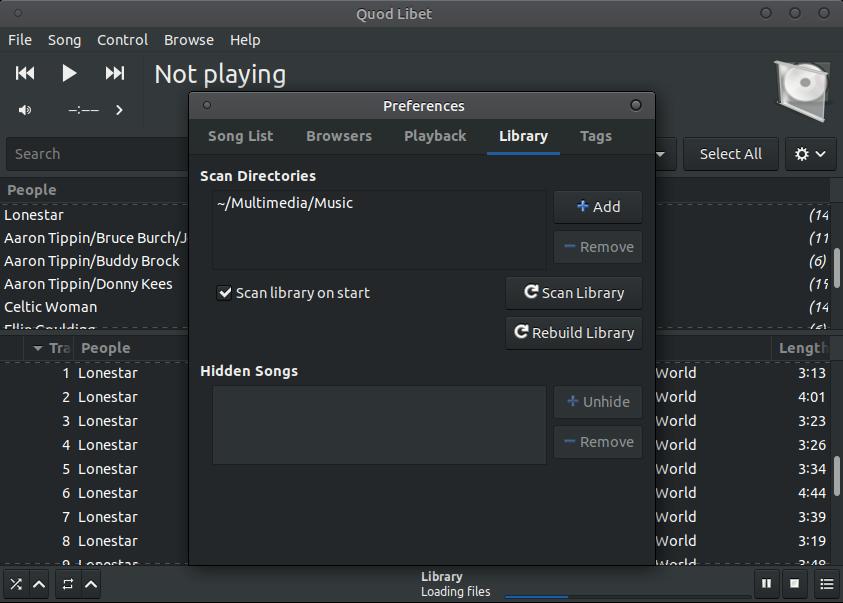
A Preferences dialog box will appear with the Library tab active. Click the Add button to allow you to locate your music.
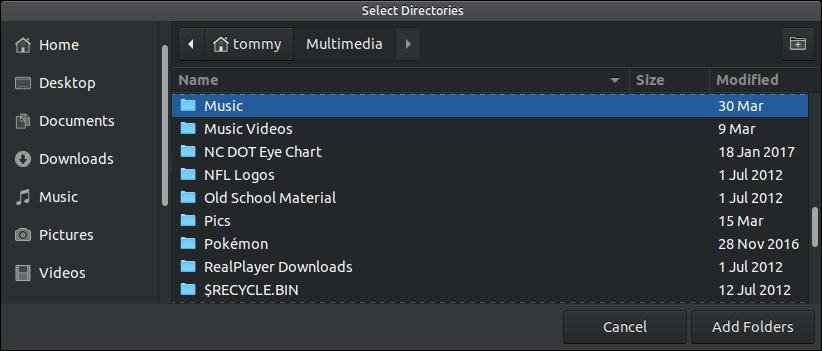
A Select Directories dialog box will appear to allow you to navigate to the folder that holds your music or albums. Select the directory or folder and then click the Add Folders button.
You will notice the path to your albums under the Scan Directories section. If you have additional folders with music then click the Add button again and locate the next folder. Keep doing this procedure until you have all your music folders selected. Then click the the Scan Library button to start the scanning process.

You will notice a progress bar grow across the bottom as your music or files load.
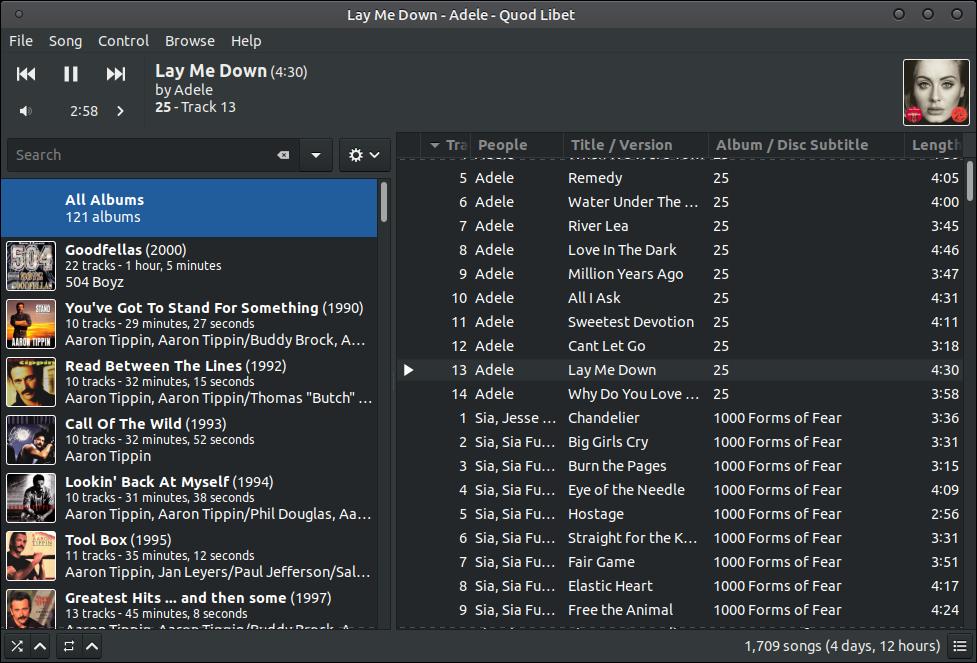
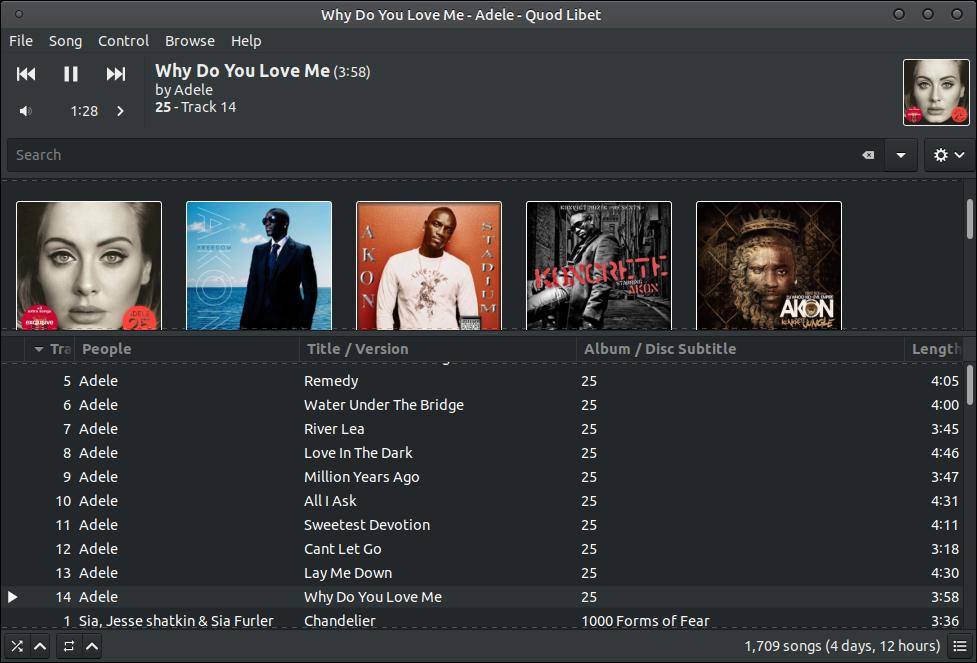
Here's what the player looks like when the scan completes.
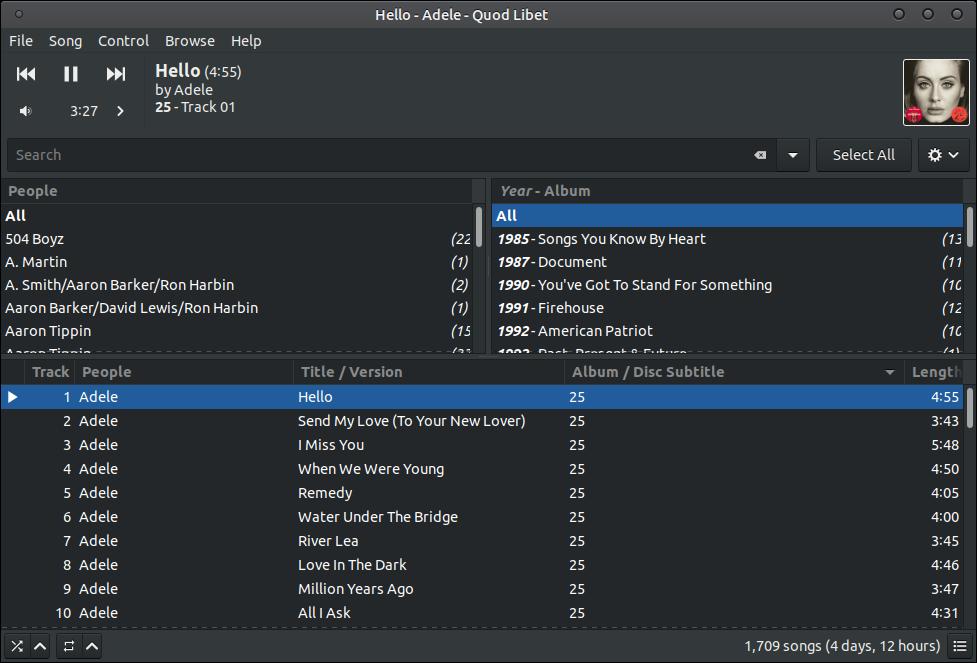
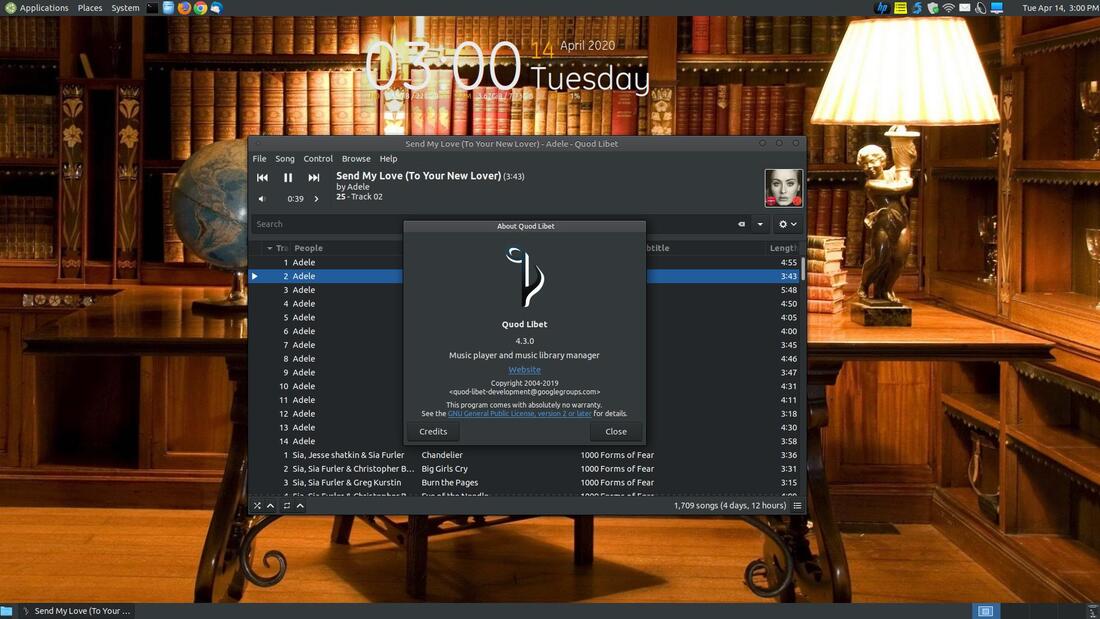
At the top of the player you will notice the Titlebar that contains the current song and artist and name of the program. Below the titlebar is the Menu bar that contains five menus: File, Song, Control, Browse, and Help. Next you have your control buttons: Previous, Play/Pause, and Next buttons. Below those buttons you'll see a small speaker icon that allows you to bring a volume slider in view when you click on it. You can turn the volume up or down with the slider. You see a counter to indicate how long the current song has played and next to it is a right arrow. If you click the right arrow icon it will bring up a song progress bar. Next to the control buttons you'll see the current song title and artist, the song length, album name, and track number. In the right corner you'll see the album art or cover art.

Here's a quick look through each menu.
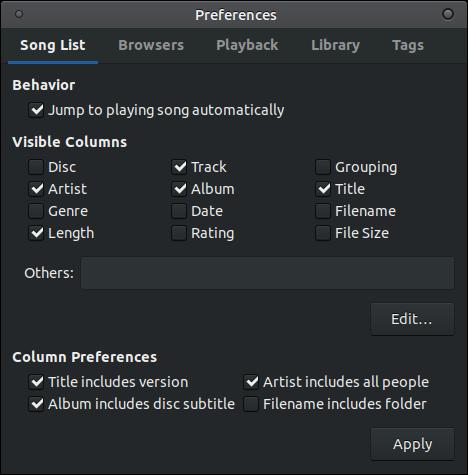
You can make changes to your player throughout the Preferences dialog box. You can access this by clicking on the File menu and then on Preferences. The Song List will be the first tab within this dialog box. In this section you can control the Behavior, Visible Columns, and Column Preferences.
The Browsers tab is the next section. This allows you to create or set a Global filter for the Search feature, Displays that allow you to select the way the time or duration is displayed, Ratings section that allow you to Confirm multiple ratings or Enable one-click ratings, and Album Art that lets you select if you prefer to use embedded art and places a file or image into your song folder.

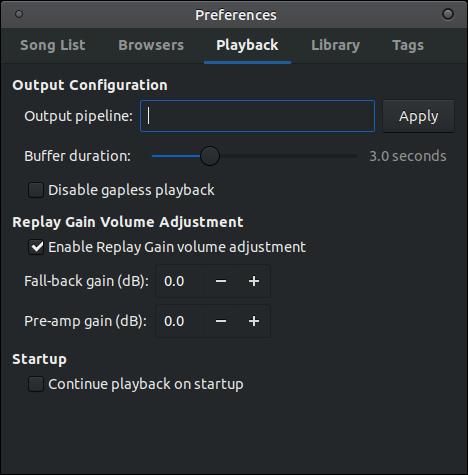
The Playback tab is the next section. In the section your can adjust the Output Configuration that allows you to set the Output pipeline, Buffer duration, and you can chose to Disable gapless playback. You can adjust the Replay Gain Volume Adjustment. You also can control the Startup or enable Continue playback on startup.
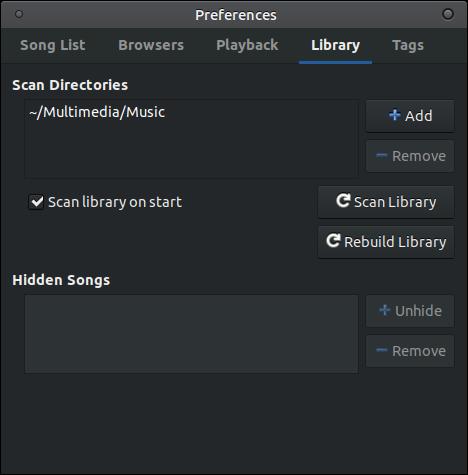
The Library tab is the next section. You already seen this tab when you first installed the program. It allows you to add or remove music folders to the program. You can perform a new Scan Library or you can use the Rebuild Lirary command. If you add or remove songs to your music folder then you may want to enable the option: Scan library on start. You can also Unhide or Remove Hidden Songs in your music folders.
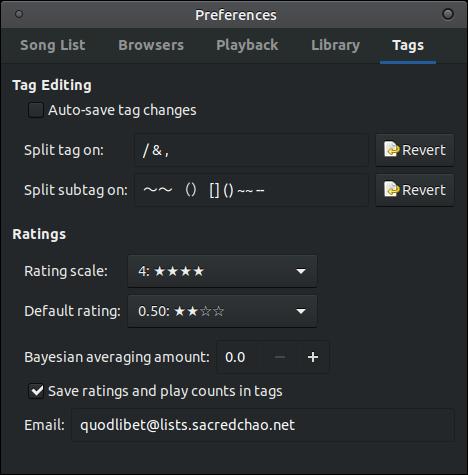
The Tags tab is the last section. In this section you can make adjustments to your tags and ratings.
You can control the look by clicking on one of the multiple options within the Browse menu. The look below is the Album List.
This is the Cover Grid option.
This is the Search Library option.
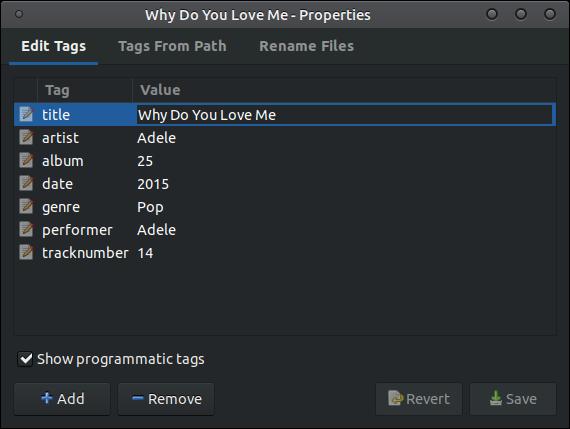
If you need to change the metadata or tag of a particular song then click on the Song menu and then click on the Edit Tags option.

When the small dialog box appears, make changes for a particular tag. You can Add or Remove a tag from your song. Click the Save button to save your changes.
You can customize Quod Libet by enabling a variety of plugins. Click the File menu and then on the Plugins option.
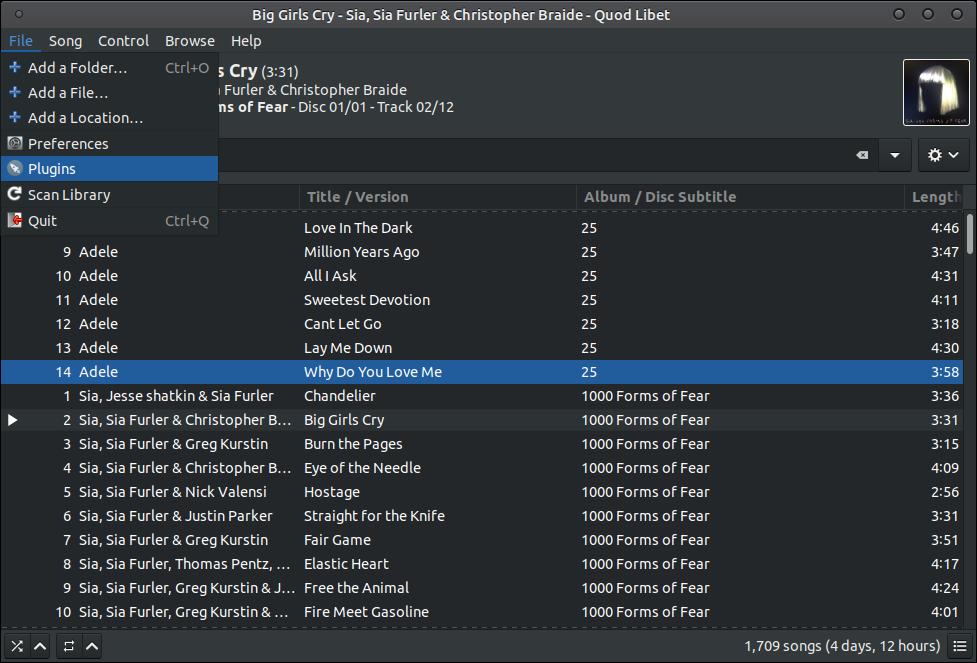
Scroll through the list of plugins on the left. When you find a plugin that you want to enable click in the checkbox to the left of the plugin. I enabled the Equalizer plugin by placing a check next to Equalizer.

Quod Libet is a nice little audio player that can be customized to meet your audio demands.
If you are looking for a nice music player for your system then give Quod Libet a try.
Apr 15, 2020
