
Caja
The Caja file manager provides a simple way to manage your files and applications. Caja is a Spanish word that means "box." The "j" in Caja is pronounced as an "h" so the word is pronounced as "kah-hah."

You can use the Caja file manager to do the following:
- Create folders and documents
- Display your files and folders
- Search and manage your files
- Run scripts and launch applications
- Customize the appearance of files and folders
- Open special locations on your computer
- Write data to a CD or DVD
- Install and remove fonts
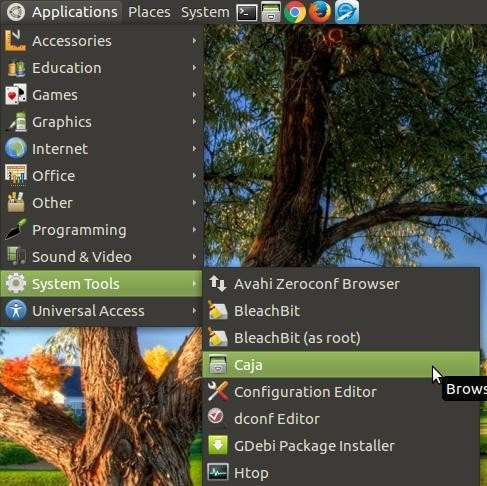
You can access the Caja file manager by clicking on the Applications menu, highlight System Tools, and then click on Caja.
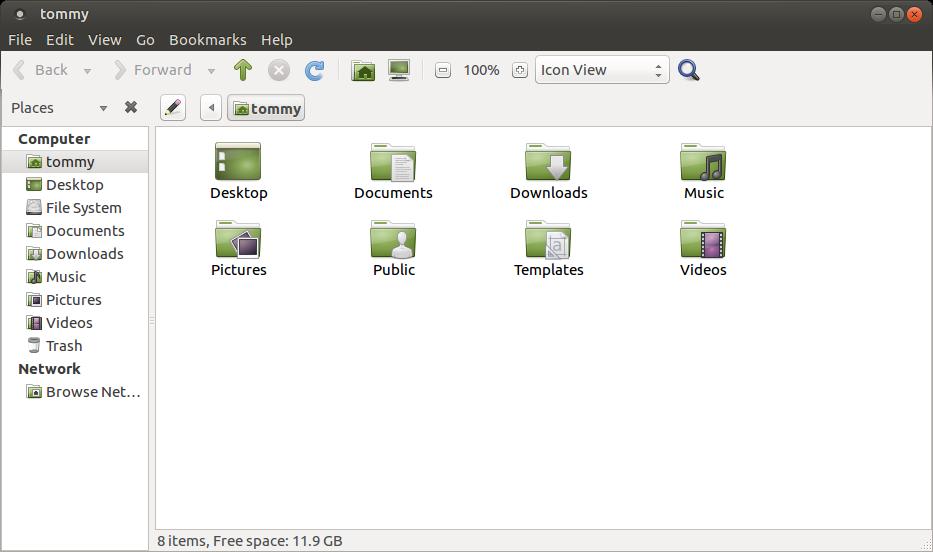
Caja lets you organize files and folders on your computer and network.
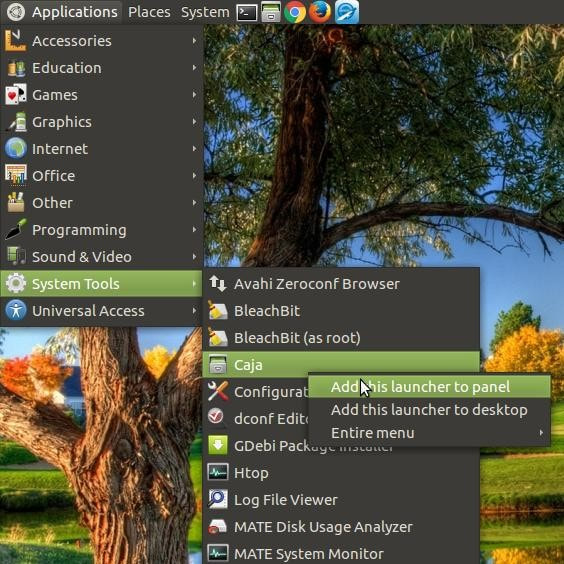
You can place the Caja icon on the panel bar for quicker access. To do this, you need to right-click the Caja command in the menu and select
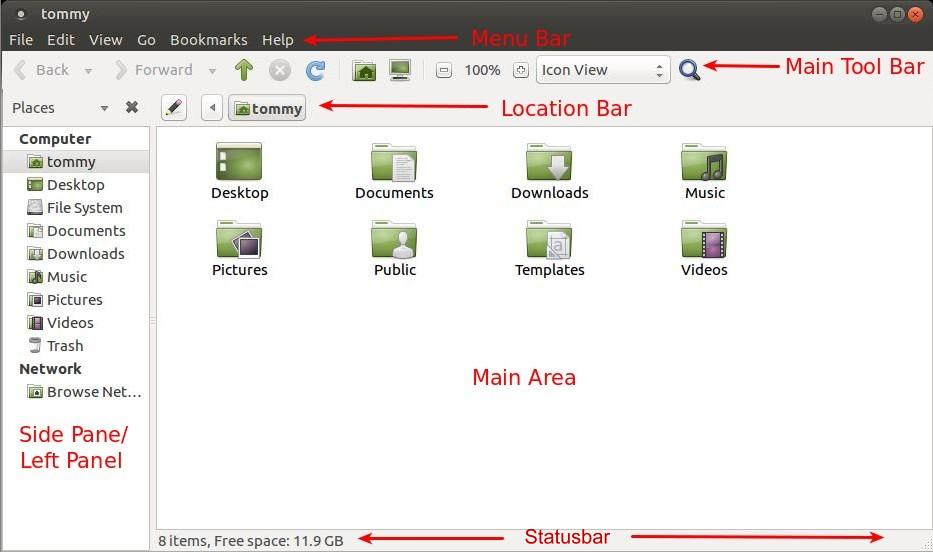
Elements of the Caja File Manager
Menu Bar
The menus on the menubar contain all of the commands that you need to work with files and folders in Caja.
Main Tool Bar
The toolbar contains a subset of the commands that you can access from the menu bar. To show or hide the toolbar,
choose View ▸ Main Toolbar.
Location Bar
The location bar is a very powerful tool for navigating your computer. The location bar contains a View as drop-down
list, which enables you to choose how to show items in your view pane.
Side Pane
The Side Pane shows information about the current file or folder and enables you to navigate through your files..
Status Bar
The Statusbar provides information about the active folder or the selected file or folder. It also provides the amount
of free space remaining on your hard drive. To show or hide the statusbar, choose View ▸ Statusbar.
Main Area
This area contains the contents of the active folder in the Side Pane.
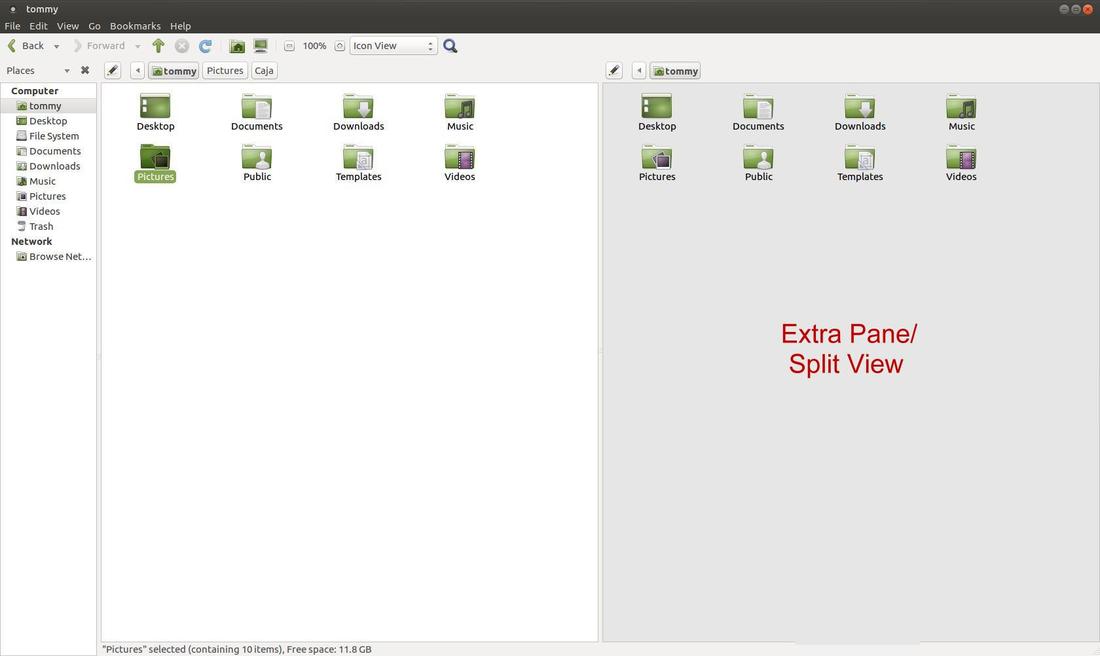
Extra Pane
This allows you to split Caja file manager into two sections which allows you to easily copy or move files or
folders to another location quickly and easily. To show or hide the Extra Pane, choose View ▸ Extra Pane
or press the F3 key.
This allows you to split Caja file manager into two sections which allows you to easily copy or move files or
folders to another location quickly and easily. To show or hide the Extra Pane, choose View ▸ Extra Pane
or press the F3 key.
In the split view mode you can move or copy a file or folder from one location to another. In the example below, you'll see how to move a file from the Pictures folder to the Downloads folder. If you click and hold down your left mouse button and drag the file to the new location and then release the mouse button.
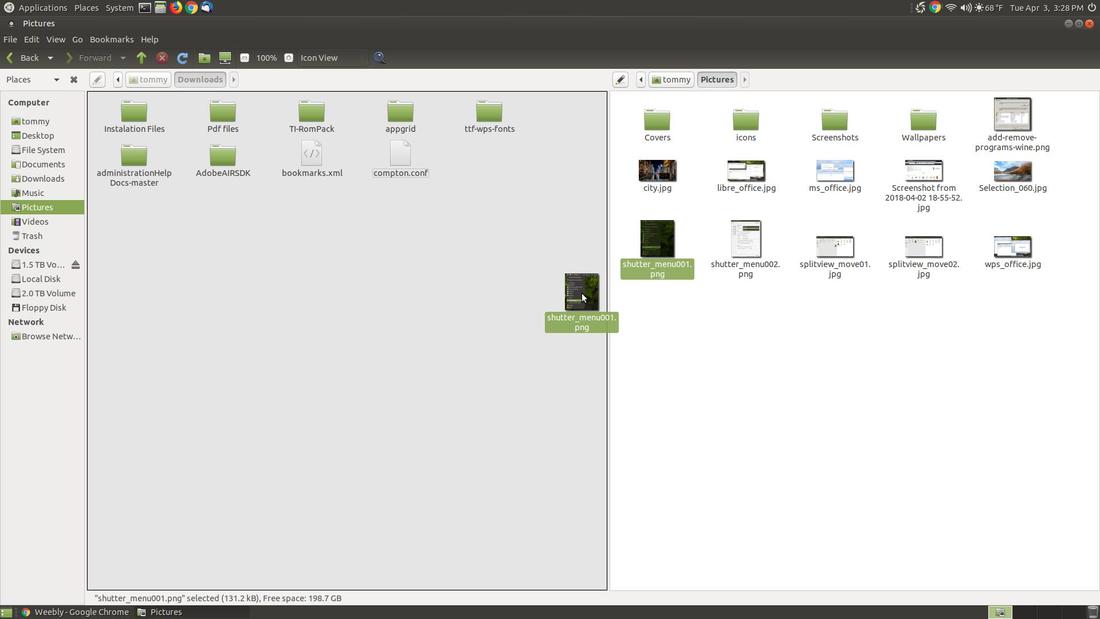
After you release the left mouse button you'll notice the file selected is now moved to the new location.
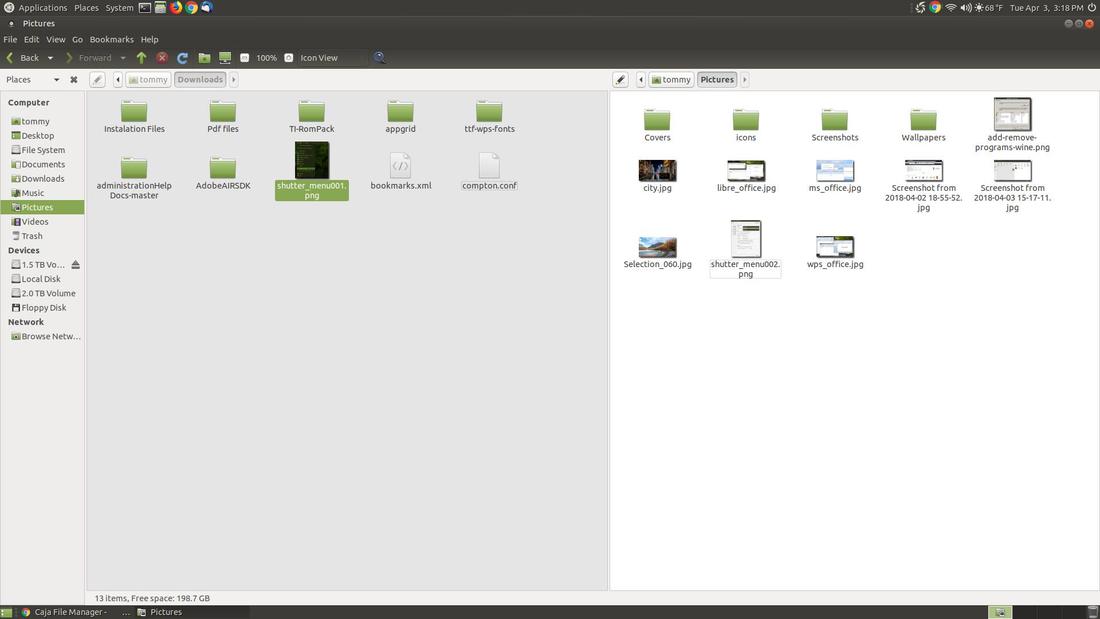
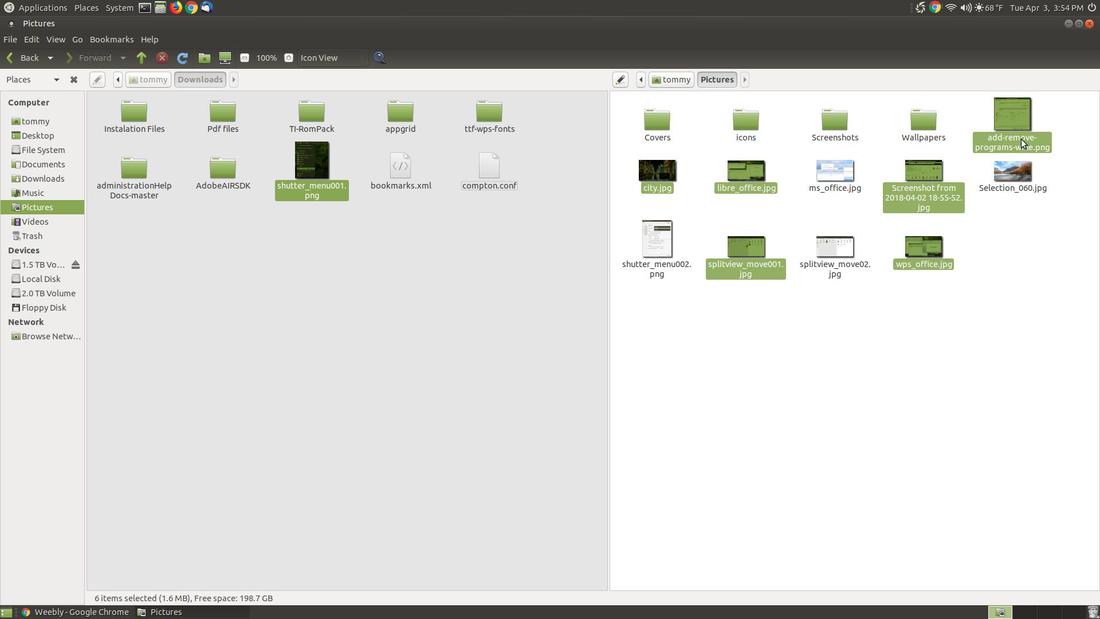
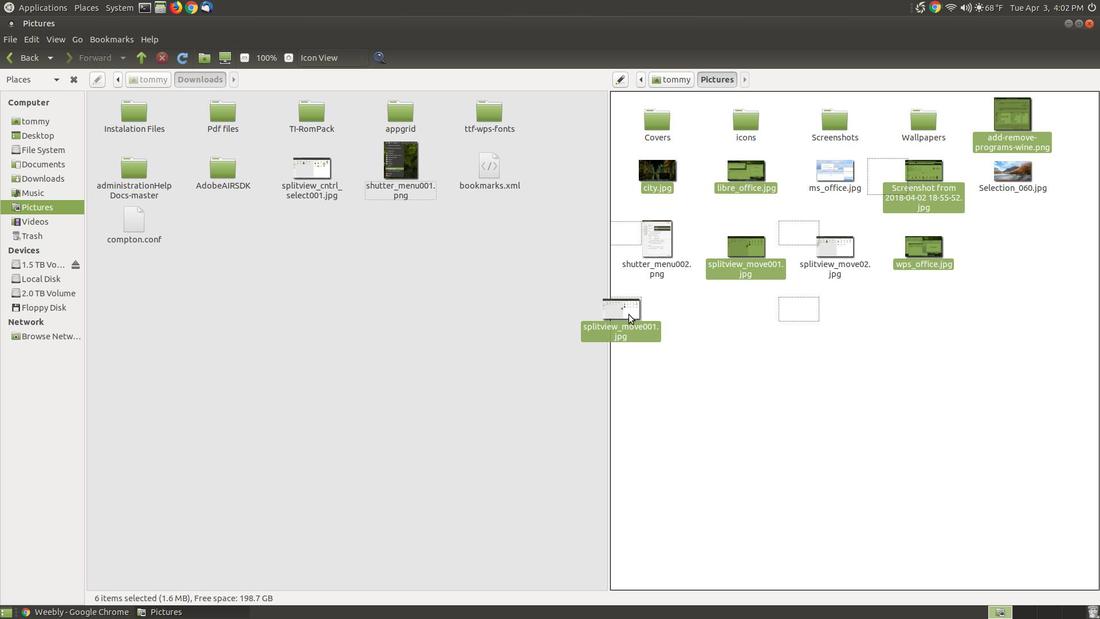
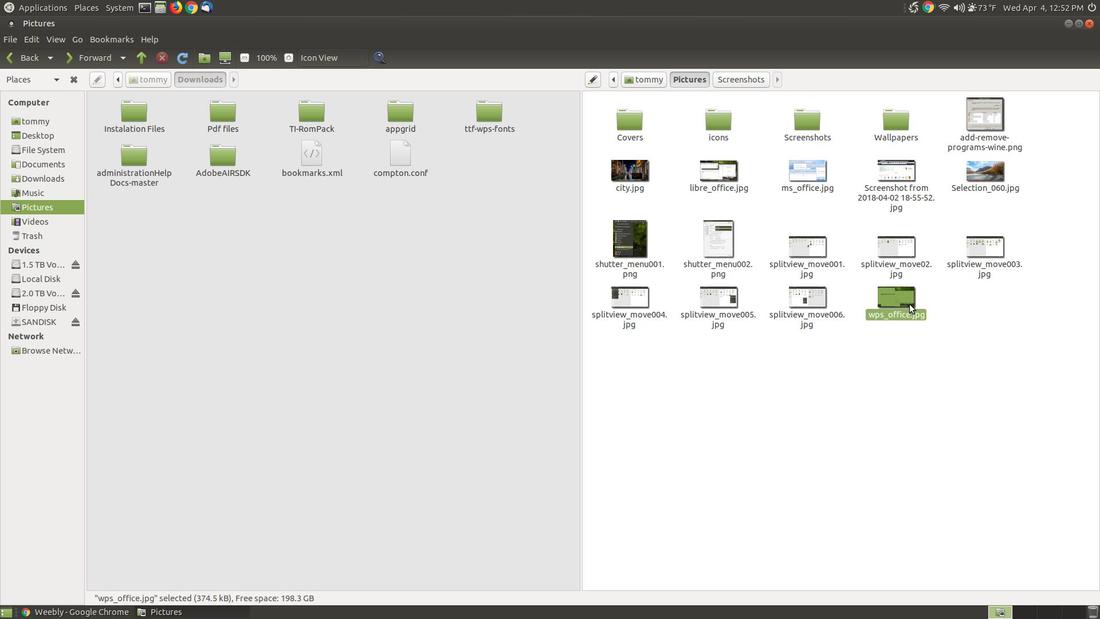
If you want to select several files or folders at once then click on a file or folder to select it and then hold down the Ctrl button and click on as many files or folders as you want. After you select all the files you want, release the Ctrl button. Using this method allows you to select the files you want without selecting or grouping files that you don't need. In the example below, I held down the Ctrl key wile selecting the six files in the Pictures folder (bottom right).
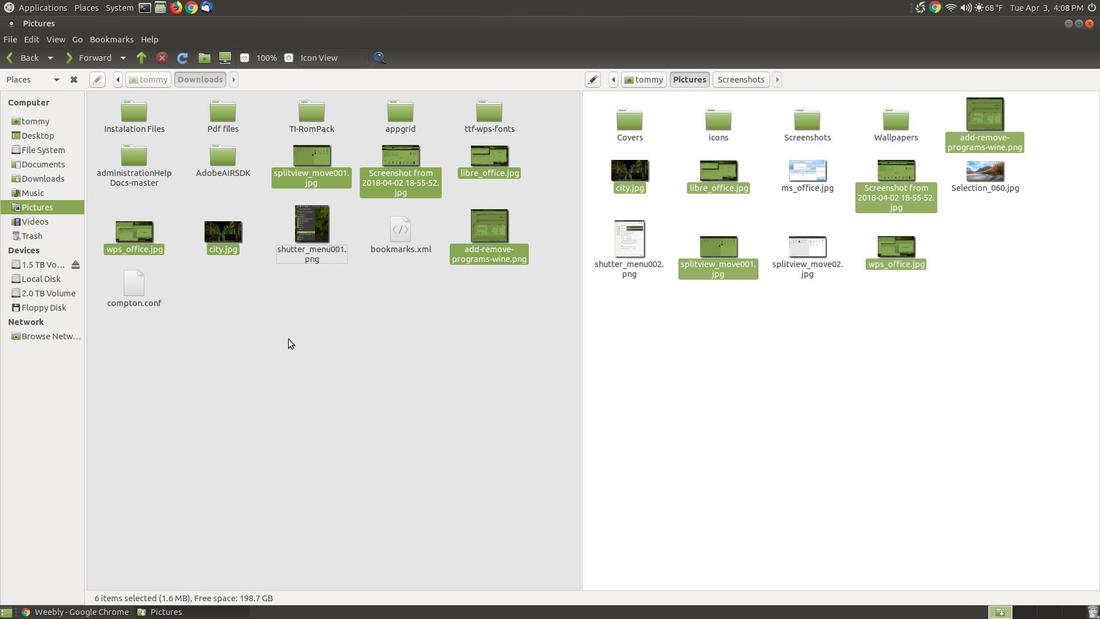
If you want to copy selected files or folders instead of moving them, then press and hold down the Ctrl button and drag the selected files to the new location. When you release the Ctrl button and left mouse button, you'll notice the files were copied to a new location instead of moved to a new location.
You now have copies of the files you selected in two different locations.
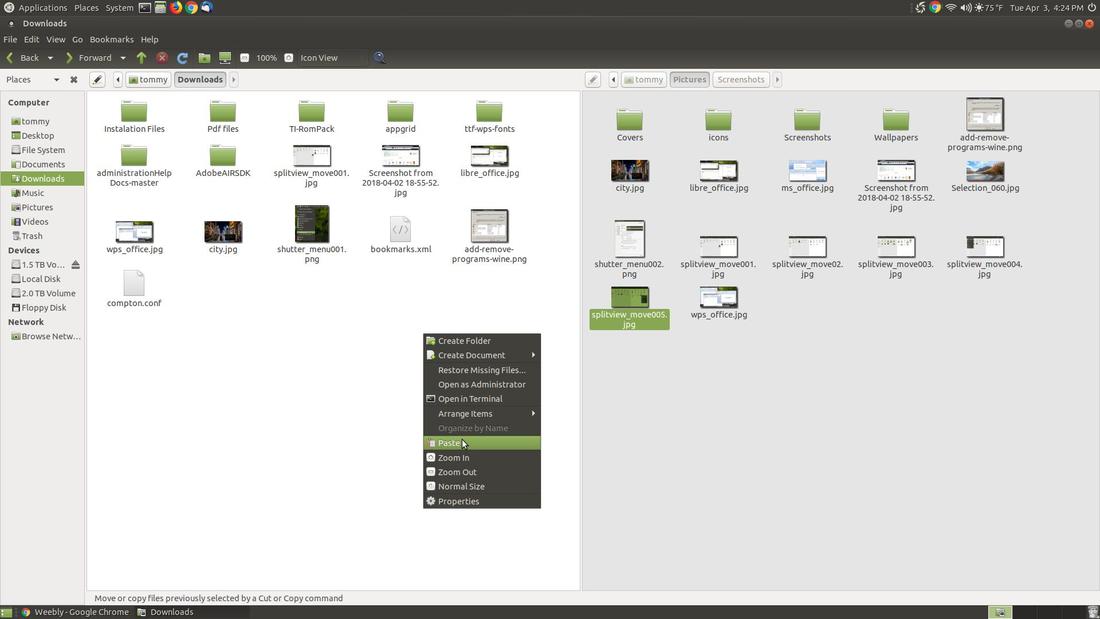
You can also move or copy selected files by using the Cut or Copy command in the Edit menu. The Cut command allows you to move selected file(s) while the Copy command allows you to copy selected file(s) to a new location.
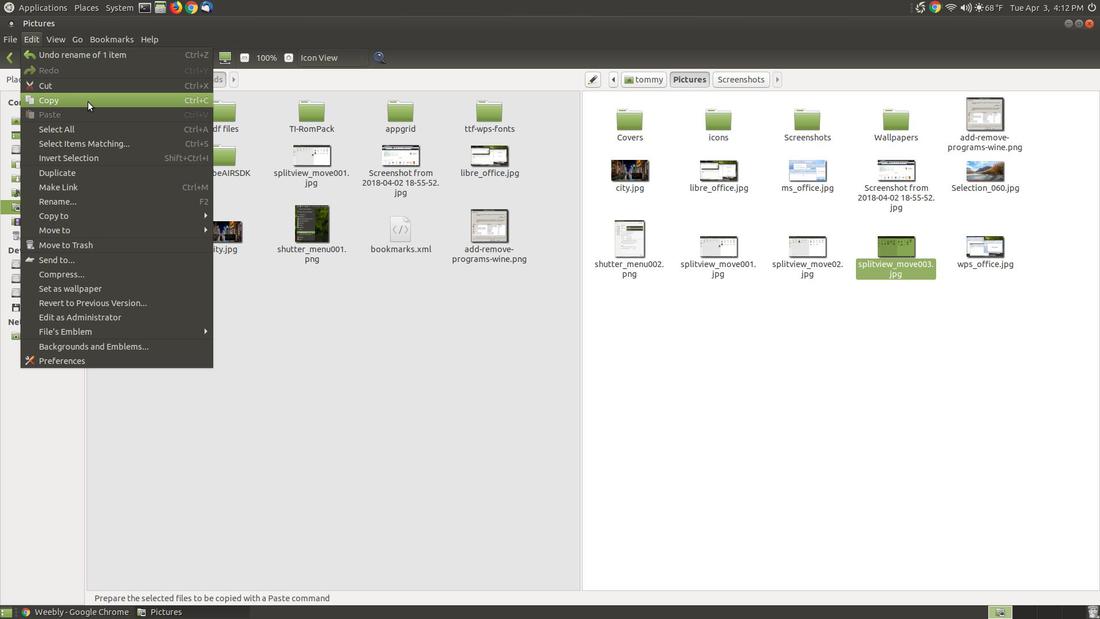
If you are switching from Windows to Ubuntu MATE, then you probably are used to copying or moving files by right-clicking the selected files and select Copy or Cut. This also works in Ubuntu MATE. Just select the files and right-click and select Cut or Copy
Then click the area you want to place the files and right-click and select Paste.
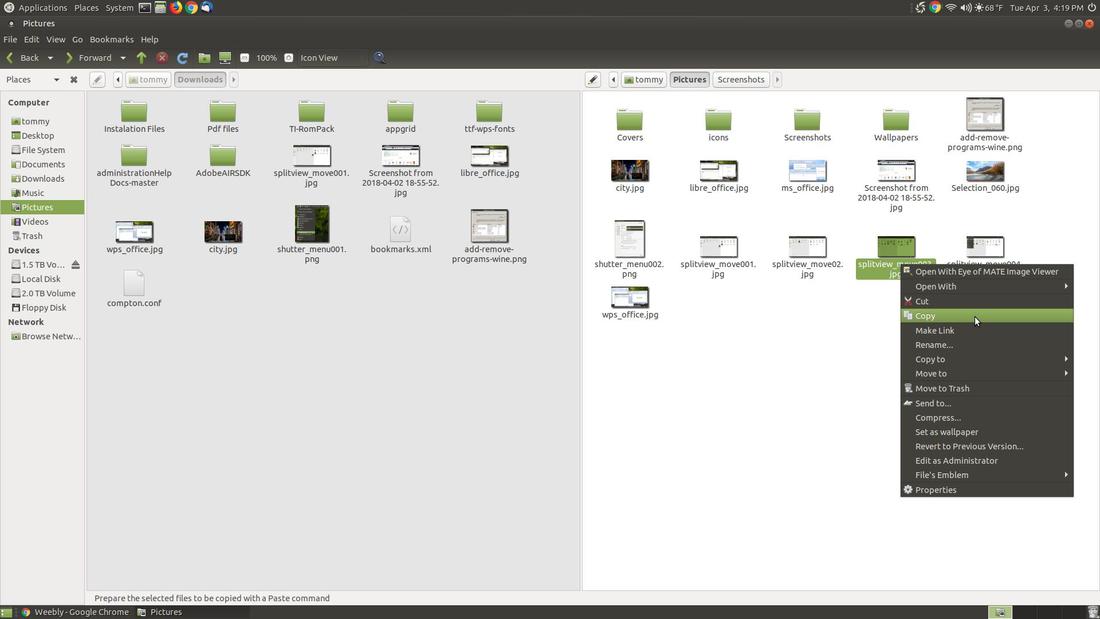
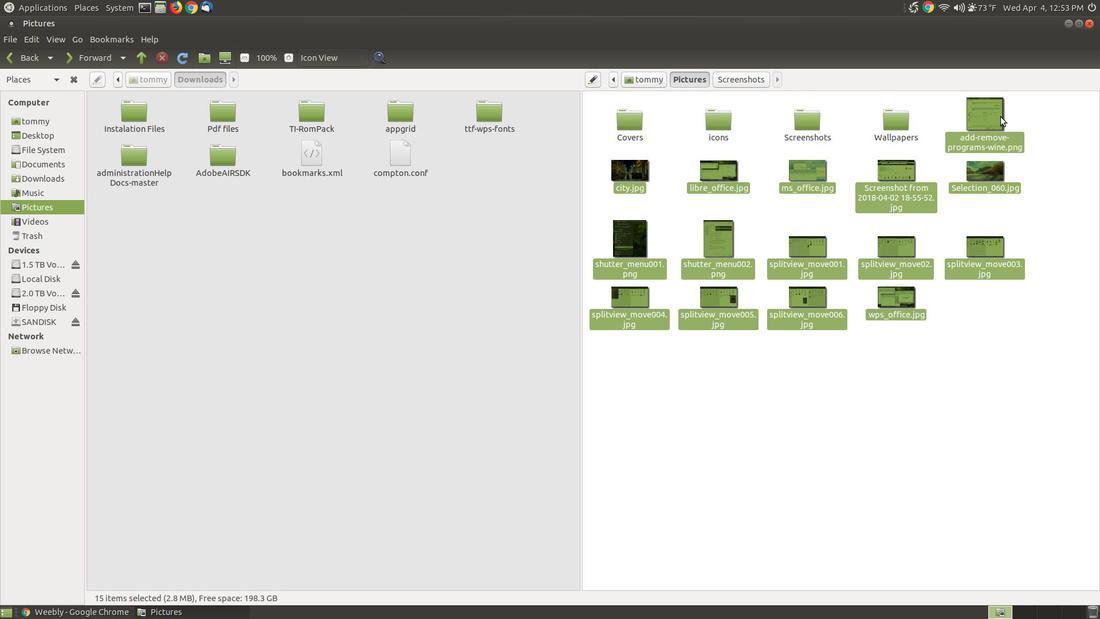
You can select multiple files or folders by holding down the Shift key and select the first file or folder in a list and while holding down the Shift key select the last file of folder in a list. In the example below, I held down the Shift key while clicking on the last file in my list.
Then I clicked on the first jpg file in the list while still holding down the Shift key. This method selected everything from the first file selected to the last file selected. You can also click on the first file in a list and hold down the Shift key and press the up or down arrow keys to select multiple files in a list.
Example: Shift key and press the up arrow key to select multiple files.
Once you have your files selected you can use the shortcut keys to copy or move the selected files. Holding down the Ctrl key while selecting the C key will allow you to copy the selected files. Holding down the Ctrl key while selecting the X key will allow you to move or cut the selected files. These format for these commands usually look like:
1. Copy CTRL + C
2. Cut CTRL + X
1. Copy CTRL + C
2. Cut CTRL + X
