
How-To Replace Clock Indicator with the Classic Clock Applet
If you recently installed the newest version of Ubuntu MATE, you've probably noticed that clock applet that displays the date and time has been changed. Don't panic because it's still installed; however, the clock applet has been replaced by the clock indicator as the default clock in your panel.

Clock Indicator
You'll also see a notification icon in the panel that can be hidden in the Settings... The notification icon can bell or a mail icon or whatever your theme assigns to it.

When the Indicator Notifications Settings dialog box appears, place a check in the box next to Hide indicator to remove the icon from your panel.
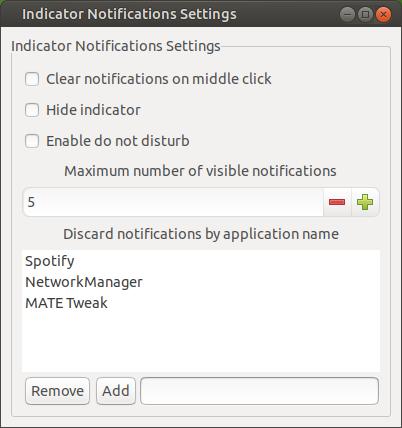
Default Settings
|
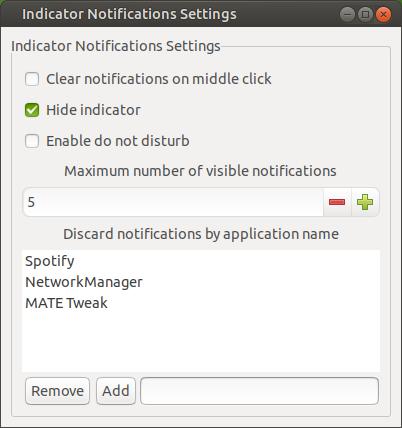
Modified Settings
|
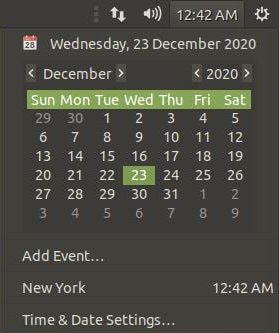
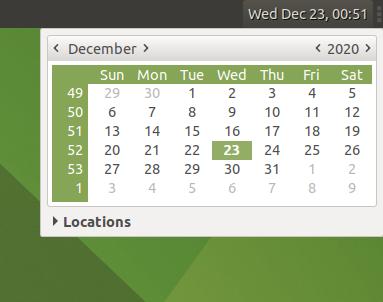
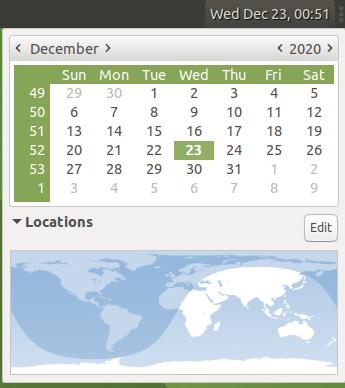
You can view the date with the clock indicator by clicking on the time. It will create a drop-down monthly calendar which allows you to see the day, month, and year. You can click on the Time & Date Settings... to change your location, date, and time. This can be a tedious task just to see the date.
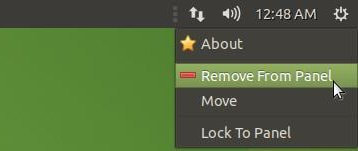
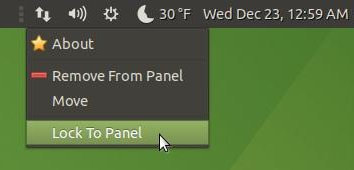
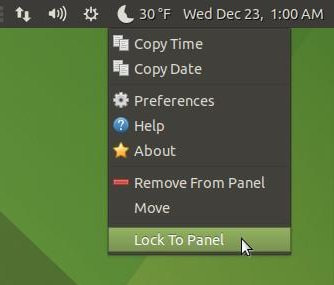
Follow these simple steps if you want to replace the clock indicator back to the old clock applet that we've grown accustomed to over the years. Right-click on the time to create a drop-down menu. Then left-click the option Lock To Panel to turn it off.
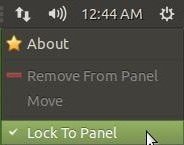
Next, left-click the option Remove From Panel to remove the clock indicator
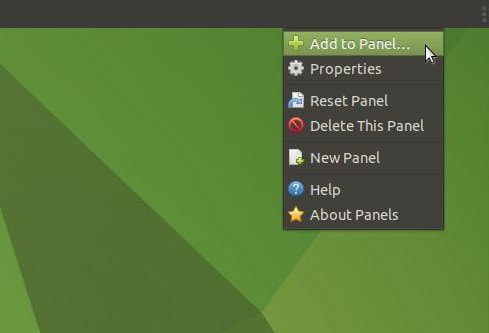
Next, right-click in the time area and then left-click the option Add to Panel...
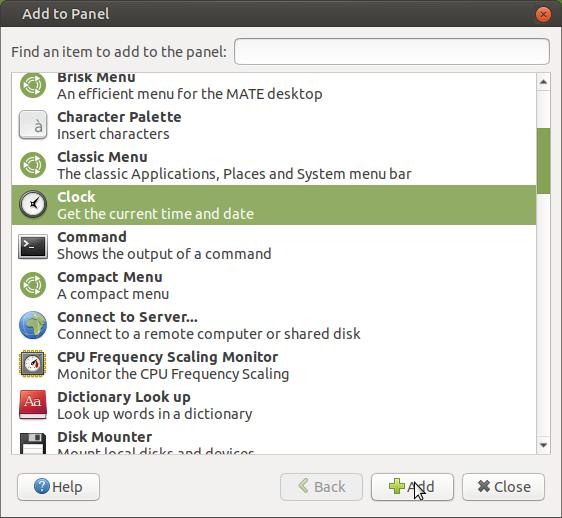
When the Add to Panel dialog box appears, scroll down until you locate the Clock applet. Then left-click the Add button.
You'll see the clock applet on your panel. You are no ready to change the settings to display the time and date to the format you're accustomed too.

Now left-click on the date & time to create a drop-down menu. Then left-click on Locations.
You should see a day and night world map and an Edit button. Click the Edit button to set your location.
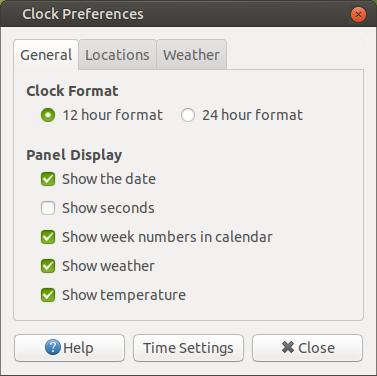
Lets start in the General tab. Here in the United States we use the 12 hour format, so I selected that option. I like looking at the date on my panel, so I made sure the Show the date option is selected. I also checked the options: Show week numbers in calendar, Show weather, and Show temperature.
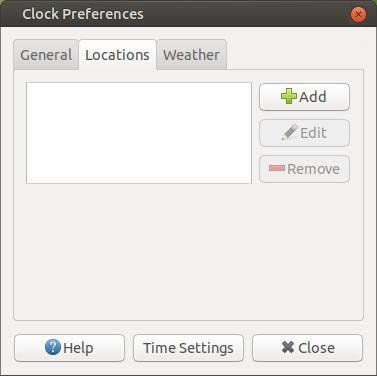
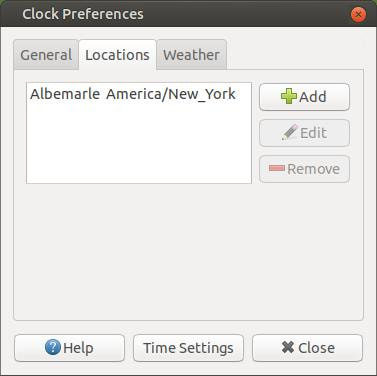
Click on the Locations tab across the top and then left-click the Add button.
Enter your city, region, or country name and then select a match from the pop-up list. It should select your correct timezone, latitude, and longitude. Click the OK button when you have everything set.
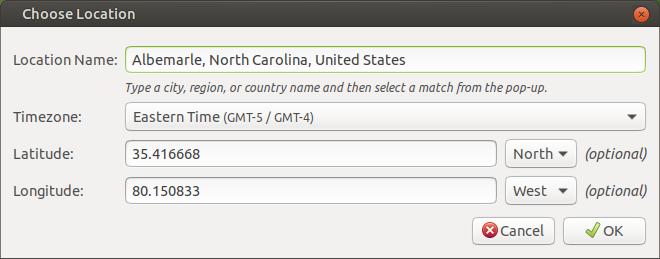
You will now see your location in the center of the dialog box.
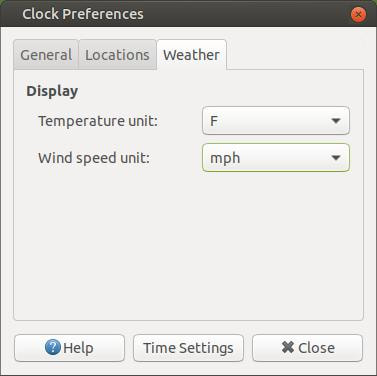
Now click the Weather tab and then select your Temperature unit and Wind speed unit from a drop-down list. Click the Close button when your finished.
You will now see your settings on your panel. Click the time once to display a drop-down box and click it again to make it disappear.

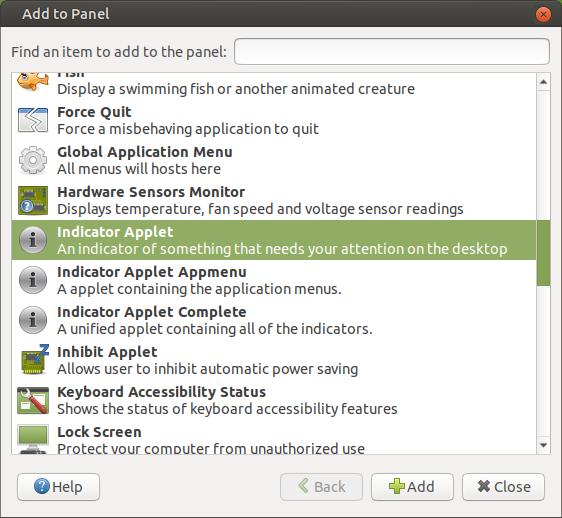
Now right-click just to the left of the clock applet and left-click on Add to Panel... option. When the Add to Panel dialog box appears, scroll down and locate the Indicator Applet. Select it and then left-click the Add button.
You will now see the WiFi/Ethernet icon, Volume Control icon, and Shut-down icon added to your panel. Right-click on the applet to display a drop-down menu. You can left-click on the Move option and drag the Indicator Applet around on your panel. Then right-click the applet again and left-click on the Lock To Panel option to lock the applet in place.
Then do the same thing for the clock applet.
Reduce Space Between Icons in System Tray
You can also remove some space between the icons in your panel if you think the current space reminds you of a Jack-O-Lantern's teeth.
You can also remove some space between the icons in your panel if you think the current space reminds you of a Jack-O-Lantern's teeth.

|

|
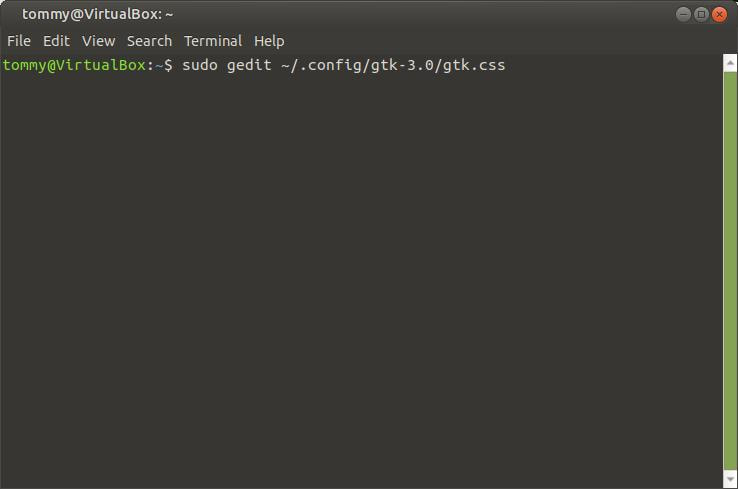
Open your Terminal and enter the following: (You can replace GEdit with your favorite text editor.) If you need to install GEdit then enter the following in your Terminal: sudo apt install gedit.
sudo gedit ~/.config/gtk-3.0/gtk.css
Then press the Enter or Return key and type in your password.
sudo gedit ~/.config/gtk-3.0/gtk.css
Then press the Enter or Return key and type in your password.
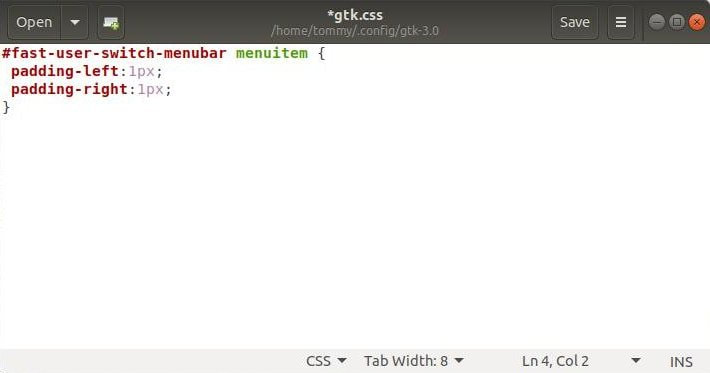
When GEdit opens, enter the following information into the gtk.css file:
#fast-user-switch-menubar menuitem {
padding-left:1px;
padding-right:1px;
}
Press the Save button to save the settings.
(You may have to tweak padding-left and padding-right values to get the results that you're looking for.)
#fast-user-switch-menubar menuitem {
padding-left:1px;
padding-right:1px;
}
Press the Save button to save the settings.
(You may have to tweak padding-left and padding-right values to get the results that you're looking for.)
Here's a before padding reduction image. Notice the space between the icons in the system tray.

Here's the results of the new settings affecting the icons in the System Tray.

For more information on padding reduction, check out my How-To Reduce Space Between Icons in System Tray page.
You can re-open the gtk.css file and delete the contents you added if you want to go back to your original settings. If you created the file then you can remove it.
Now reboot your system. When it loads, your icons should have less space between them.
I hope this helped you customize your Ubuntu MATE System Tray.
Take care!
Take care!

