
TI-84 Plus CE
TI-84 Plus CE (Using the CEmu Emulator) - The TI-84 Plus CE (Color Enhancement) is an easy-to-use graphing calculator with a high-resolution, full-color backlit display and built-in MathPrint™ feature that makes comprehension of math and science topics quicker and easier.
The built-in MathPrint™ functionality allows you to input and view math symbols, formulas and stacked fractions exactly as they appear in textbooks.
Entering Fractions on Your TI-84 Plus CE
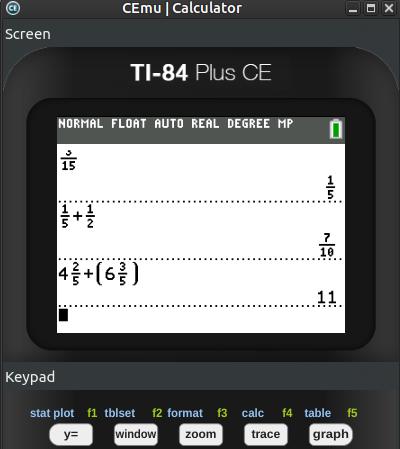
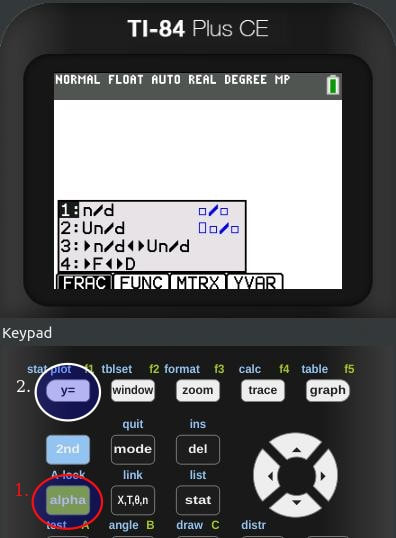
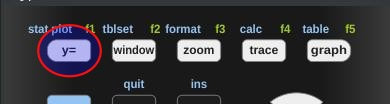
Press the Alpha button on the upper left of your keypad and then press the Y= button. This brings up a series of shortcut menus: FRAC, FUNC, MTRX, and YVAR. The first menu, FRAC, controls the input of fractions and mixed numbers. Select 1: n/d if you want your results to be shown as an improper fraction. Select 2: Un/d if you'd rather see your results as a mixed number. Select 3: >n/d<>Un/d to convert your answer to a mixed number fraction or vice versa. Select 4: >F<>D to convert a fraction answer to a decimal number or vice versa.
Press the Alpha button on the upper left of your keypad and then press the Y= button. This brings up a series of shortcut menus: FRAC, FUNC, MTRX, and YVAR. The first menu, FRAC, controls the input of fractions and mixed numbers. Select 1: n/d if you want your results to be shown as an improper fraction. Select 2: Un/d if you'd rather see your results as a mixed number. Select 3: >n/d<>Un/d to convert your answer to a mixed number fraction or vice versa. Select 4: >F<>D to convert a fraction answer to a decimal number or vice versa.
How to Graph Functions on the TI-84 Plus CE
Sometimes it can be tricky graphing an equation or function on a graphing calculator. Below you will find the instructions for graphing an equation using the TI-84 Plus CE.
Enter Your Equations
You must first enter your equations in your calculator before you can create a graph.
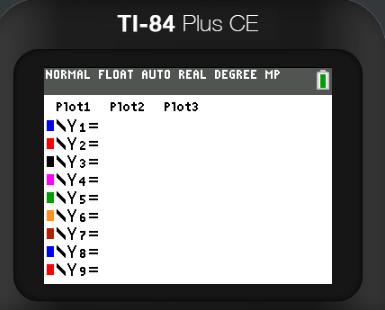
Press the y= button on your calculator.
Sometimes it can be tricky graphing an equation or function on a graphing calculator. Below you will find the instructions for graphing an equation using the TI-84 Plus CE.
Enter Your Equations
You must first enter your equations in your calculator before you can create a graph.
Press the y= button on your calculator.
You should now see a screen similar to the one shown below. This is the screen where you will enter all of the equations you plan to graph.
So, for example, if I wanted to enter the equations y=x+1, y=x^2-6 and y=5x^3+2x^2+1, I would do it like this: (using the arrow keys to switch to different equation slots)
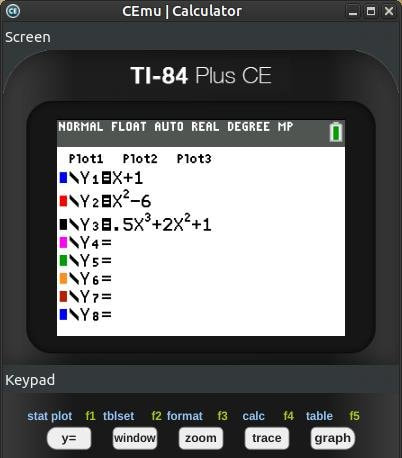
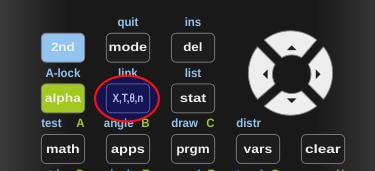
To type the “X”, press the X,T,Θ,n button on your calculator.
You must have Y isolated on one side in each of your equations. You do not need to type Y because it is already entered in the calculator. You can graph up to ten equations at a time and you move around via using the arrow keys.
Graphing Your Equations
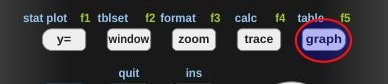
When you have finished entering all your equations, press the graph button.
When you have finished entering all your equations, press the graph button.
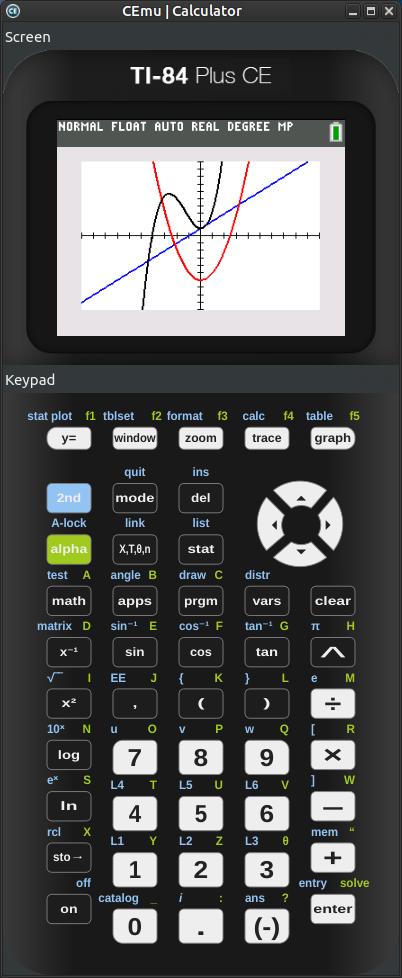
You will then see your TI-84 Plus CE graph your equations. Notice the color matches each equation, y=x+1, y=x^2-6 and y=5x^3+2x^2+1.
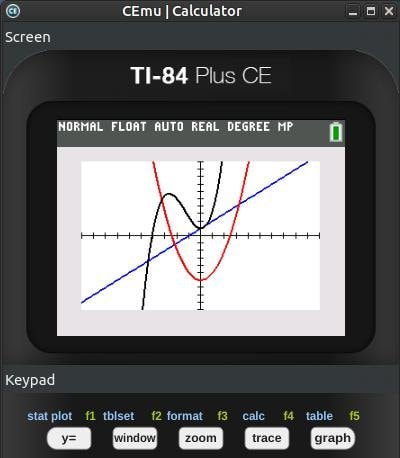
You can press the Y= button and use your arrow keys to navigate through your equations and press the clear button to erase or delete the selected equation.
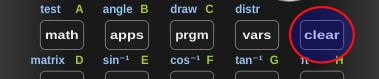
Press the Window button to set up your viewing window.
How to Install CEmu - TI-84 Plus CE / TI-83 Premium CE emulator
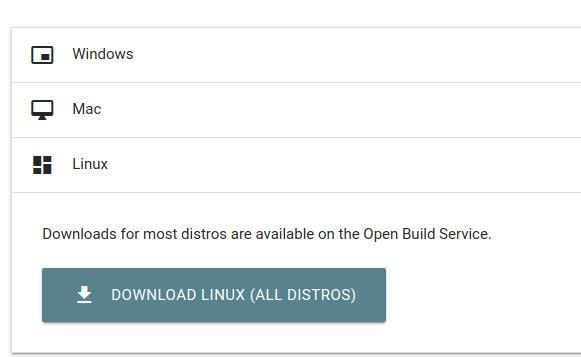
You must install the CEmu Emulator before you're able to use the TI-84 Plus CE on your system (unless you use a different emulator). The CEmu Emulator is free and open-source and can be installed on multiple platforms. Click the Download button from the developers website and then select your operating system's platform. Since I use Ubuntu MATE I selected Linux and then I clicked on the DOWNLOAD LINUX (ALL DISTROS) button.
You must install the CEmu Emulator before you're able to use the TI-84 Plus CE on your system (unless you use a different emulator). The CEmu Emulator is free and open-source and can be installed on multiple platforms. Click the Download button from the developers website and then select your operating system's platform. Since I use Ubuntu MATE I selected Linux and then I clicked on the DOWNLOAD LINUX (ALL DISTROS) button.
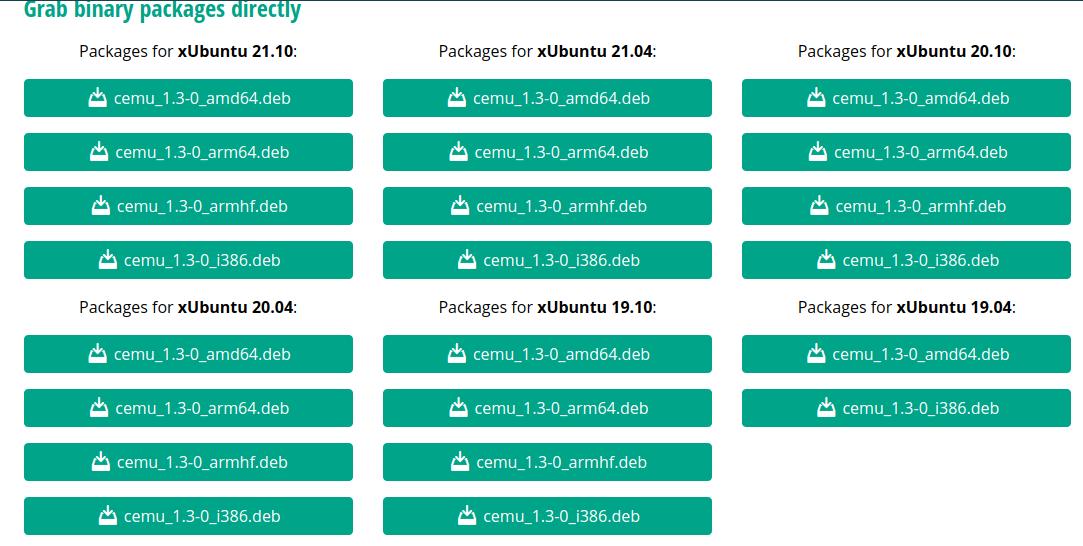
Then click on your type of Linux distribution (often abbreviated as distro) or operating system. I clicked on Ubuntu.It will create a drop-down menu that will allow you to Add repository and install manually or Grab binary packages directly.

I selected the second option of Grab binary packages directly and then I clicked on the cemu_1.3-0_amd64.deb button under Packages for xUbuntu 20.04.
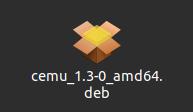
It download the deb package into my Downloads folder. I double-clicked the file to open it with my package installer. I use the gDebi Package Installer (you can install it by entering the following in your Terminal: sudo apt-get install gdebi).
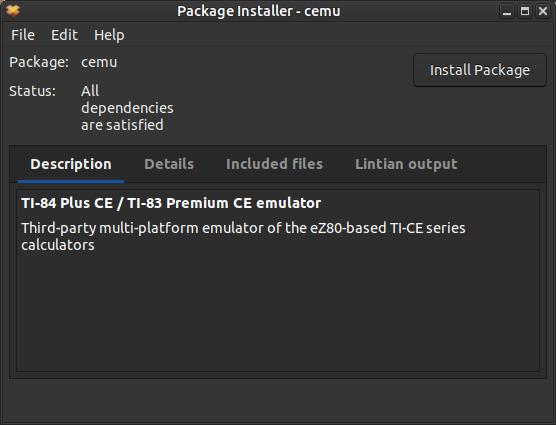
Double-clicked the cemu_1.3-0_amd64.deb file to open it with the default Package Installer. Then click the Install Package button.
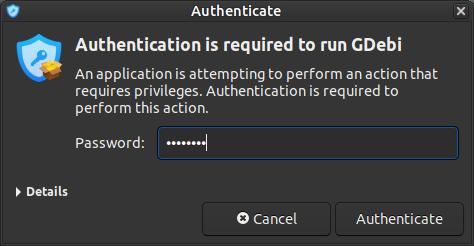
Type in your Password and then click the Authenticate button.
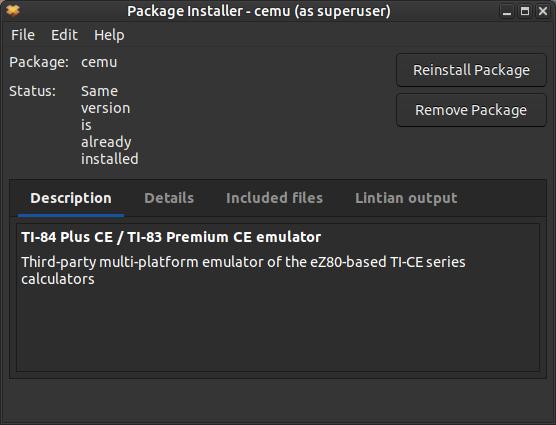
Wait until your see, "Status: Same version is already installed" before you close the Package Installer.
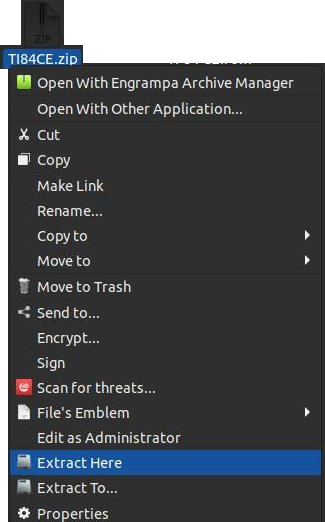
After you install the CEmu Emulator you will need the TI-84 CE Boot ROM (TI84CE.zip or TI-84CE.rom). You can hook up your TI-84 Plus CE to a Windows computer via USB cable and install TI Connect CE Software or use Wine to install it on your Linux system. This will allow you to get a copy of the TI-84 Plus CE operating system or ROM file(s).
You should now see a folder that contains the ROM file. In my example, the folder is called TI84CE.
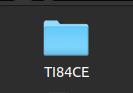
It should contain all the files needed for the TI-84 Plus CE graphing calculator to work on your system.

Now open your Terminal and enter: cemu (then press the Enter key)
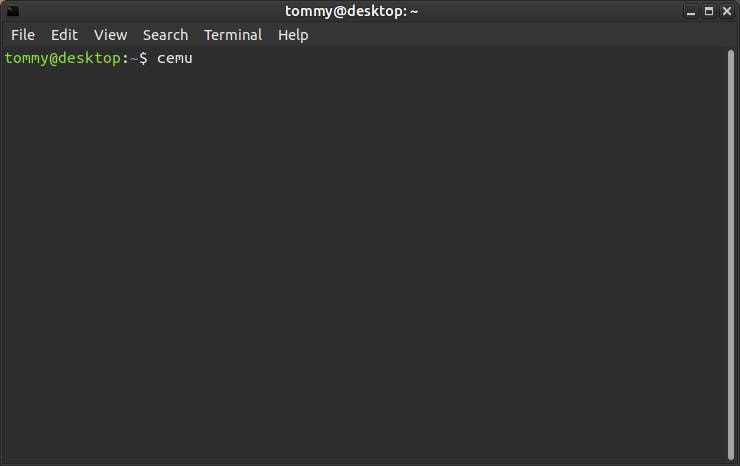
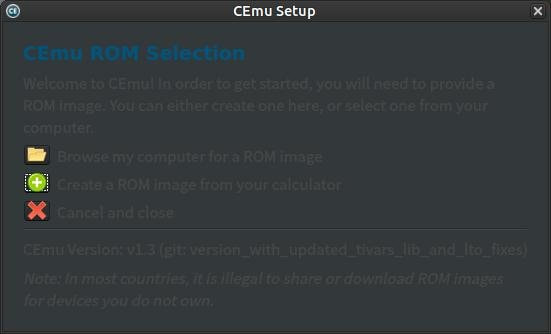
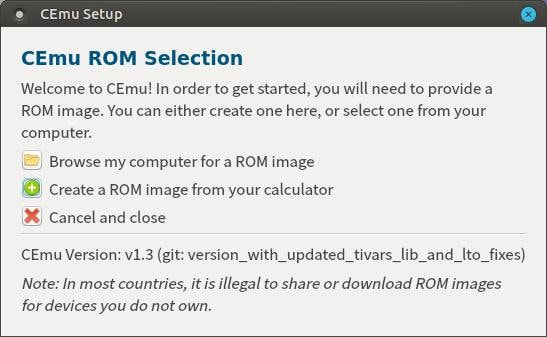
The first time you run or execute the cemu command it will bring up a CEmu Setup dialog box. It will prompt you to browse your computer for a ROM image, create a ROM image from your calculator, or cancel and close. If you have a ROM image on your computer then select the first option and navigate to the location of the ROM file and select it.
Dark Mode
|
Light Mode
|
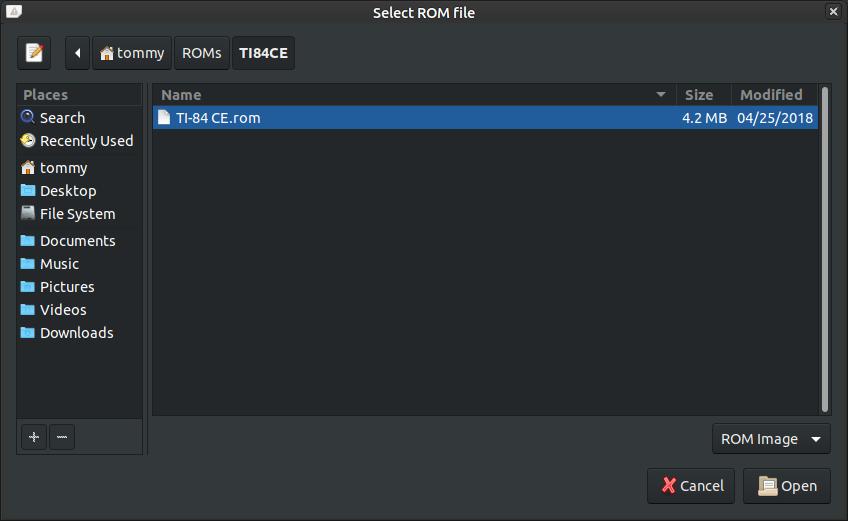
Next, browse your computer and locate and select your ROM image.Then click the Open button.
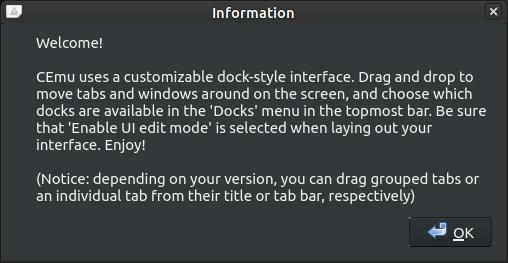
You will then be greeted with a Welcome dialog box. It will give you a nice tip to let you know that CEmu can be customized.Click the OK button to continue.
You will then see a screen similar to the one below.
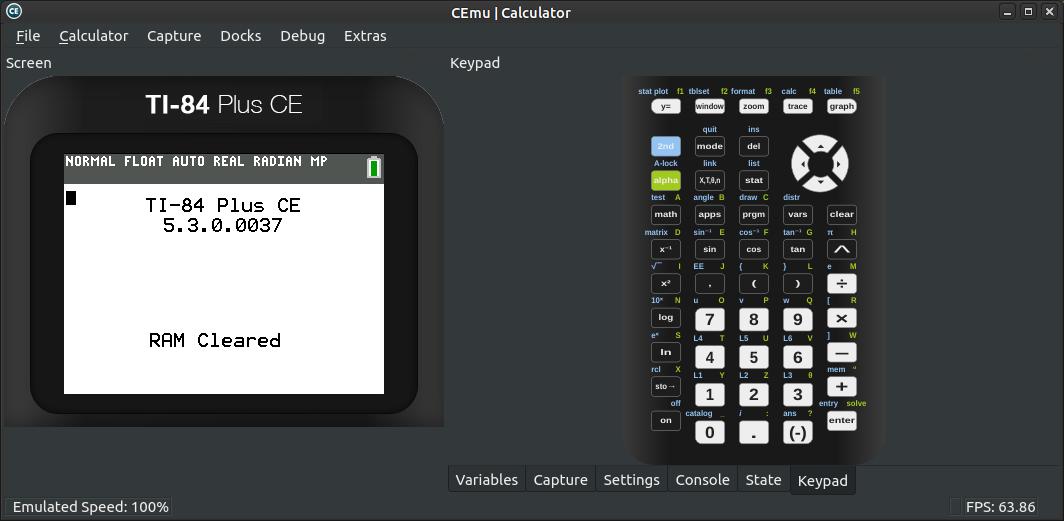
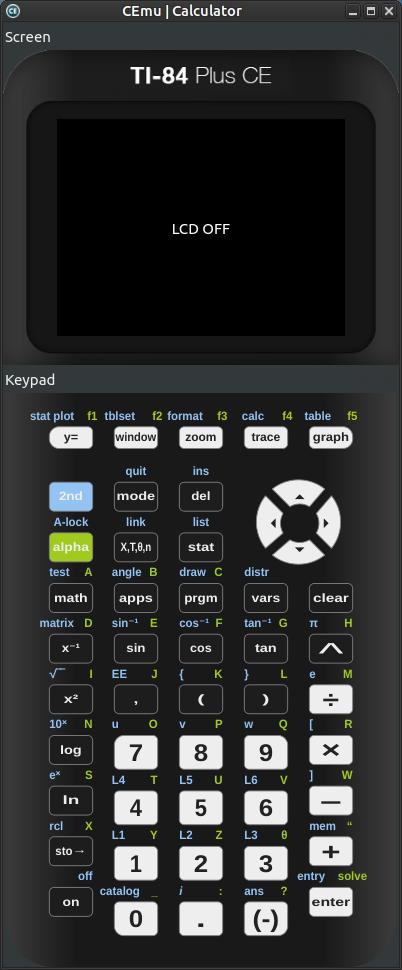
You can access the keys or buttons of the calculator by clicking the Keypad button on the bottom right.
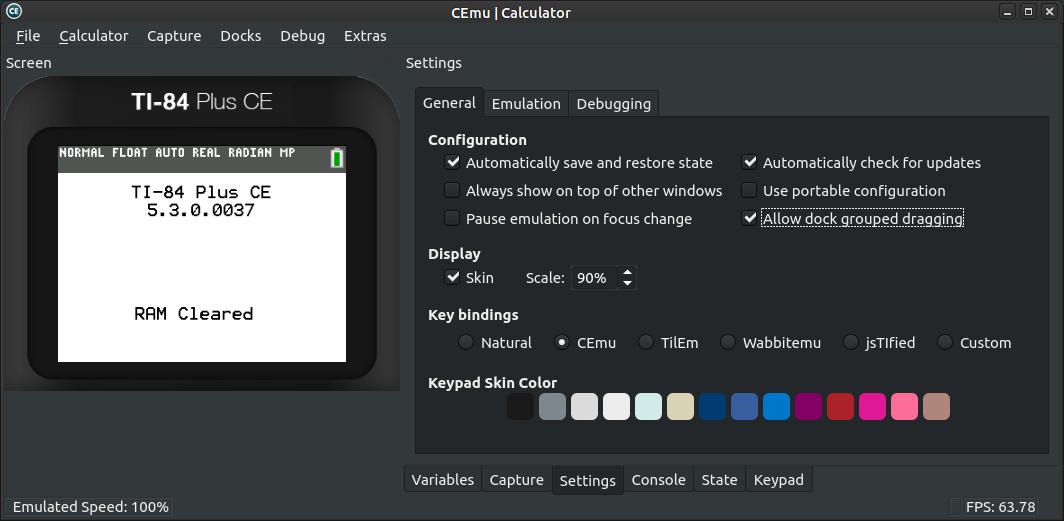
In order to join the Keypad to the Screen, you'll need to make some changes in the Settings. Click the Settings tab across the bottom right.
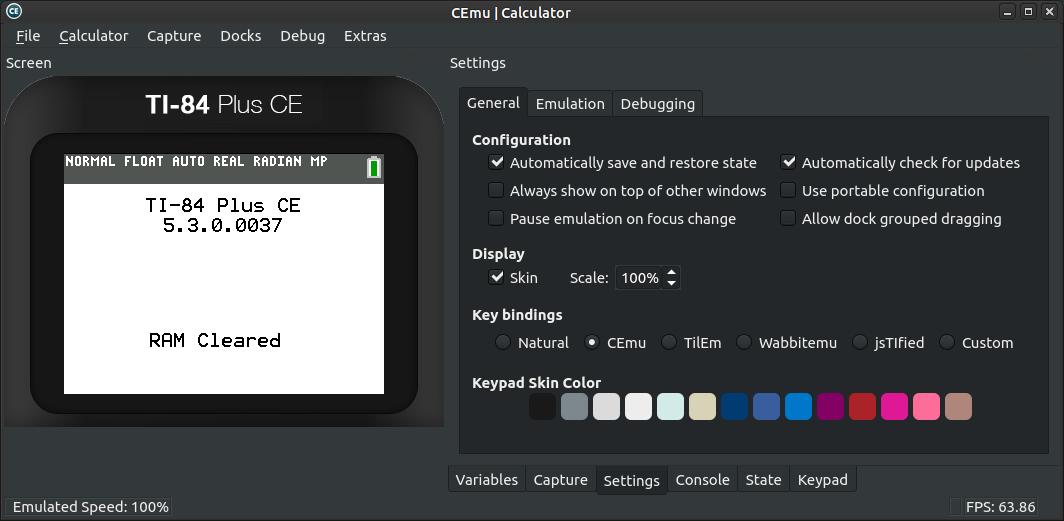
I reduced the Scale to 90% and I checked the option, "Allow dock grouped dragging." You may need to adjust the scale to accommodate the size of your screen.
I then clicked back on the Keypad tab across the bottom to make the Keypad viewable again. I then clicked on the Keypad title bar and drug it under the Screen.
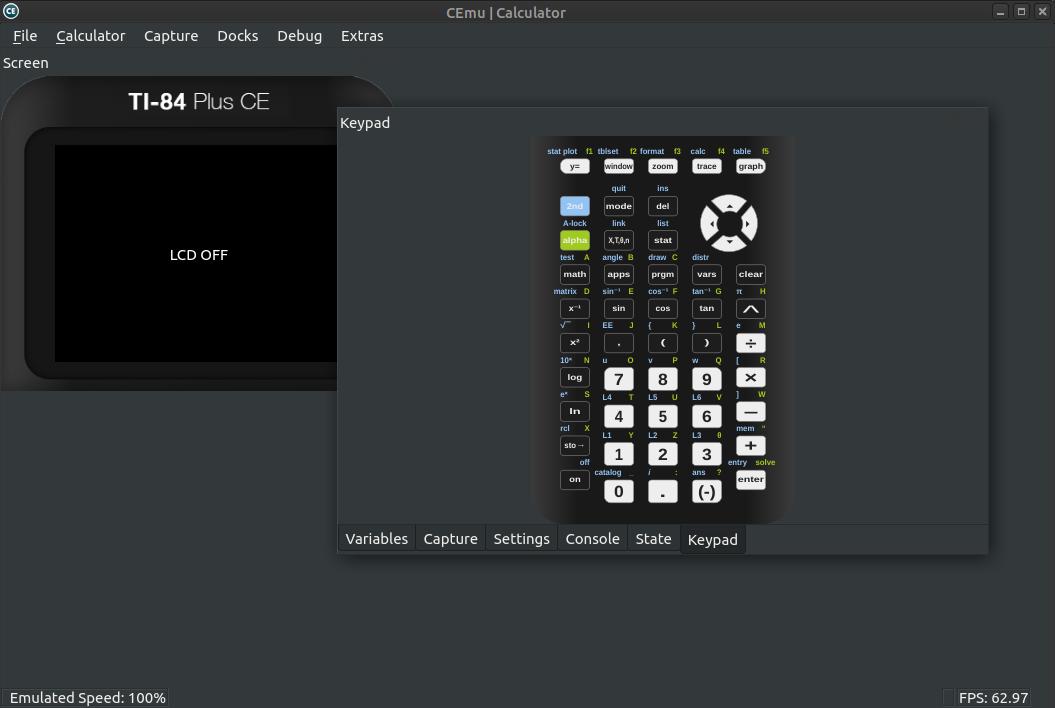
I then moved the Keypad section away from the screen and adjusted the outside frame to come to the edges of the Screen section. Then I drug the Keypad and placed it under the Screen. (This is very tricky and can take some time to accomplish.)
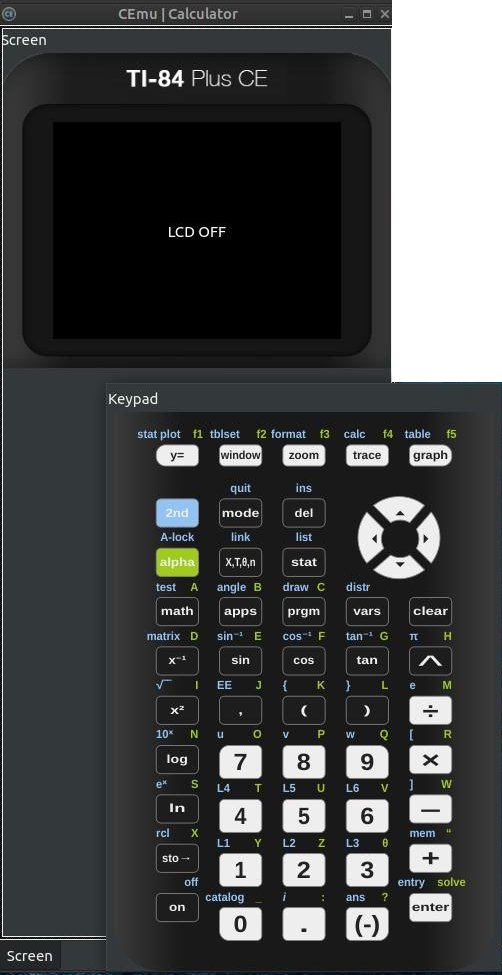
After a lot of trial and error, I was able to accomplish the joining of Screen and Keypad. I still haven't figured out how to make the title bars disappear, but for now I'm pleased with the results.
If you are having trouble lining up the Screen and Keypad, you're not alone. Below are several websites of people that have trouble lining up the two sections and solutions from others who use CEmu Emulator and the TI-84 Plus CE calculator.
How can I combine the screen and the keypad into a simple on-screen version of the calculator?
Qt Error Encountered While Starting CEmu
Window size and dock positioning is 1 pixel off
Not able to find where to have a calculator only layout
Qt Error Encountered While Starting CEmu
Window size and dock positioning is 1 pixel off
Not able to find where to have a calculator only layout
Ubuntu MATE Users:
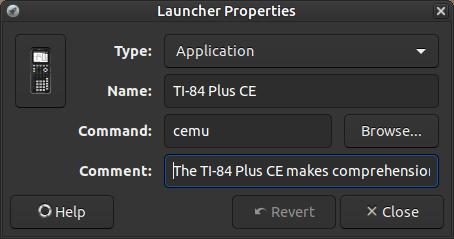
If you prefer to put the TI-84 Plus CE icon in your Education folder, then follow the following procedure. Open up the Main Menu tool to manual add an icon. (Click on System > Preferences > Look and Feel > Main Menu.) Click on the Education menu on the left when the Main Menu dialog box appears. Then click on the +New Item button on the right to create a menu application icon for the selected menu. When the Create Launcher dialog box appears, enter the following:
Type: Application
Name: TI-84 Plus CE
Command: cemu
Comment: The TI-84 Plus CE makes comprehension of math and science topics quicker and easier.
Next, click the square icon on the left and locate an icon for the program. Then click the OK button when you finish in the Create Launcher dialog box to close it.

|
|
You can now access TI-84 Plus CE in the Education sub-menu.

You can now access TI-84 Plus CE in the Education menu.

Off
|

On
|
Click the Mode button to access the Mode Menu. This is the most important menu on the TI-84 Plus CE calculator; it tells the calculator how you want numbers and graphs to be displayed. You can make a variety of changes to your calculator, including setting the internal clock and default language. Click the 2nd button and then the Mode button to exit or quit the Mode Menu.
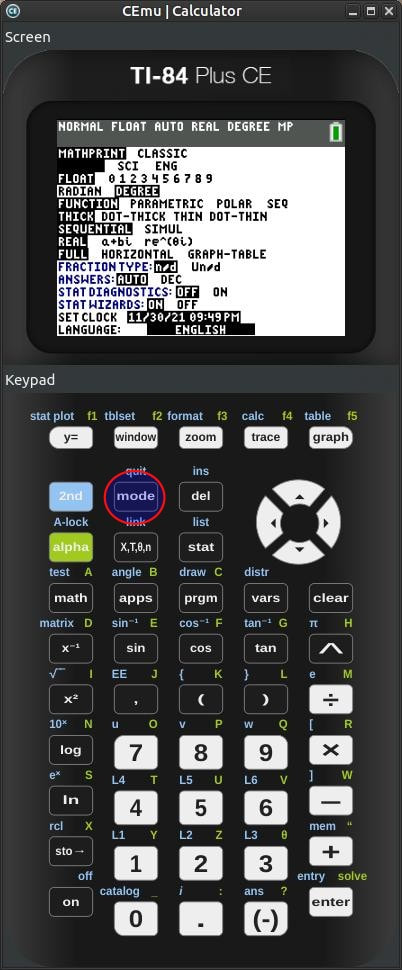
Mode Menu Screen
Look below to compare the Classic Mode of the older TI-83 Plus versus MathPrint Mode of the newer TI-84 Plus CE calculator.
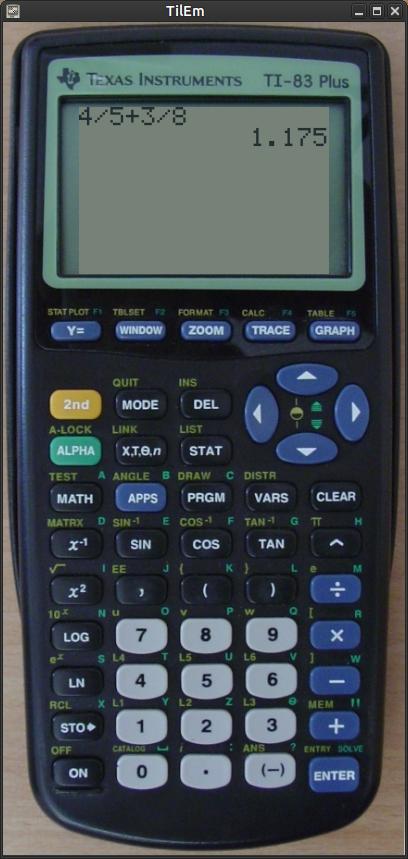
Classic Mode
|
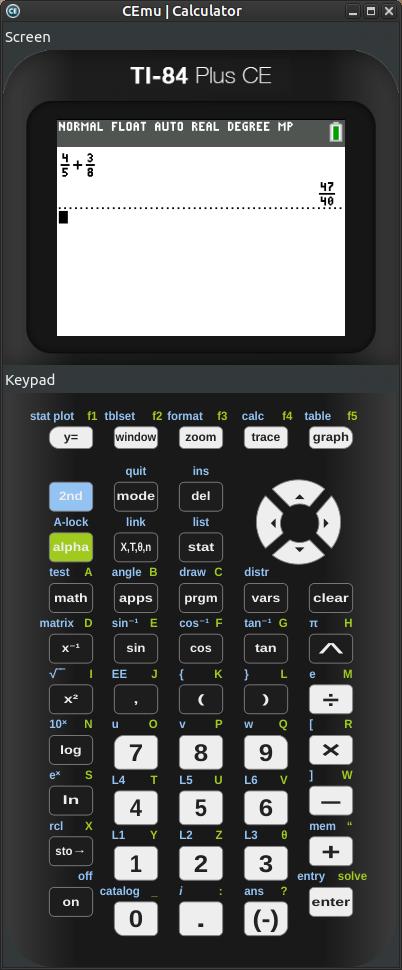
MathPrint Mode
|
Help Files & Reference Guides

Nov 30, 2021
