
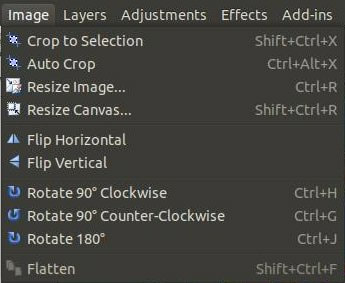
Pinta: Image Menu
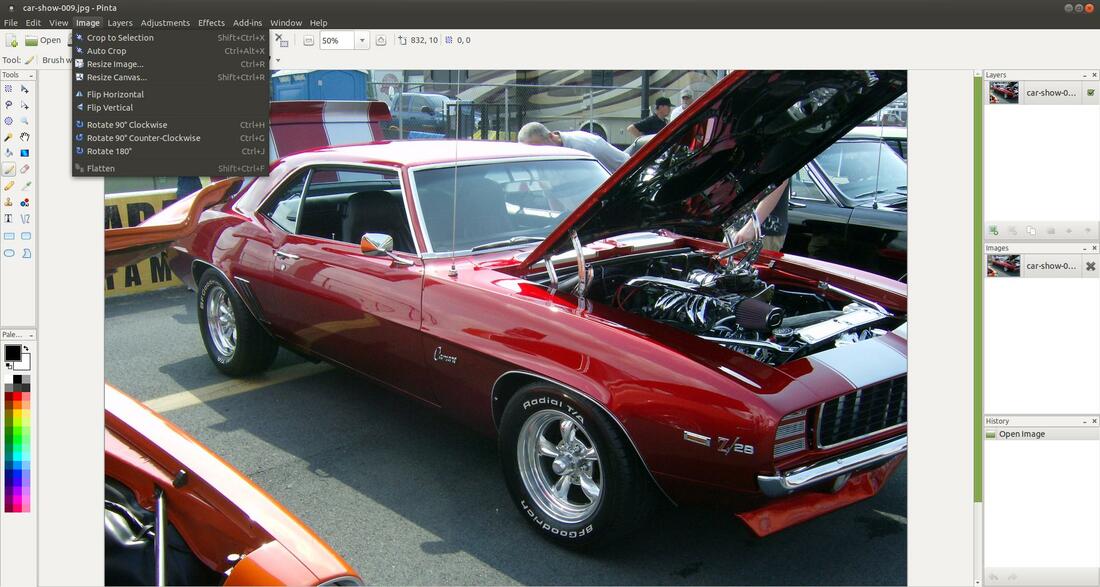
The Image menu contains commands that affect the image in some way. Most of the image adjustments in the menu have associated keyboard shortcuts. The commands that have three dots ... will have a dialog box that offer additional features.
Crop to Selection
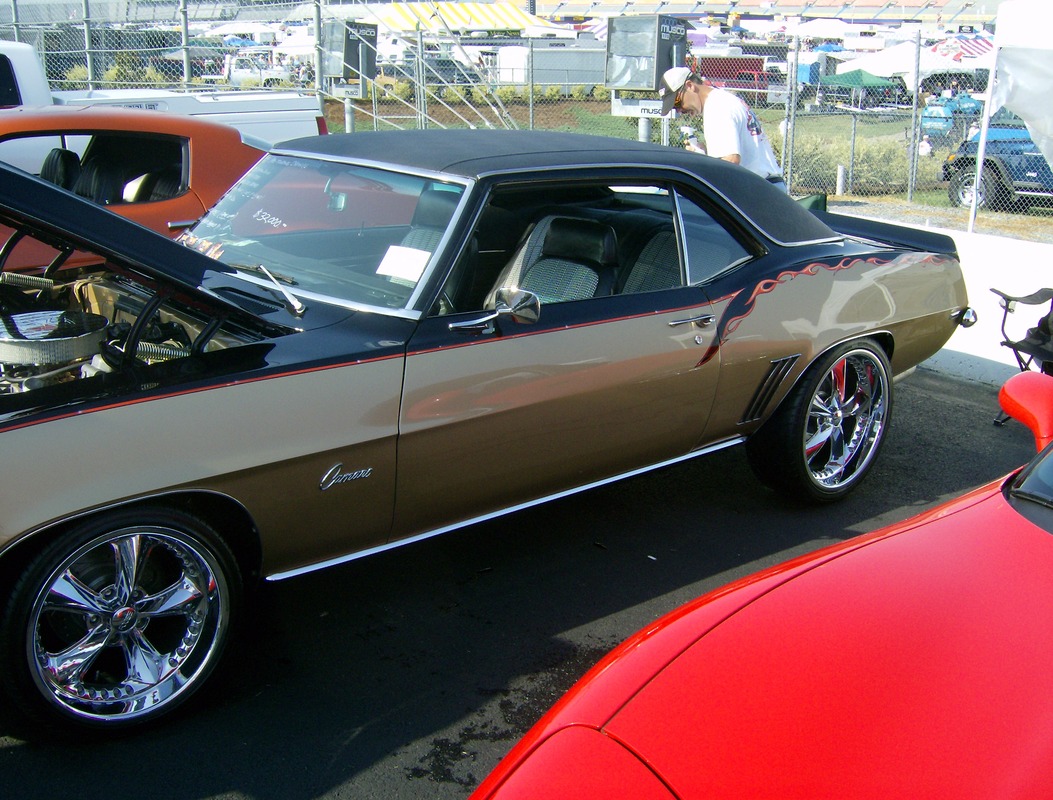
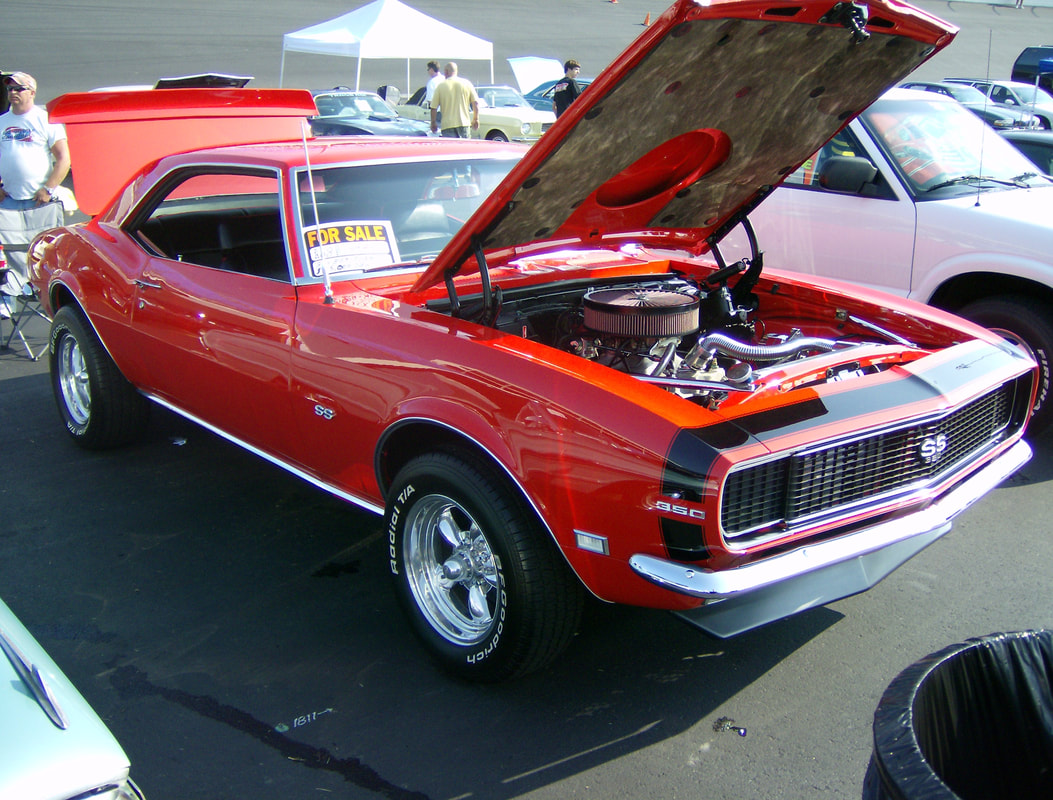
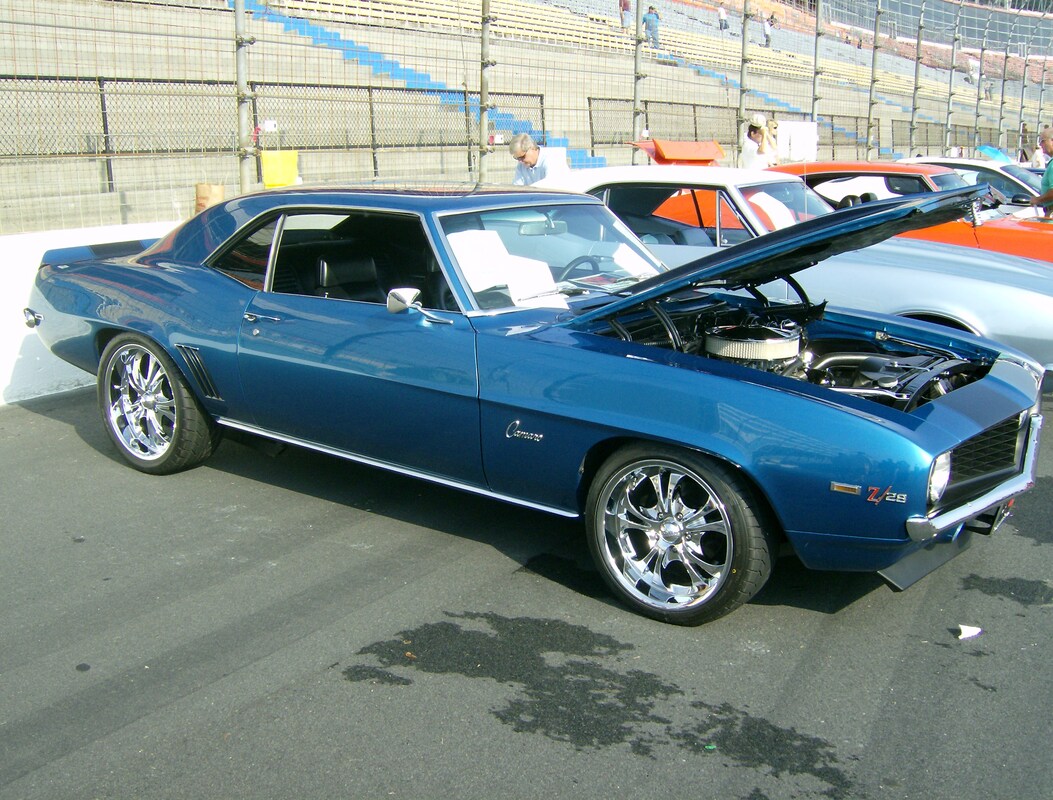
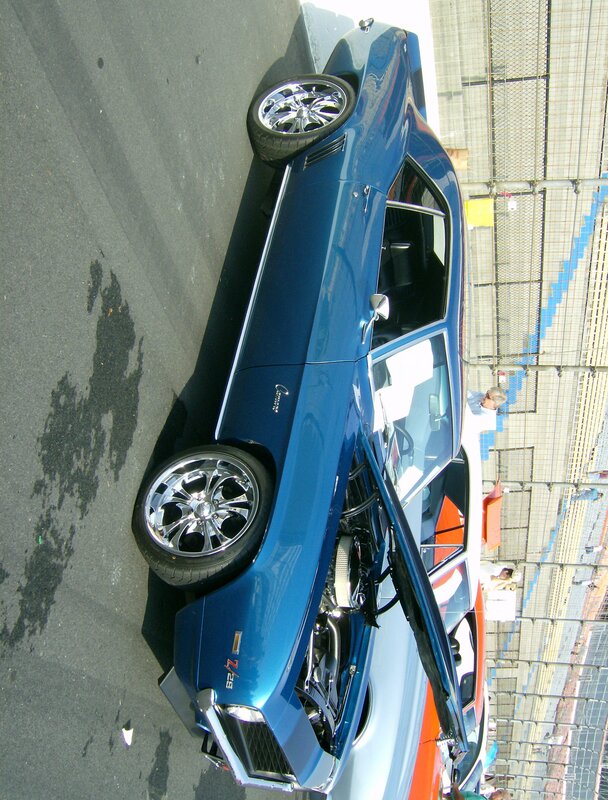
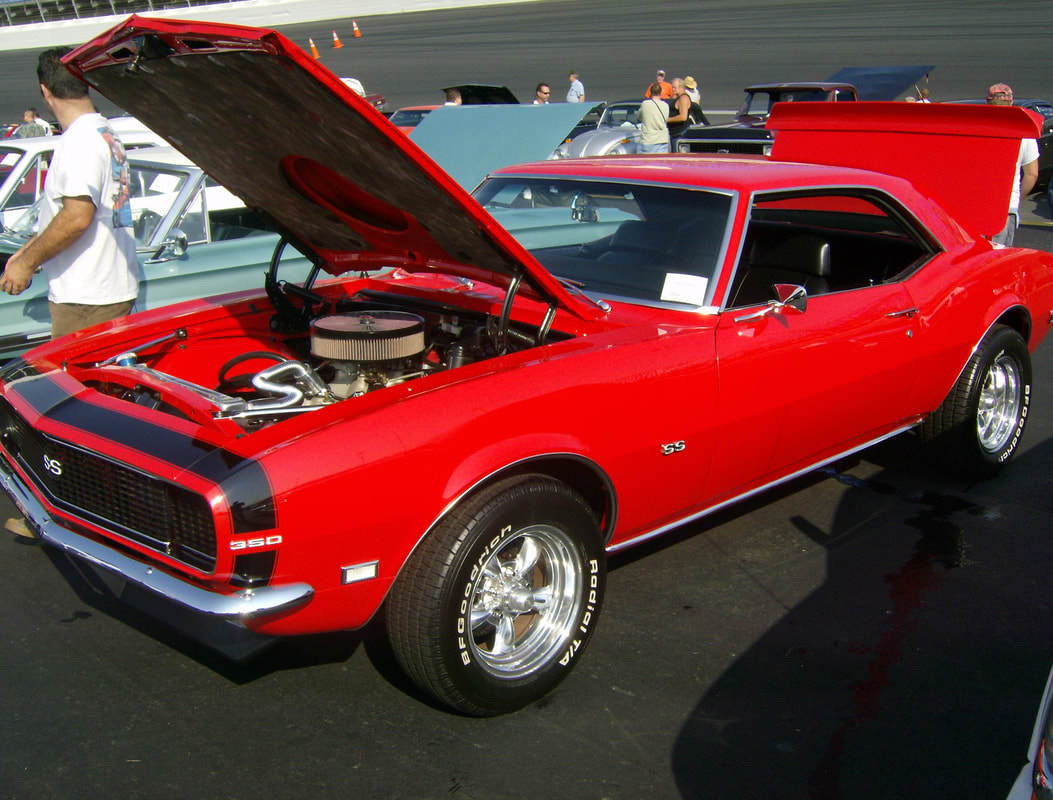
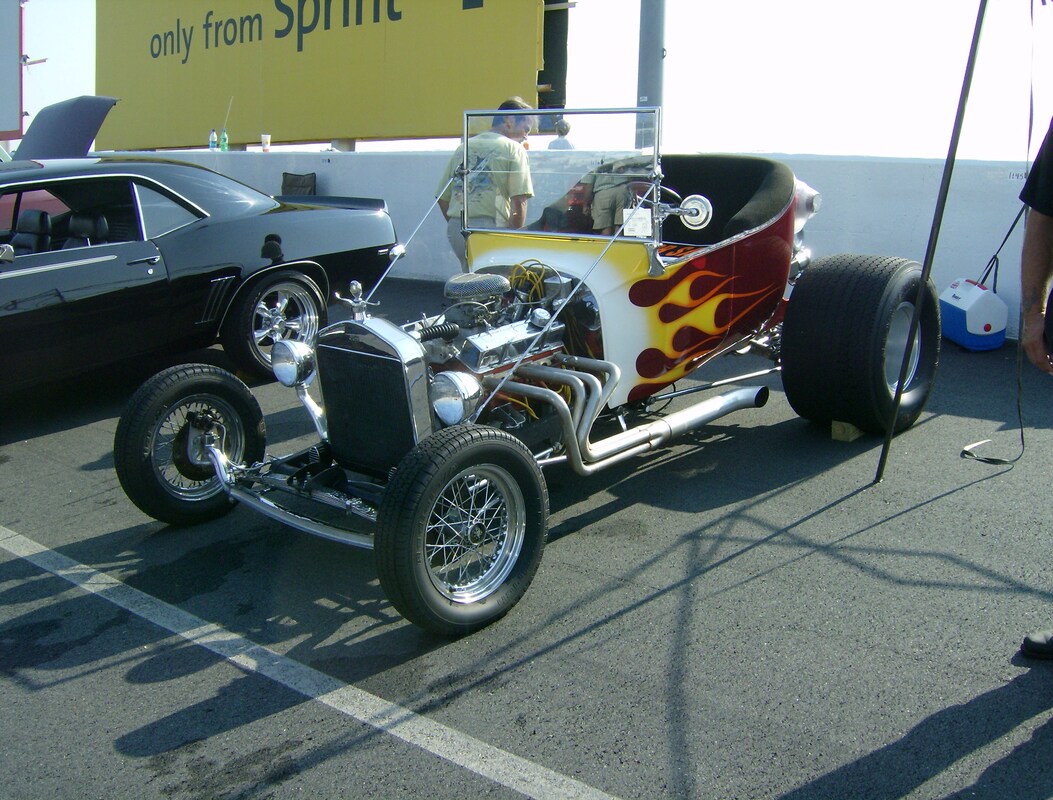
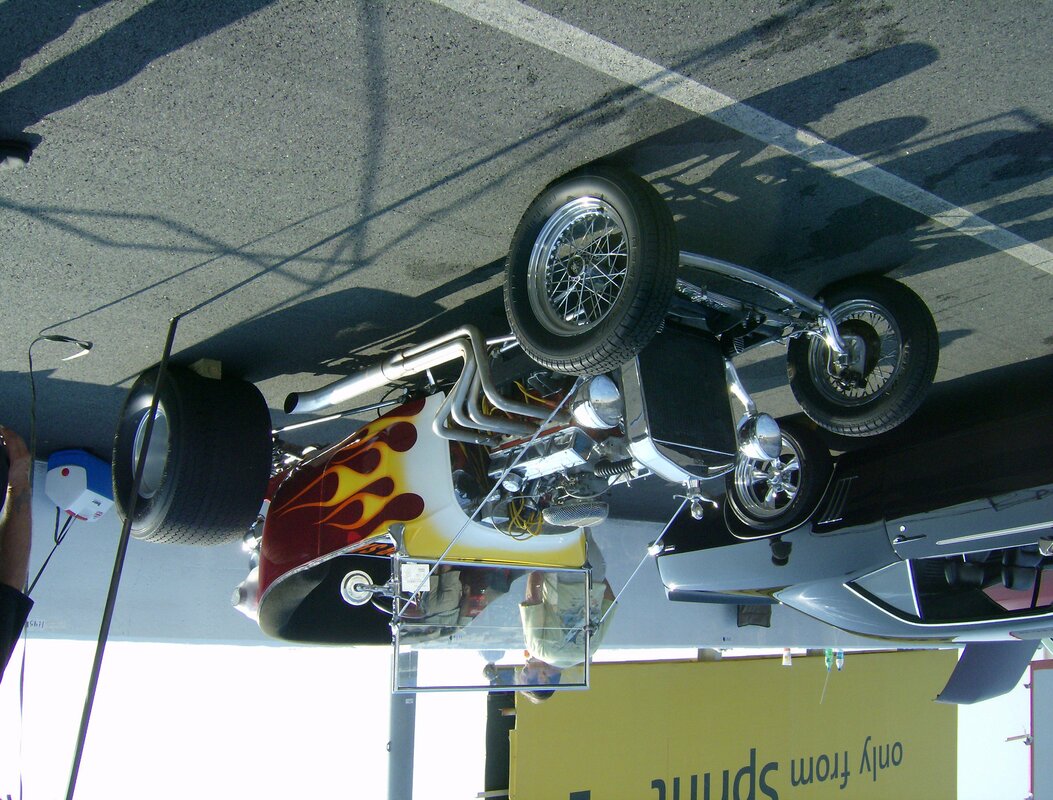
The Crop to Selection is only available to a selected part of an image. To see how this feature works, click the Rectangle Select button on the Tool Palette and then select an object in your image. I selected the red Z/28 1968 Camero in the image below.
The Crop to Selection is only available to a selected part of an image. To see how this feature works, click the Rectangle Select button on the Tool Palette and then select an object in your image. I selected the red Z/28 1968 Camero in the image below.
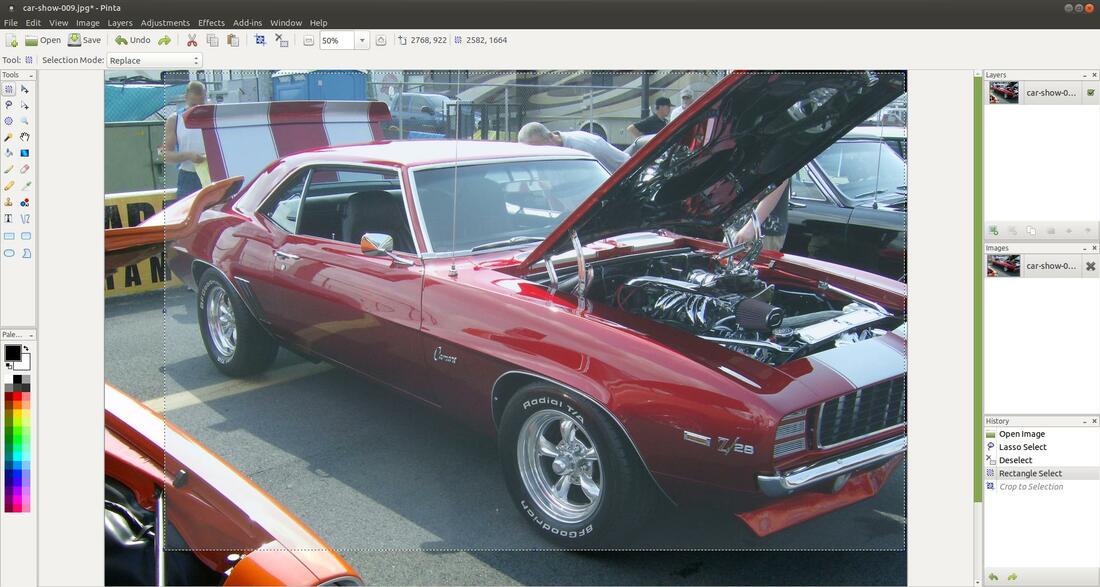
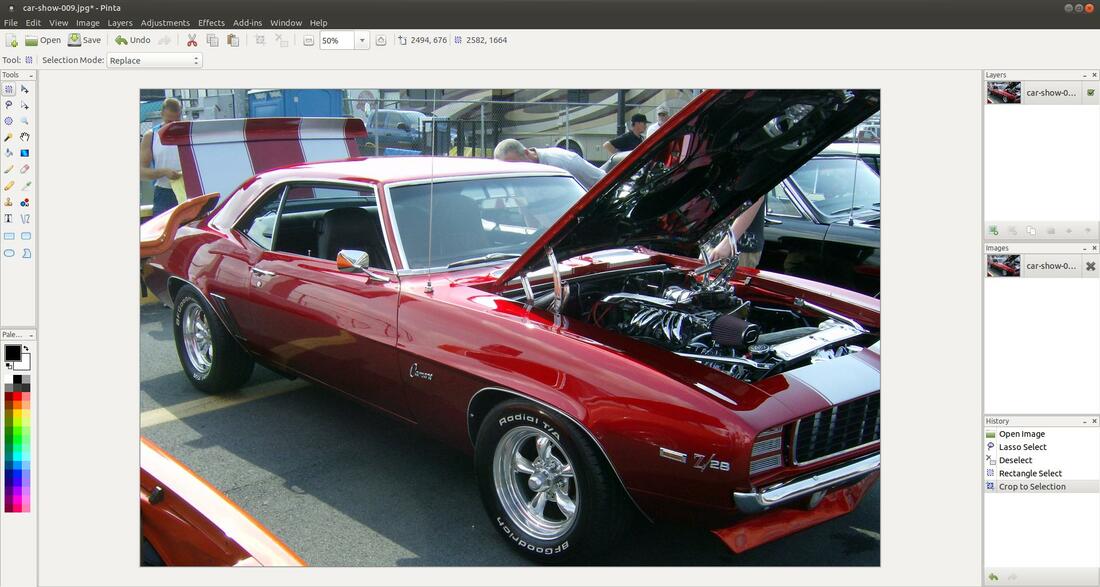
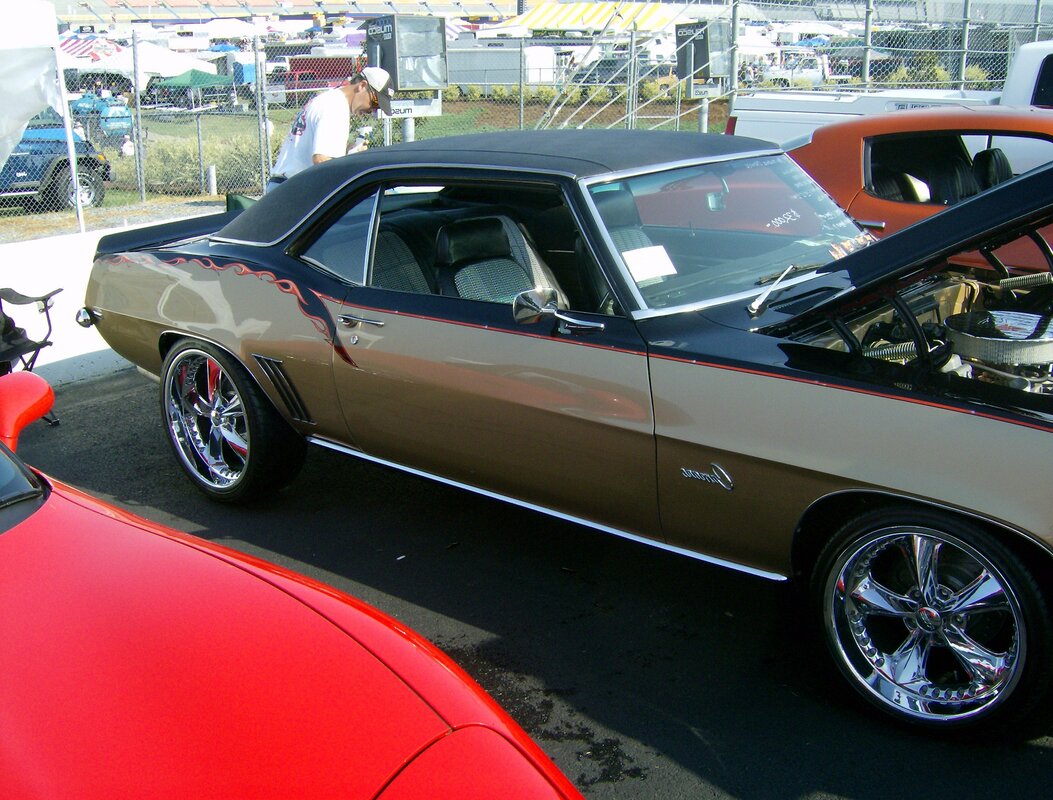
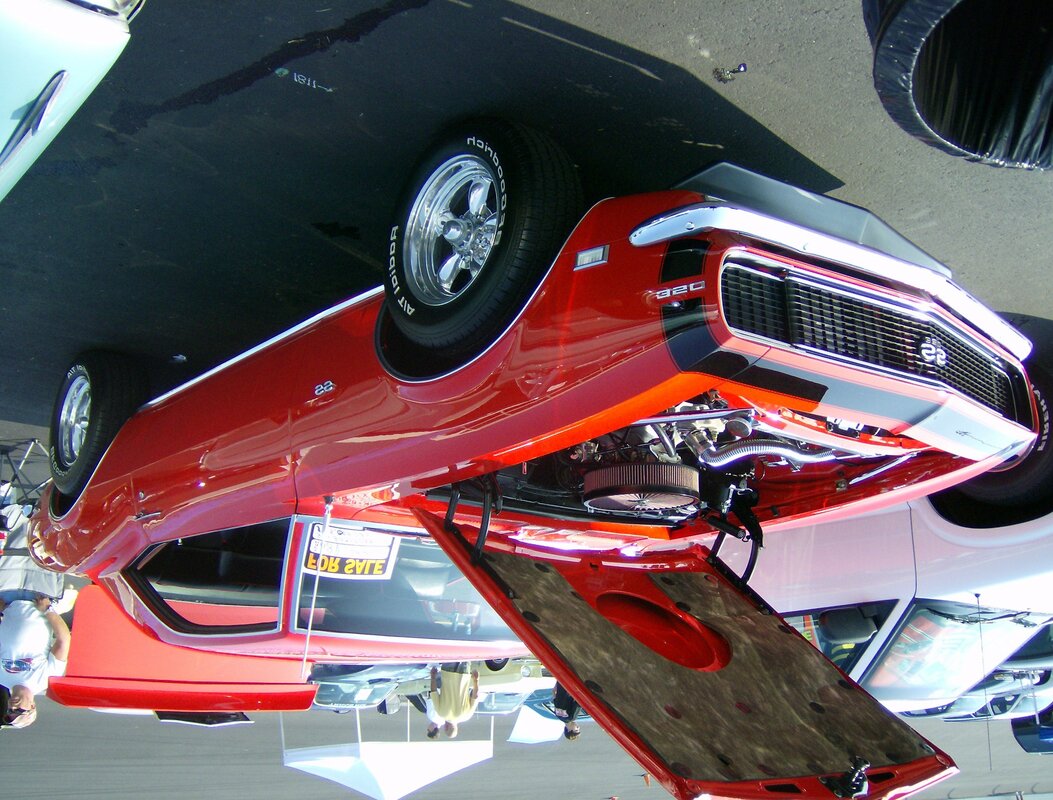
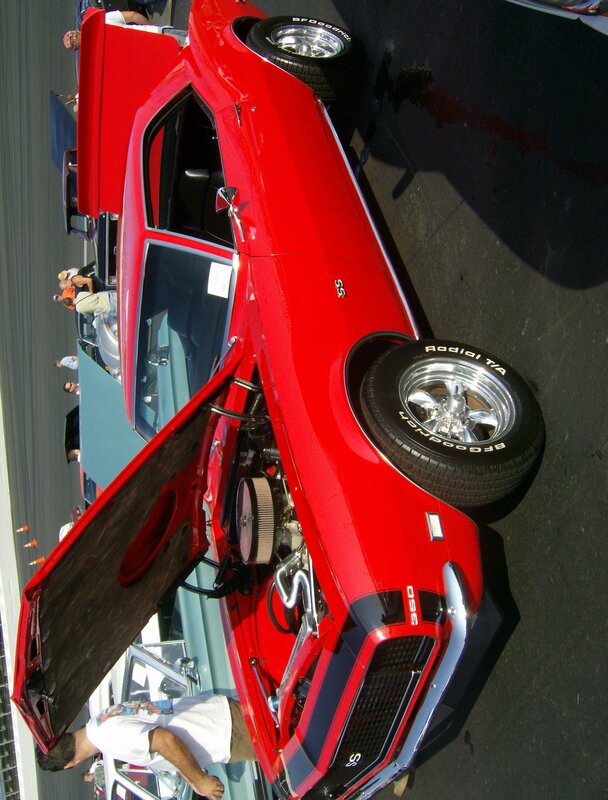
Then I clicked the Crop to Selection in the Image menu. You can see how it cropped or trimmed off parts of the original image.
Auto Crop
The Auto Crop feature will help remove that small area of white that usually occurs when you scan an image and the photo wasn't placed properly in the scanner. If you look around the edges of the picture below, you'll notice a small amount of space surrounding the photo.
The Auto Crop feature will help remove that small area of white that usually occurs when you scan an image and the photo wasn't placed properly in the scanner. If you look around the edges of the picture below, you'll notice a small amount of space surrounding the photo.
To fix this problem, open the photo in Pinta and click on the Image menu and Auto Crop. The Auto Crop feature will remove a layer of pixels around the edges of your photo, so you may have to use Auto Crop several times to completely remove all the white space around your photo. You can use the shortcut keys Ctrl+Alt+X to prevent from opening the Image menu and clicking on Auto Crop multiple times. Each time you press the shortcut keys Ctrl+Alt+X you'll notice the white area getting smaller. Continue pressing these shortcut keys untill all the empty or white space is gone.

As you can see in the image above, the white space around the edges of the photo is completely gone. Now you can preserve those special memories and backup your treasured photographs without having space around them. You can also print your little monsters and share them with family and friends.
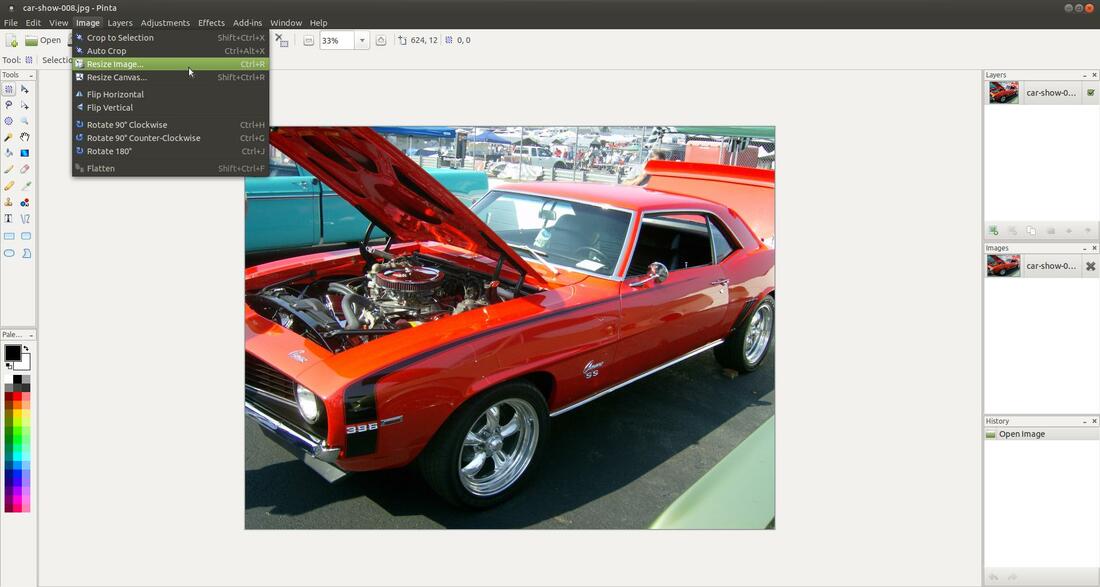
Resize Image...
To resize the your image in Pinta will increase or decrease the actual image. This feature will bring up a dialog box so that you can make multiple changes.
Example: Click on the Image menu and then click on Resize Image...
To resize the your image in Pinta will increase or decrease the actual image. This feature will bring up a dialog box so that you can make multiple changes.
Example: Click on the Image menu and then click on Resize Image...
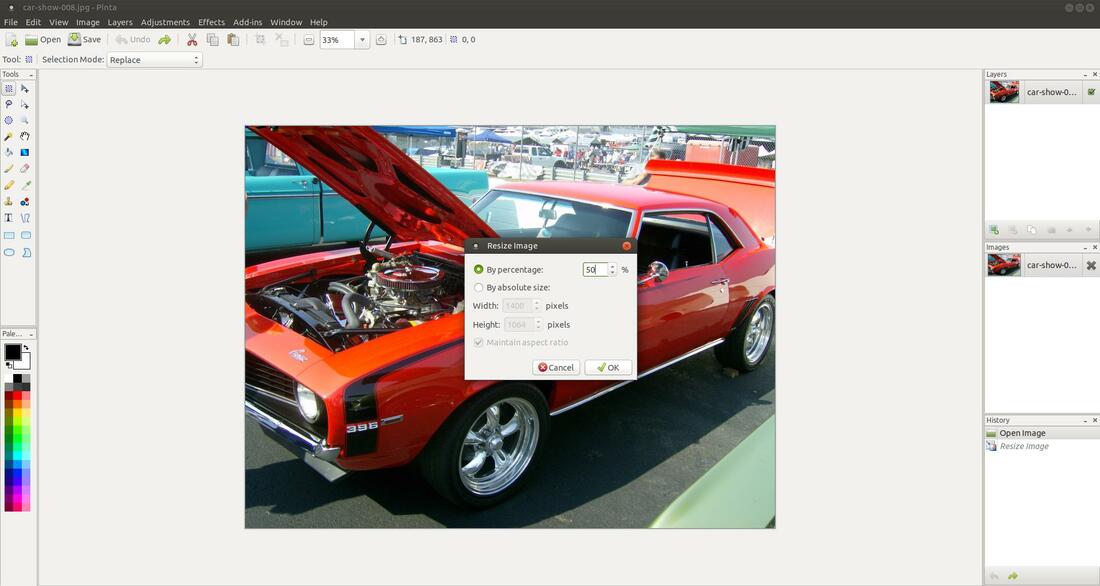
Resize Image dialog box will appear to allow you to change the size of your image. You can change the size of your image by percentage or by absolute (change the width and/or height). I decreased my image size to 50% of its original size by entering 50 in the By percentage box and clicking the OK button.
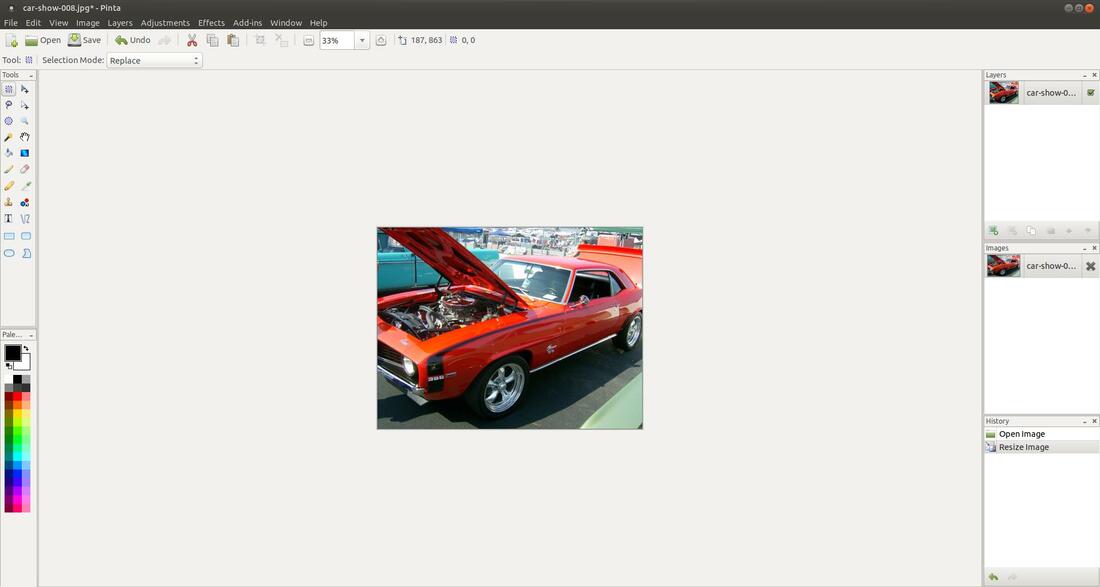
You will notice that your image is now 50% of its original size.
Resize Canvas...
To resize the your canvas in Pinta, is to change the current size of the document your working on, but not the image itself. This feature will bring up a dialog box so that you can make multiple changes.
You can resize your canvas and your image will stay the same size. However, if you make the canvas smaller than the image it will appear the your image was cropped. When you resize your canvas you are simply making your canvas bigger or smaller, allowing for more or less room.
Example: Click on the Image menu and then click on Resize Canvas...

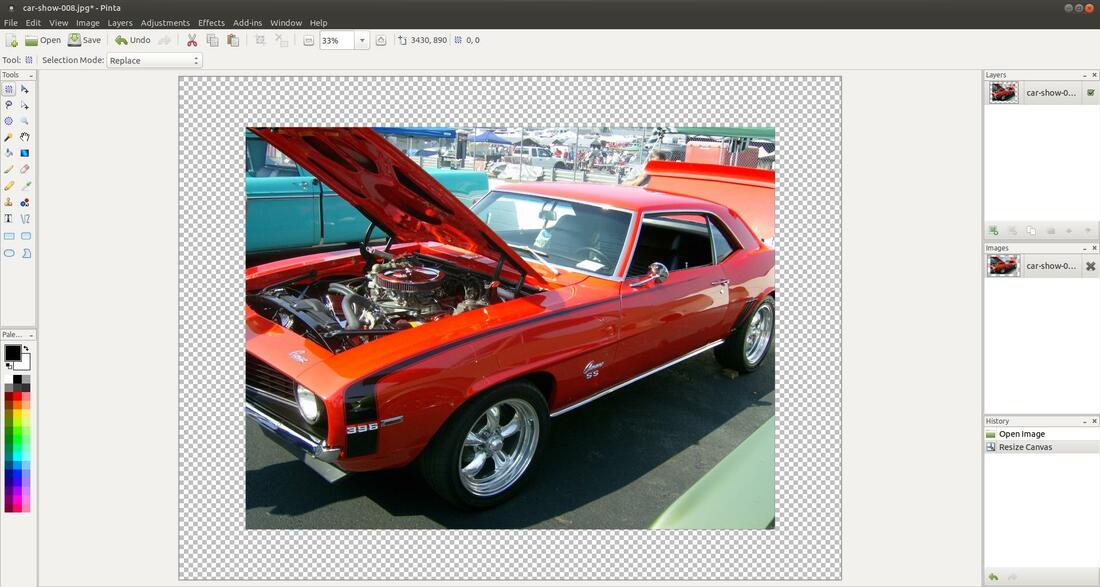
You can increase or decrease the image Canvas size by chaning the number in the By percentage box. A number less than 100 will decrease the Canvas size and a number great than 100 will increase the Canvas size. I changed the Canvas to 125% and then clicked the OK button.
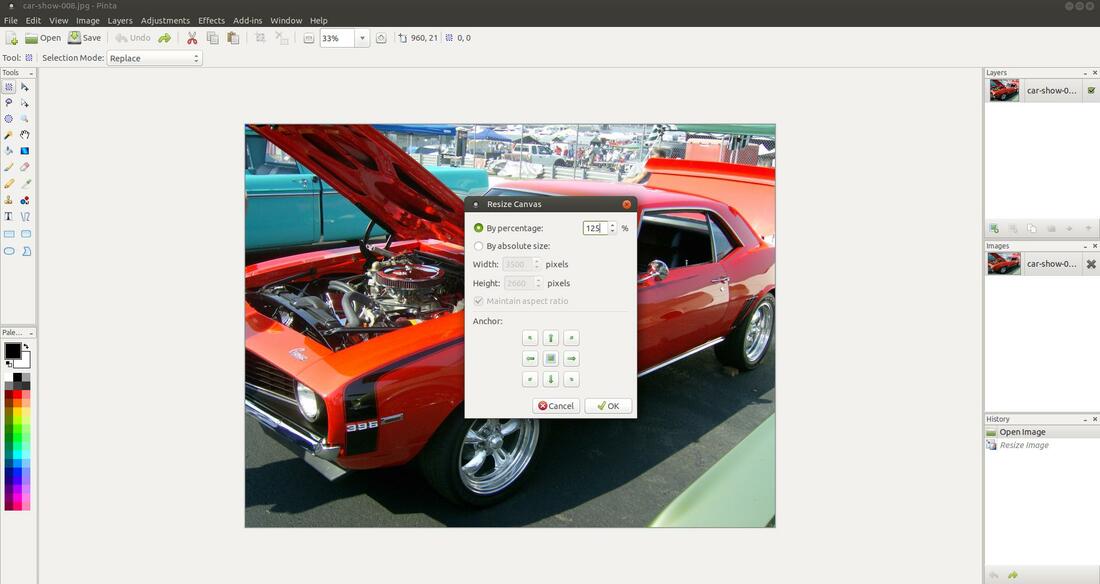
The default setting of Resize Canvas will add space around all four sides of the current document. (The gray and white lattice pattern indicates the area is transparent. A background image, if one is present, will display in this area.)
For more information on Resize Image & Resize Canvas click Here.
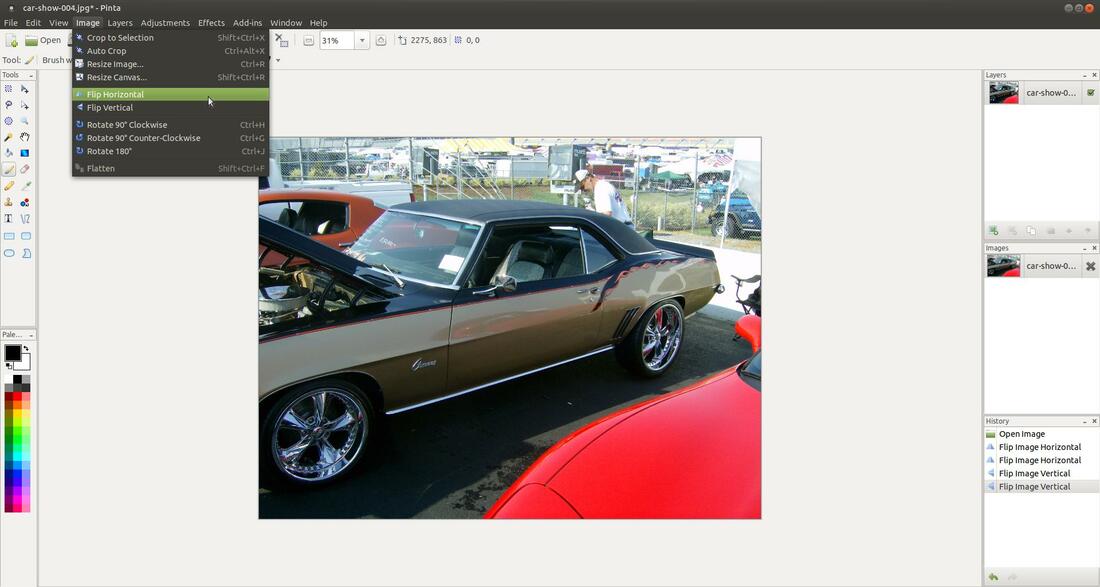
Flip Horizontal
The Flip Horizontal feature reverses the image horizontally, that is, from left to right.
Click on the Image menu and then on Flip Horizontal.
The Flip Horizontal feature reverses the image horizontally, that is, from left to right.
Click on the Image menu and then on Flip Horizontal.
You will imediately notice a change in your photo.
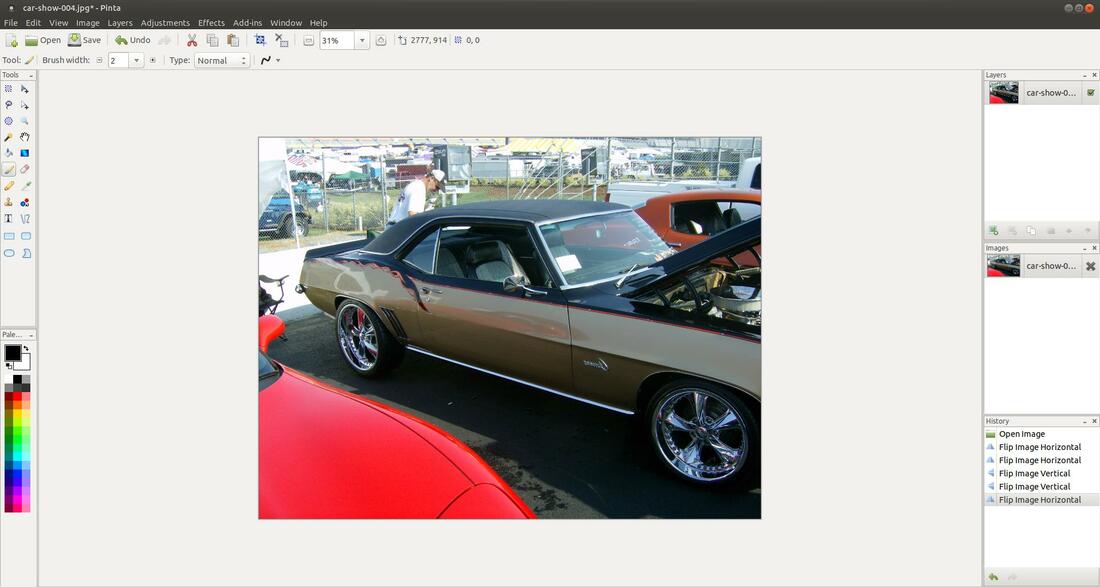
Before Flip Horizontal
|
After Flip Horizontal
|
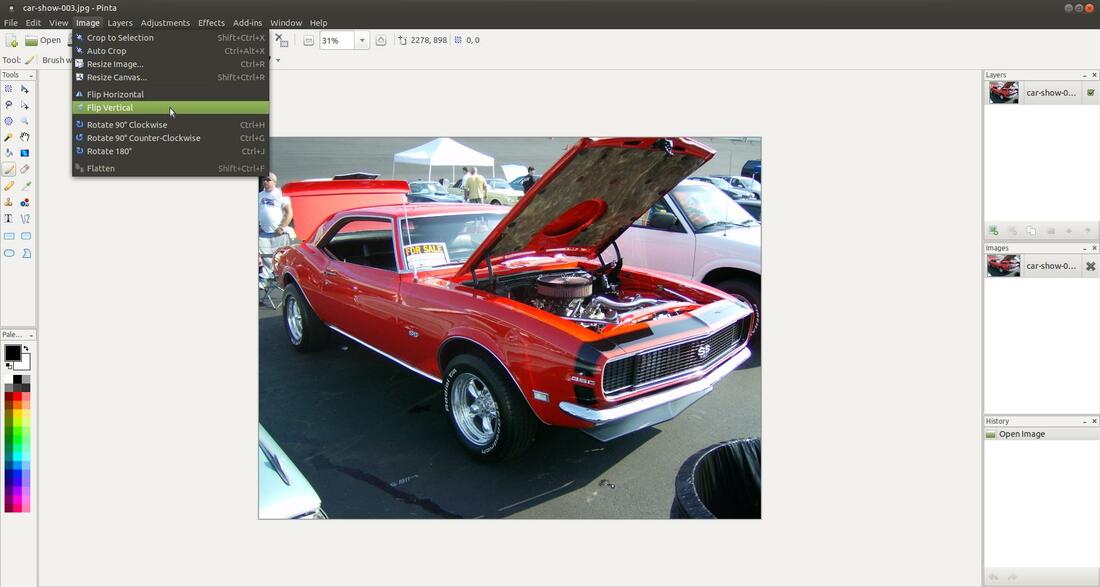
Flip Vertical
The Flip Vertical feature reverses the image from top to bottom.
Click on the Image menu and then on Flip Vertical.
The Flip Vertical feature reverses the image from top to bottom.
Click on the Image menu and then on Flip Vertical.
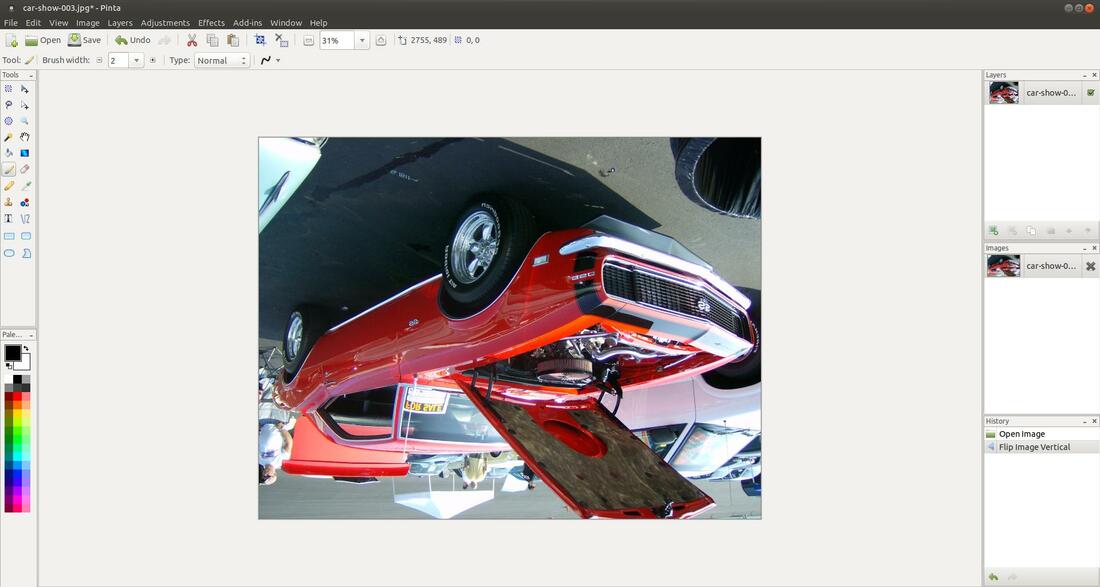
You will imediately notice your photo upside down.
Before Flip Vertical
|
After Flip Vertical
|
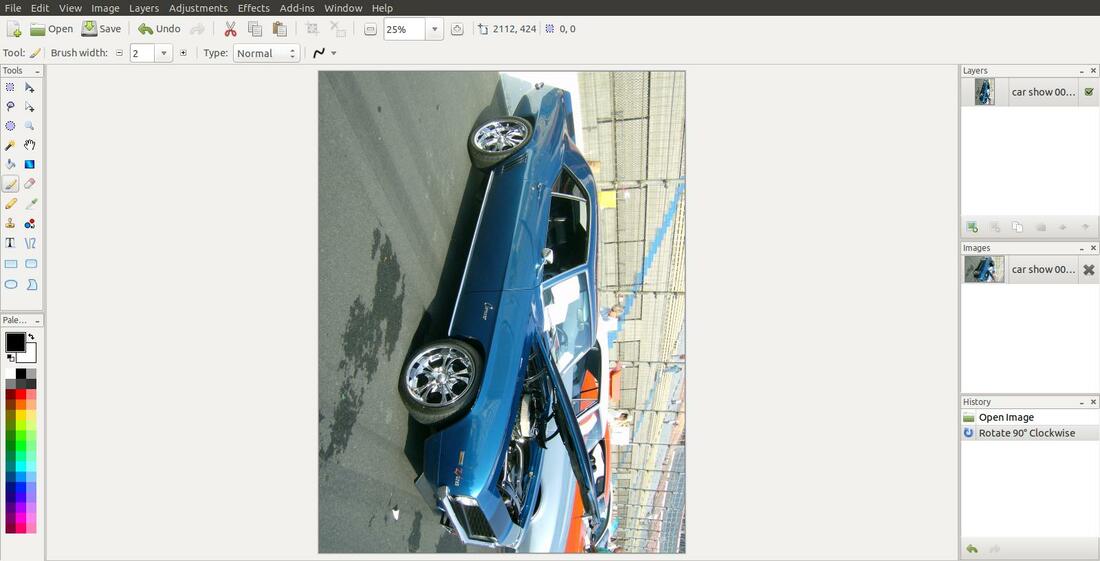
Rotate 90° Clockwise
The Rotate 90° Clockwise feature rotates the active layer by 90° around the center of the layer.
Click on the Image menu and then on Rotate 90° Clockwise.
The Rotate 90° Clockwise feature rotates the active layer by 90° around the center of the layer.
Click on the Image menu and then on Rotate 90° Clockwise.
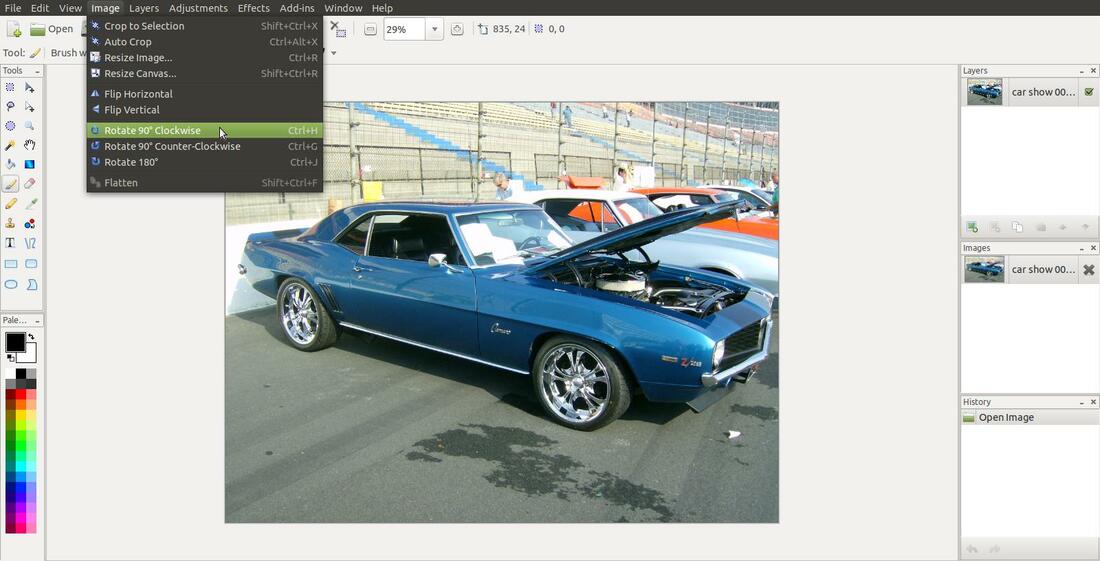
You will imediately notice your photo rotated 90° Clockwise.
Before Rotate 90° Clockwise
|
After Rotate 90° Clockwise
|
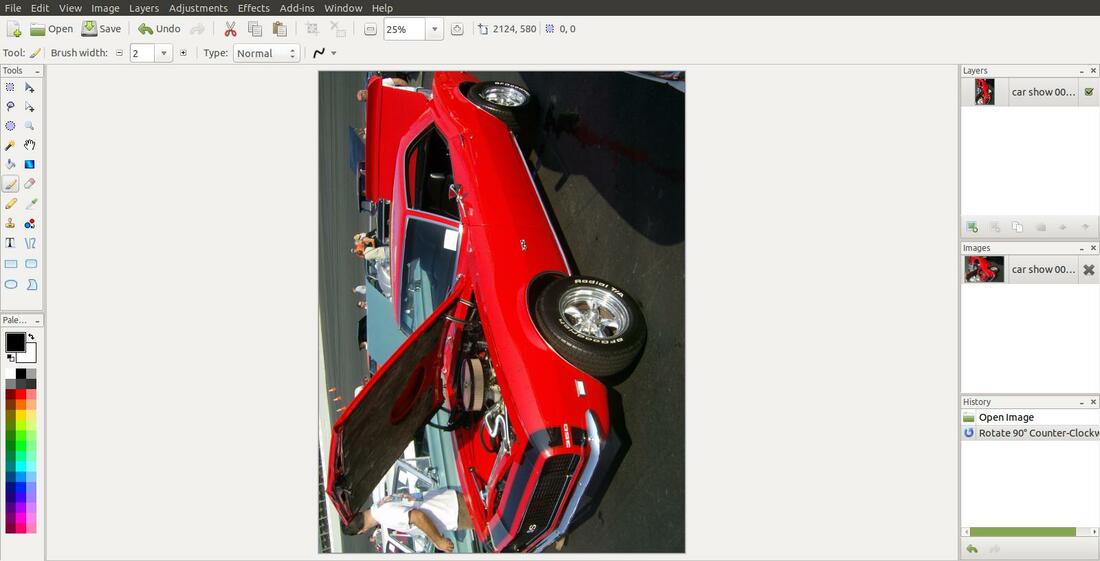
Rotate 90° Counter-Clockwise
The Rotate 90° Counter-Clockwise feature rotates the active layer by 90° counter-clockwise around the center of the layer.
Click on the Image menu and then on Rotate 90° Counter-Clockwise.
The Rotate 90° Counter-Clockwise feature rotates the active layer by 90° counter-clockwise around the center of the layer.
Click on the Image menu and then on Rotate 90° Counter-Clockwise.
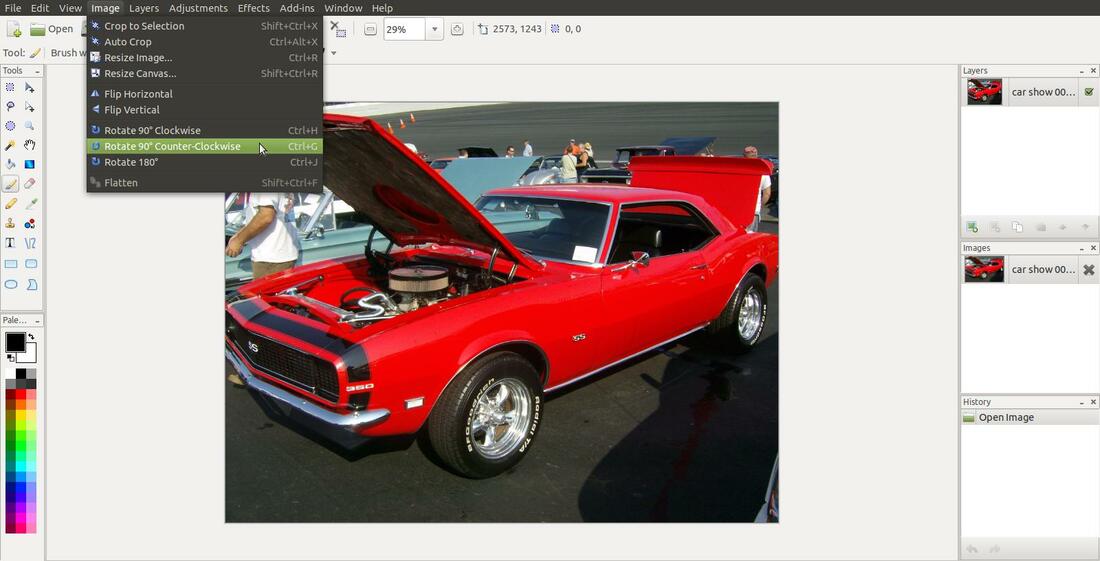
You will imediately notice your photo rotated 90° Counter-Clockwise.
Before Rotate 90° Counter-Clockwise
|
After Rotate 90° Counter-Clockwise
|
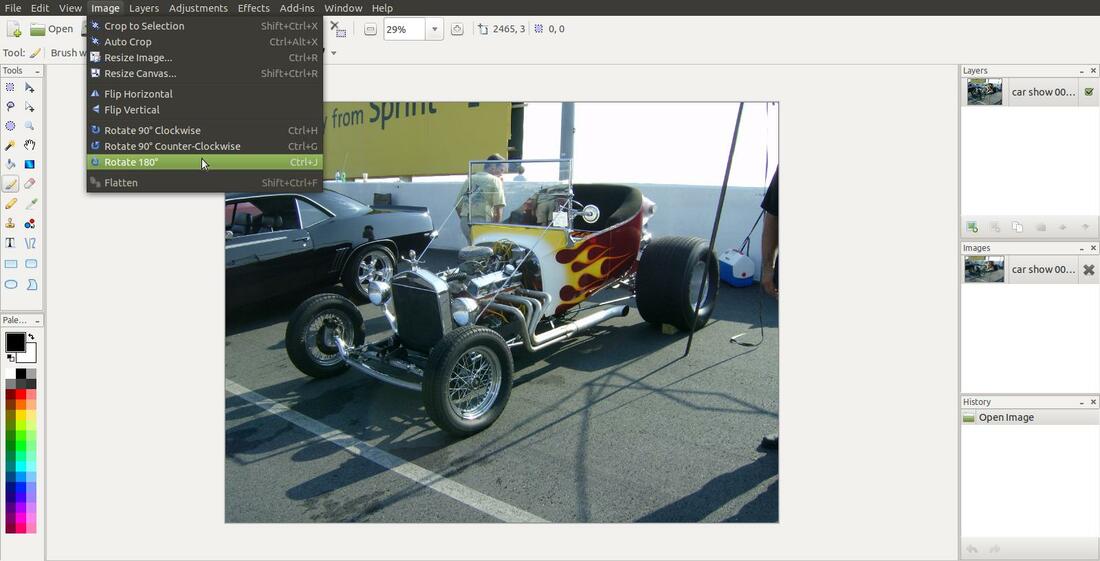
Rotate 180°
The Rotate 180° feature rotates the active layer by 180° around the center of the layer.
Click on the Image menu and then on Rotate 180°.
The Rotate 180° feature rotates the active layer by 180° around the center of the layer.
Click on the Image menu and then on Rotate 180°.
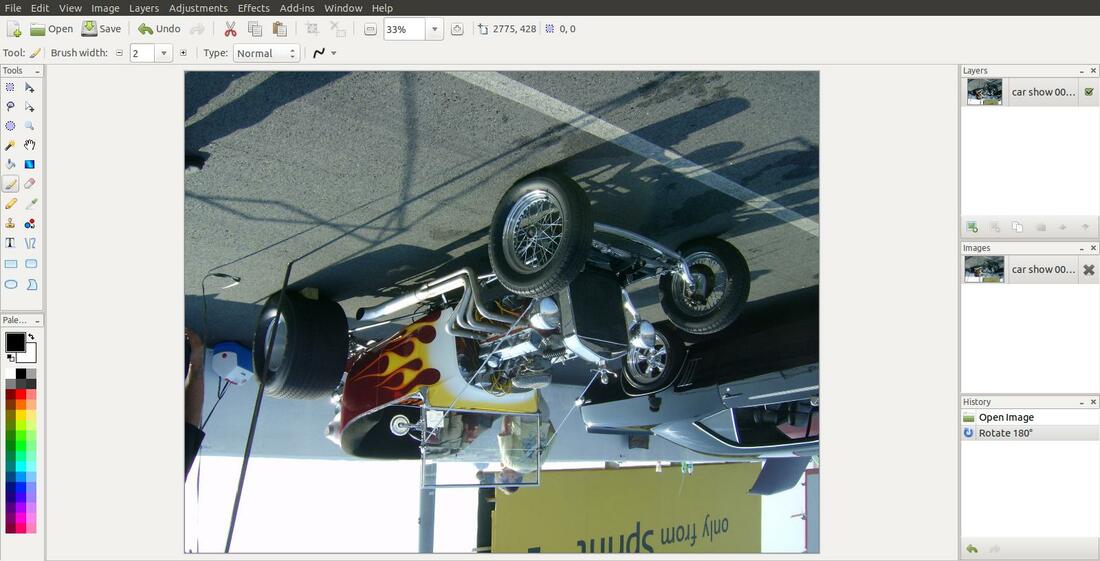
You will imediately notice your photo rotated 180° which will make it look upside down.
Before Rotate 180°
|
After Rotate 180°
|
Flatten
The Flatten feature will merge all your layers together to create one image or one layer. The Flatten feature works similar to the Merge Layer Down feature in the in the Layers menu. (Merge Layer Down - Clicking this button takes the active layer and combines it with the layer immediately below it.)
Here are the three images that I will load into my Layers Window.
window image
|
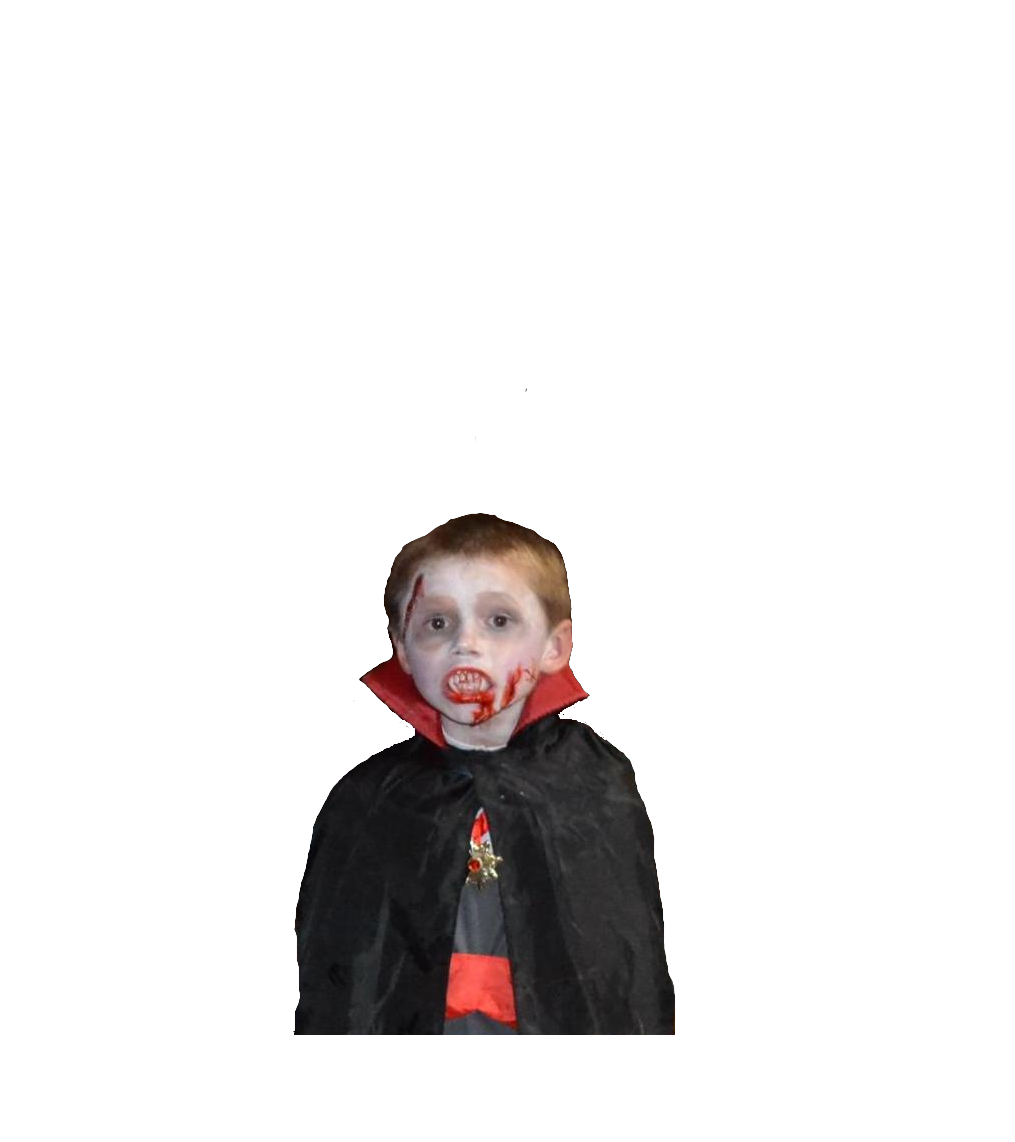
nephew's son
|
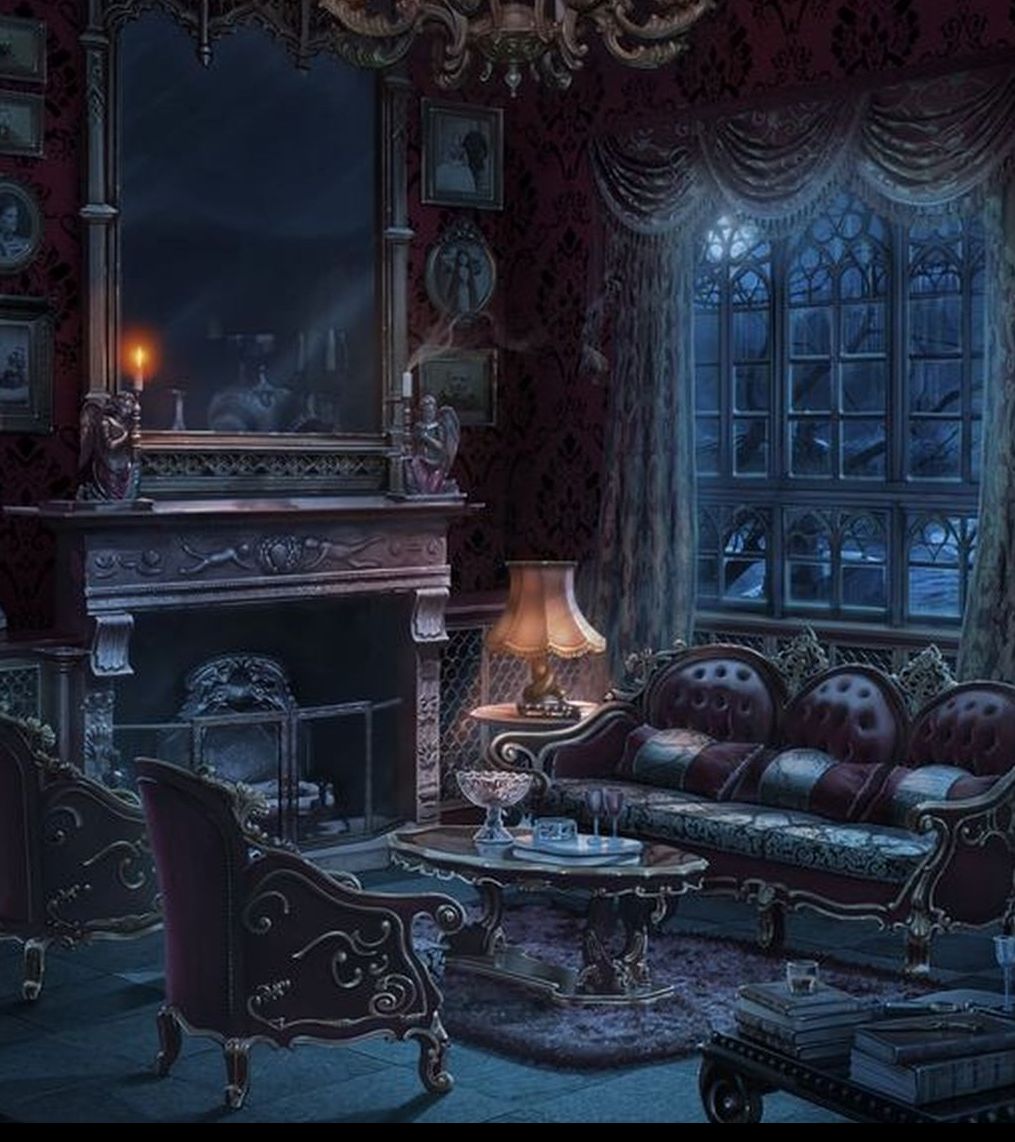
dark living room
|
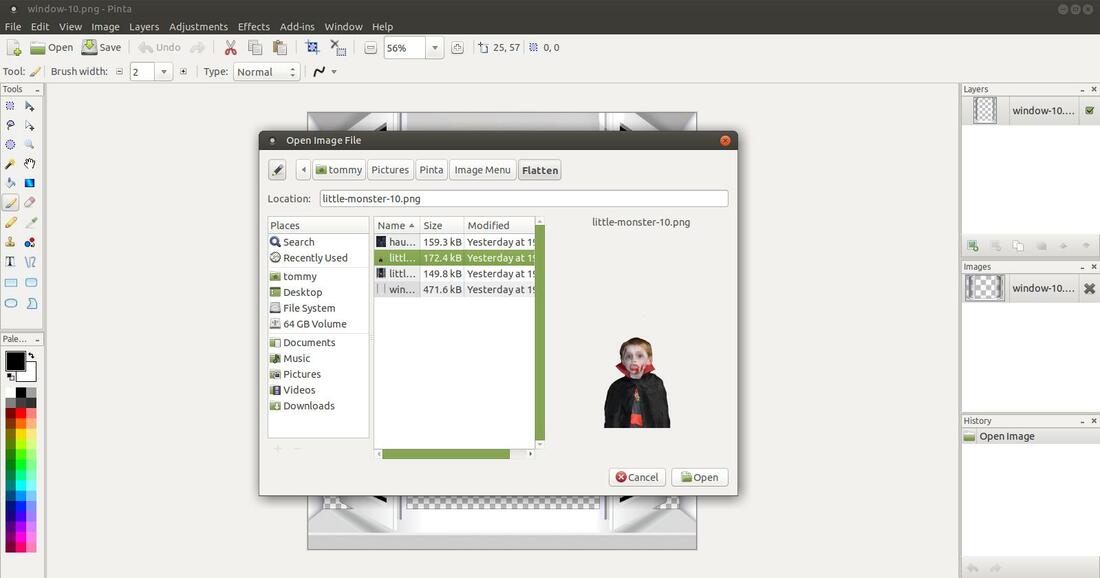
I first opened the window image first then I clicked on the Layers menu and then on Import From File...

Then I located a picture of my nephew's son and loaded it in the Layers Window by clicking on the Open button.
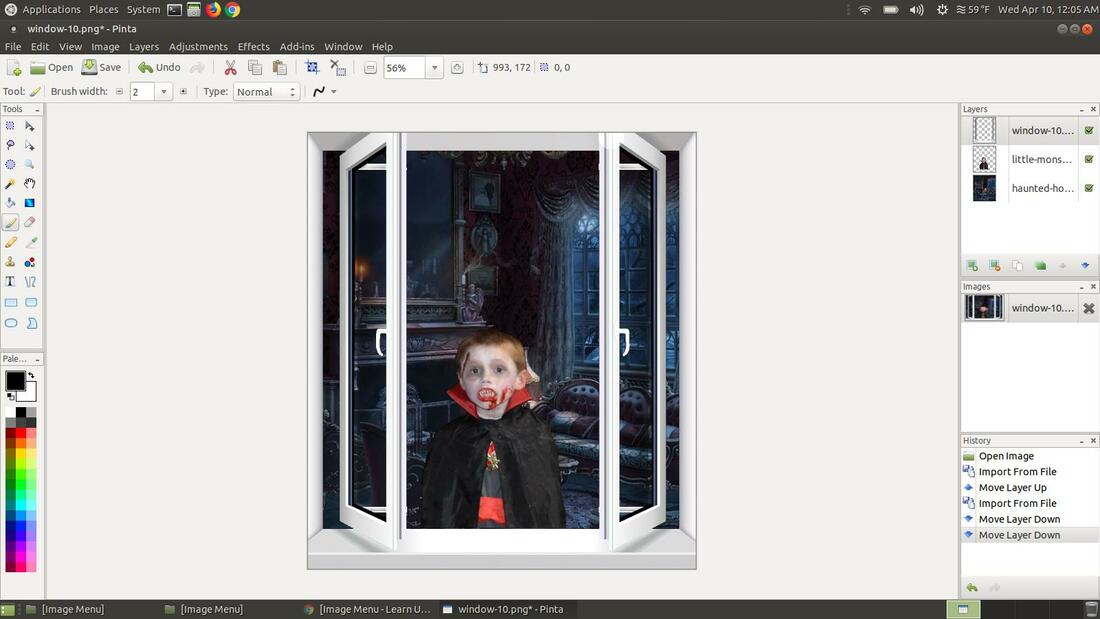
Then I did the same steps to load the dark living room image in the Layers Window. I used the Move Layer Up and Down buttons until I had the window image, nephew's son, and dark living room organize in that order in the in the Layers Window.
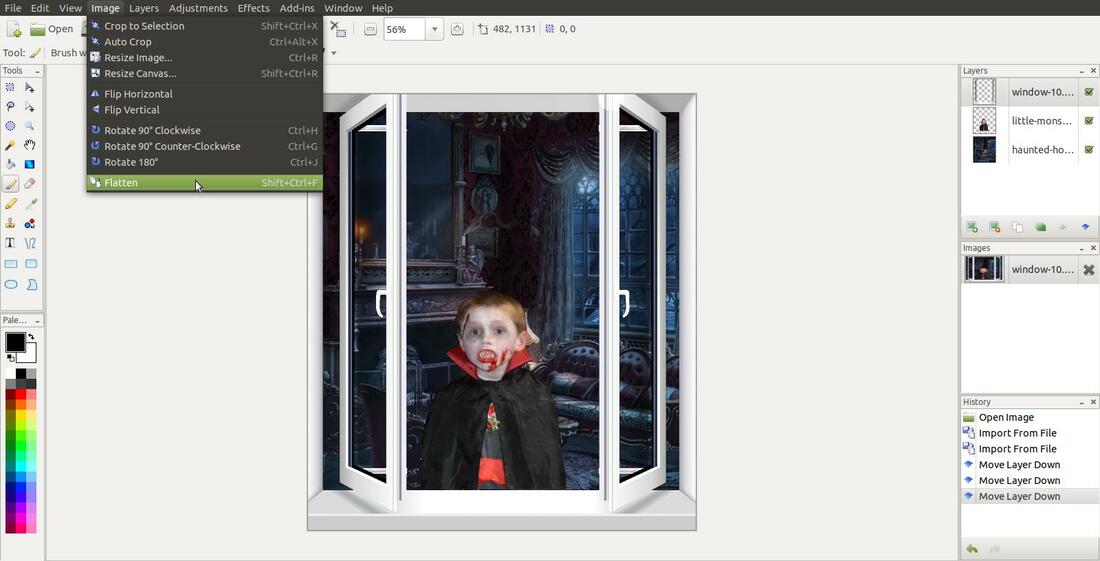
Then I clicked on the Image menu and then on the Flatten feature.
It immediately merged the three images into one in the Layers Window.
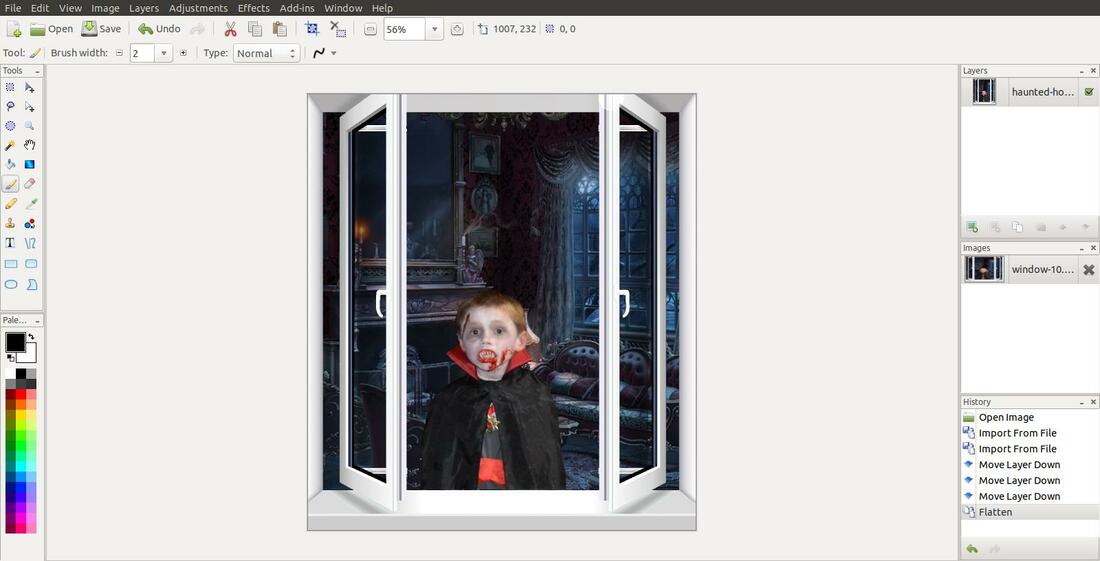
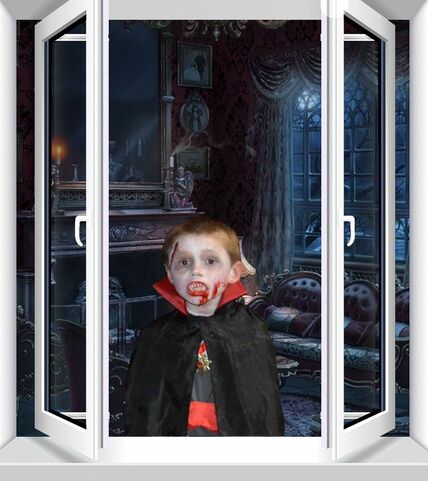
Here's the result of Flattening the three images together.
I hope this helped you understand the features or commands that make up the Image menu.
Take care!
Take care!
Apr 10, 2019
