How-To Fix Screen Blanking
Recently, my computers received an update and it changed the way they behaved. I noticed that if I left my computer unattended for around 10 minutes or so, the screen would go blank. I thought it had to do with something I recently installed or something that I had changed on my computer, but then I noticed it was happening to both of my laptops. It didn't affect my desktop computer; however, this problem may affect other desktop systems.
I searched online for a solution that worked for me and my problem. I also found additional solutions that work for others that had a similar problem.
I searched online for a solution that worked for me and my problem. I also found additional solutions that work for others that had a similar problem.

Not My Actual Laptop
Steps for Fixing Screen Blanking
1. Open your Control Center.
1. Open your Control Center.
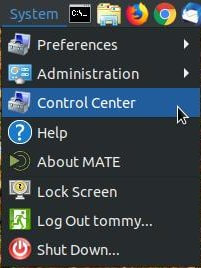
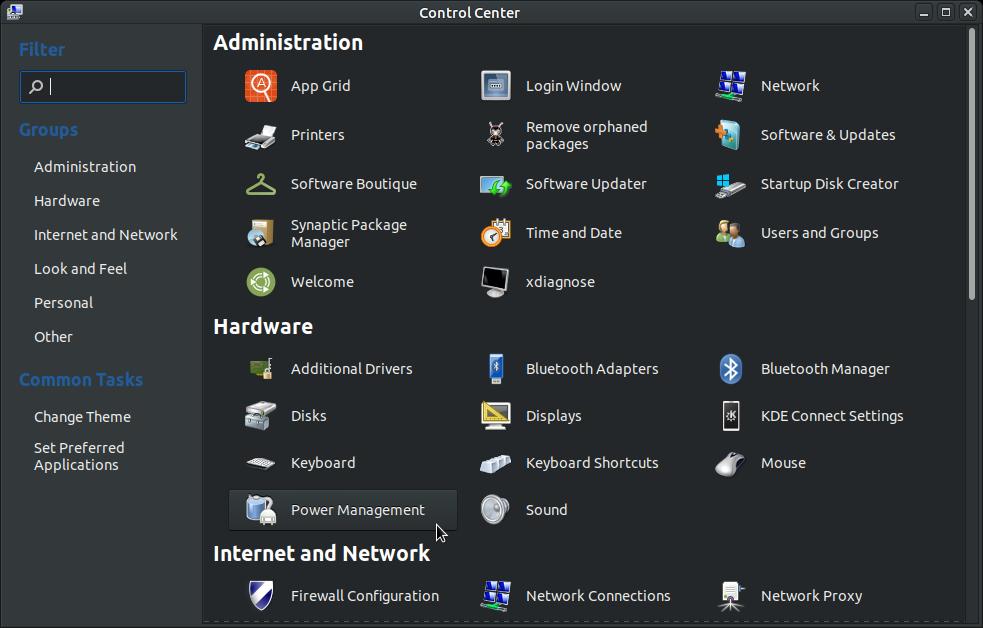
2. When the Control Center opens, scroll down to the Hardware section and click on Power Management.
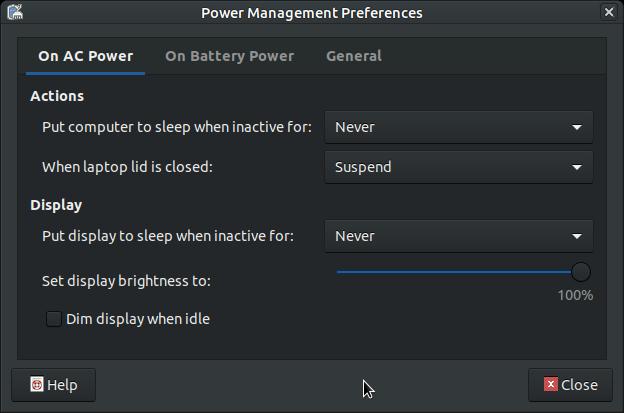
3. Make sure that you have On AC Power tab selected at the top. Under the Actions section, set the option Put computer
to sleep when inactive for: to Never. Under the Display section, set the option Put display to sleep when inactive
for: to Never and uncheck the option Dim display when idle. Then click the close button.
to sleep when inactive for: to Never. Under the Display section, set the option Put display to sleep when inactive
for: to Never and uncheck the option Dim display when idle. Then click the close button.
This might fix your dimming or blanking problem if any of the options above were changed. I recommend that you reboot
your computer and then leave your computer unattended for around 10 to 15 minutes to see if the blanking returns. If it
does, go to the next step.
your computer and then leave your computer unattended for around 10 to 15 minutes to see if the blanking returns. If it
does, go to the next step.
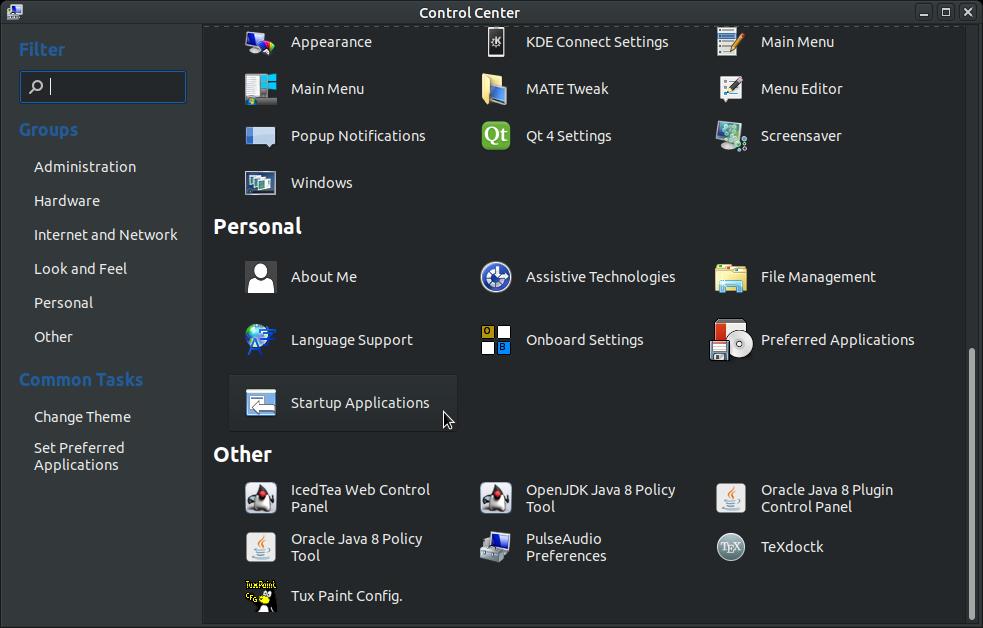
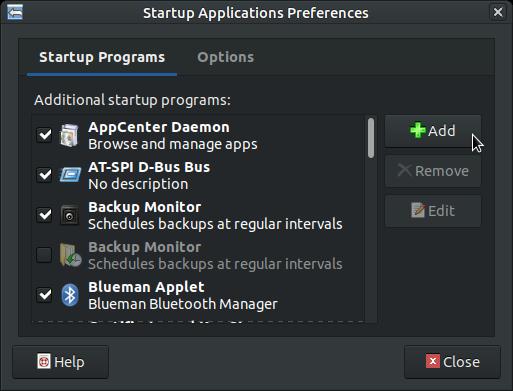
4. Open the Control Center and scroll down to the Personal section and click on Startup Applications.
5. When the Startup Applications Preferences dialog box appears, click on the +Add button.
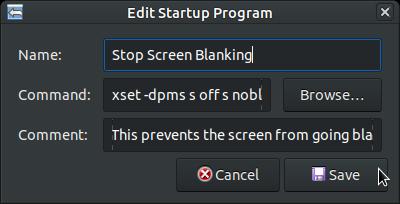
6. When the Edit Startup Program dialog box appears, enter the following information. (You can copy & paste.)
Name: Stop Screen Blanking
Command: xset -dpms s off s noblank s 0 0 s noexpose
Comment: This prevents the screen from going blank.
Then click the Save button and then reboot your computer.
Name: Stop Screen Blanking
Command: xset -dpms s off s noblank s 0 0 s noexpose
Comment: This prevents the screen from going blank.
Then click the Save button and then reboot your computer.
When your system returns from the reboot, leave it unattended for around 10 to 15 minutes to see if the blanking returns. If it does, go to the next step.
*** I am using the nano text editor in my solution below. If you do not have nano installed and you would like to install it,
then open your
Terminal and enter the following (then press Enter or Return):
sudo apt-get install nano
You can replace nano with your favorite text editor, if you prefer.
*** I am using the nano text editor in my solution below. If you do not have nano installed and you would like to install it,
then open your
Terminal and enter the following (then press Enter or Return):
sudo apt-get install nano
You can replace nano with your favorite text editor, if you prefer.
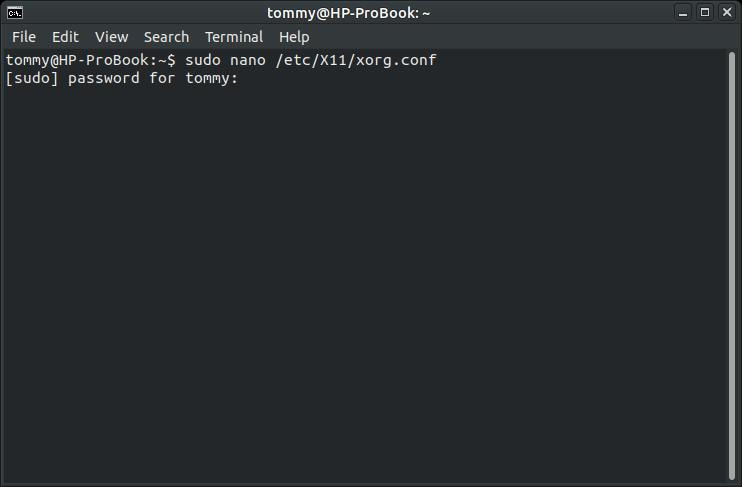
7. Open the Terminal and enter sudo nano /etc/X11/xorg.conf and then press the Enter or Return key. Enter your
password when prompted.
password when prompted.
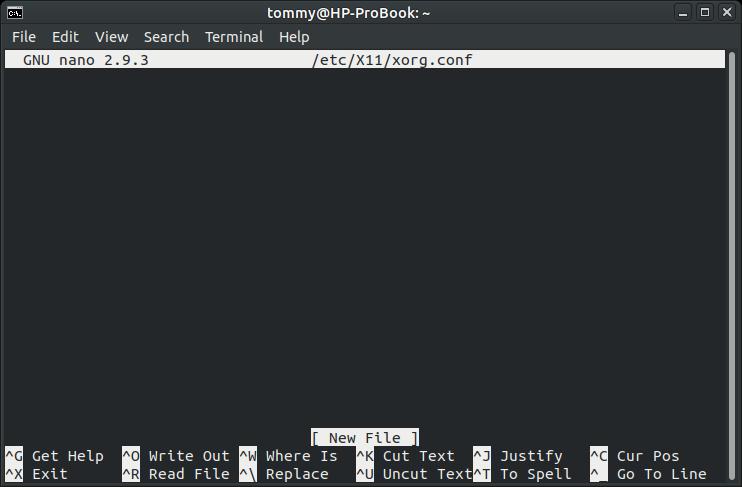
8. The nano editor will be displayed within your Terminal and it will display the file name that you will edit or create and
the location of that file.
the location of that file.
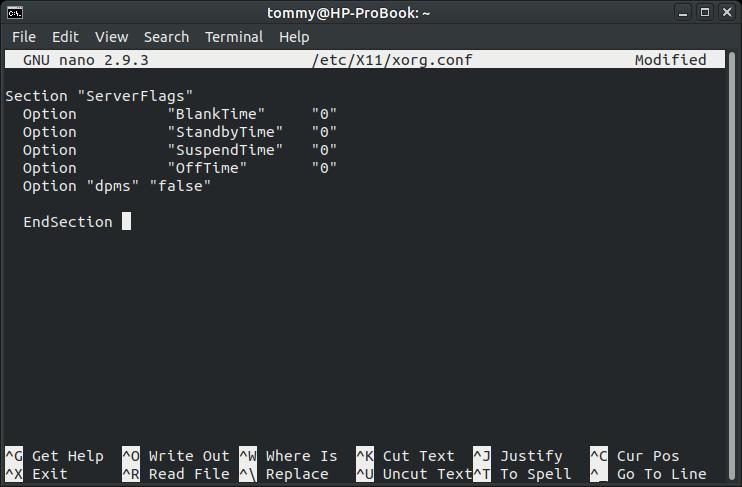
9. If your file has data within it, then you'll add the the following options at the end of your ServerLayout section in
/etc/X11/xorg.conf file.
Section "ServerFlags"
Option "BlankTime" "0"
Option "StandbyTime" "0"
Option "SuspendTime" "0"
Option "OffTime" "0"
Option "dpms" "false"
EndSection
/etc/X11/xorg.conf file.
Section "ServerFlags"
Option "BlankTime" "0"
Option "StandbyTime" "0"
Option "SuspendTime" "0"
Option "OffTime" "0"
Option "dpms" "false"
EndSection
DPMS is an abbreviation for Display Power Management Signaling. DPMS is a standard to reduce power consumption in monitors. DPMS has four modes of operation: "BlankTime", "StandbyTime", "SuspendTime" and "OffTime." Each of these affect the power use of your monitor. Using 0 (zero) disables that mode. So putting a 0 for each of these will turn off each of these features.
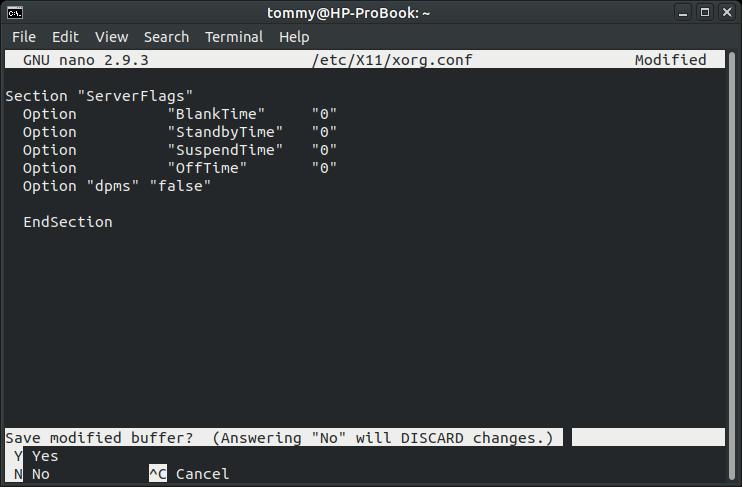
10. When you finish entering the data press the ctrl key and the x key. You will be prompted, at the bottom to save your
changes by pressing the y key.
changes by pressing the y key.
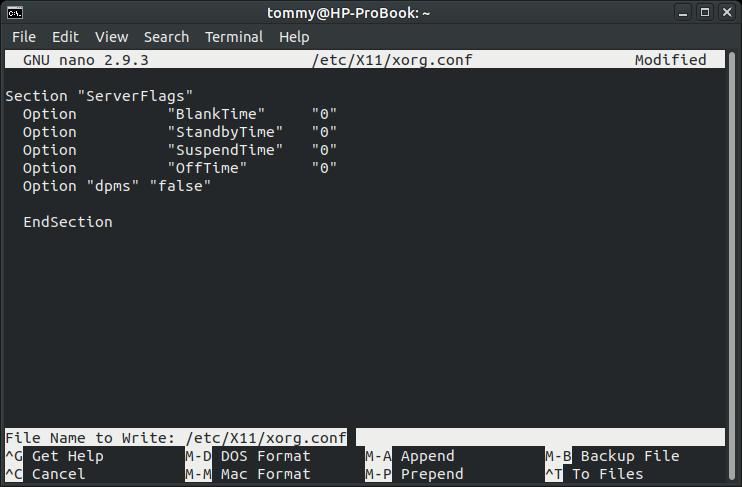
11. After you press the y key, to save the file name at the given location. Press the Enter or Return key to accept the
location and file name.
location and file name.
Close your Terminal and any other programs that maybe running and then reboot your computer. When your systems returns from the reboot, leave it unattended for around 10 to 15 mintues to see if the blanking returns. If it does, go to the next step.
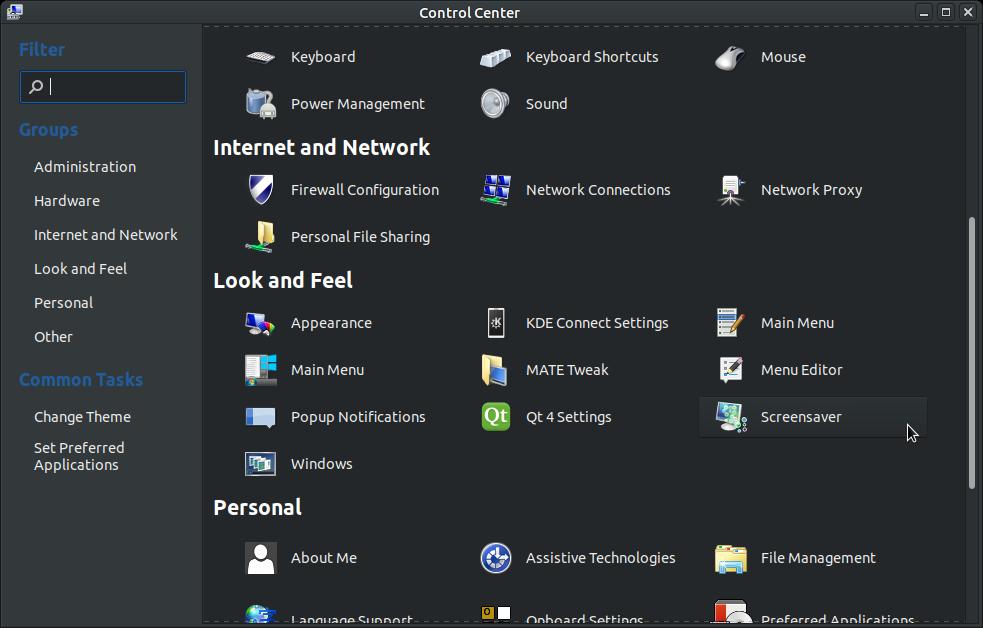
12. If you are still getting a blank or black screen after 10 to 15 minutes after no activity, then your screensaver could be
causing your problem. Open your Control Center and scroll down to the Look and Feel section and click on the
Screensaver option.
causing your problem. Open your Control Center and scroll down to the Look and Feel section and click on the
Screensaver option.
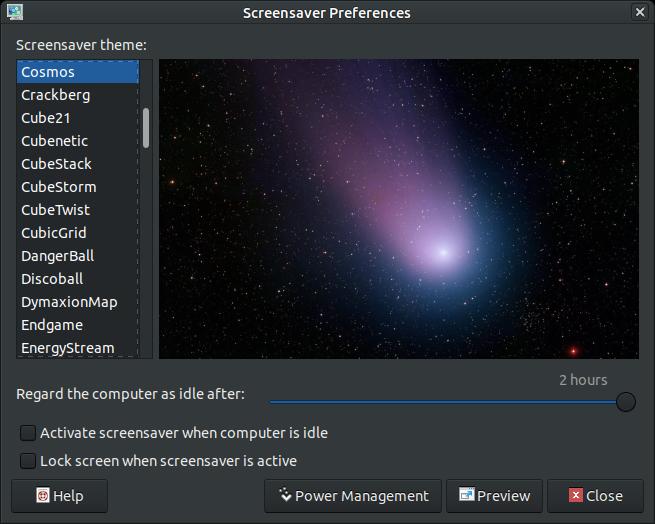
13. When the Screensaver Preferences dialog box appears, drag the slider to the end for a maximum time of 2 hours. Then
make sure they are no checks in the boxes in front of "Activate screensaver when computer is idle" and "Lock
screen when screensaver is active".
make sure they are no checks in the boxes in front of "Activate screensaver when computer is idle" and "Lock
screen when screensaver is active".
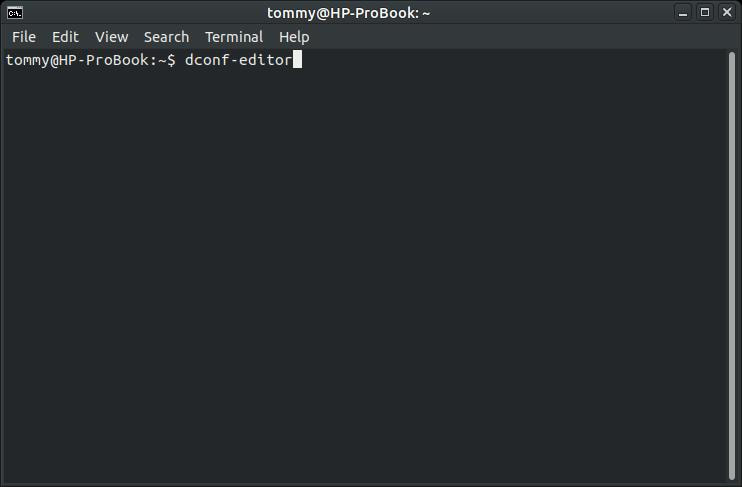
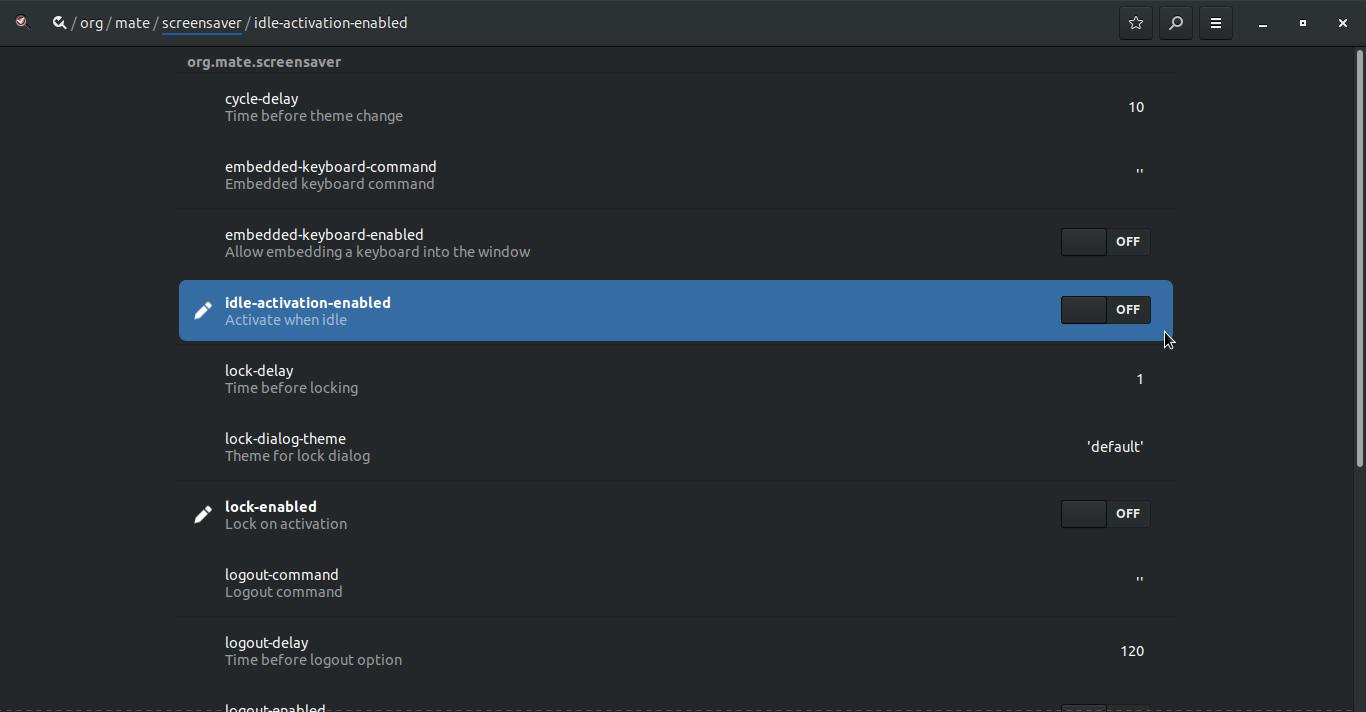
14. Next you'll want to make sure that idle-activation-enabled is turned off using the dconf-editor. The dconf-editor is
not installed by default, but you can install it by opening your Terminal and entering the following:
sudo add-apt-repository universe
sudo apt update
sudo apt install dconf-cli dconf-editor
Then enter the command dconf-editor and press the Enter or Return key.
not installed by default, but you can install it by opening your Terminal and entering the following:
sudo add-apt-repository universe
sudo apt update
sudo apt install dconf-cli dconf-editor
Then enter the command dconf-editor and press the Enter or Return key.
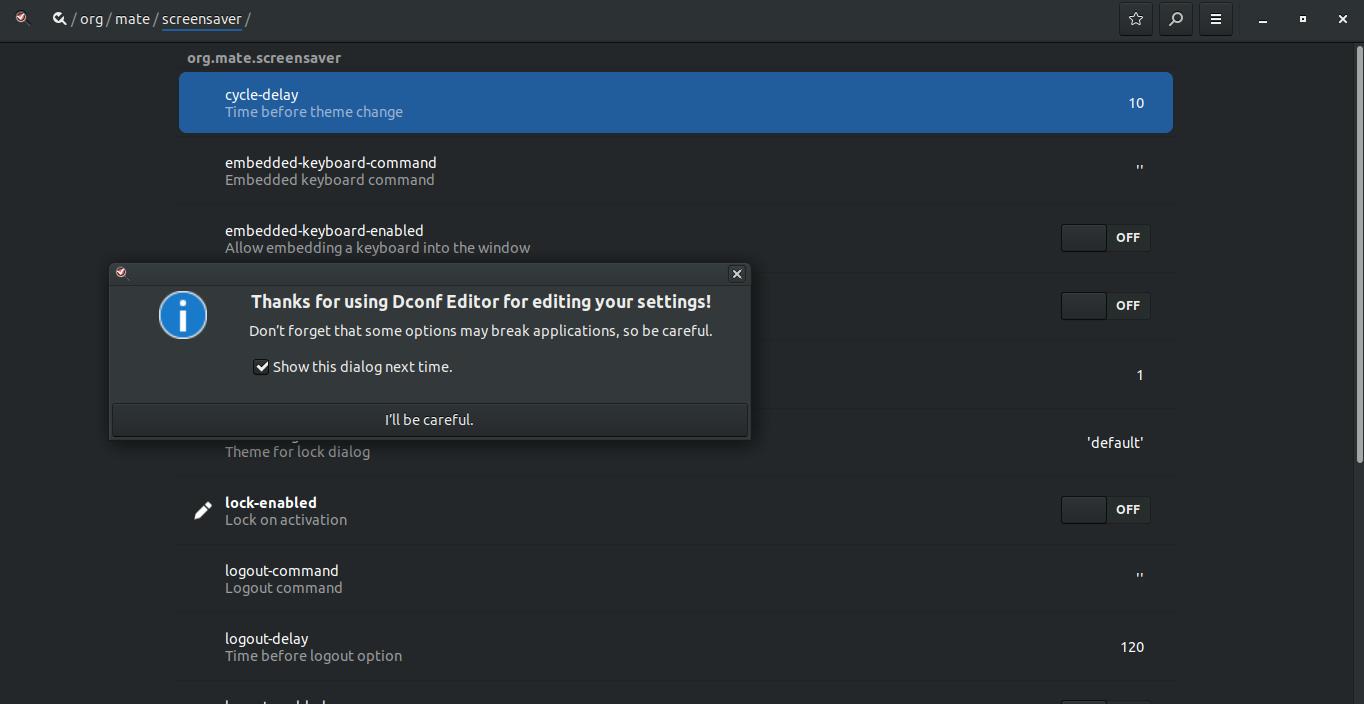
15. When the dconf-editor appears, click the "I'll be careful" button. This will close the small dialog box. Just be careful
making changes using the dconf-editor. You could mess up your computer if you change a wrong setting.
making changes using the dconf-editor. You could mess up your computer if you change a wrong setting.
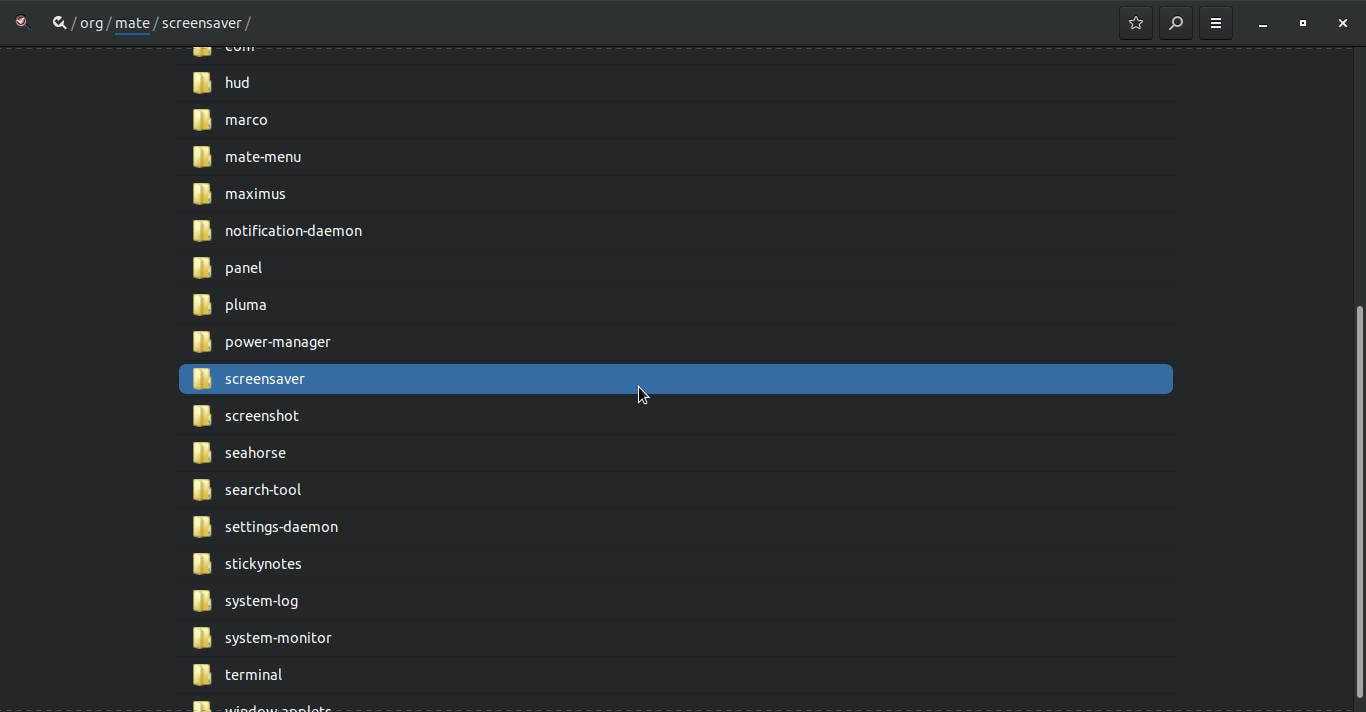
16. If you are not within the screensaver directory follow these steps:
Click on org in the upper left corner and then click on the mate folder.
Click on org in the upper left corner and then click on the mate folder.
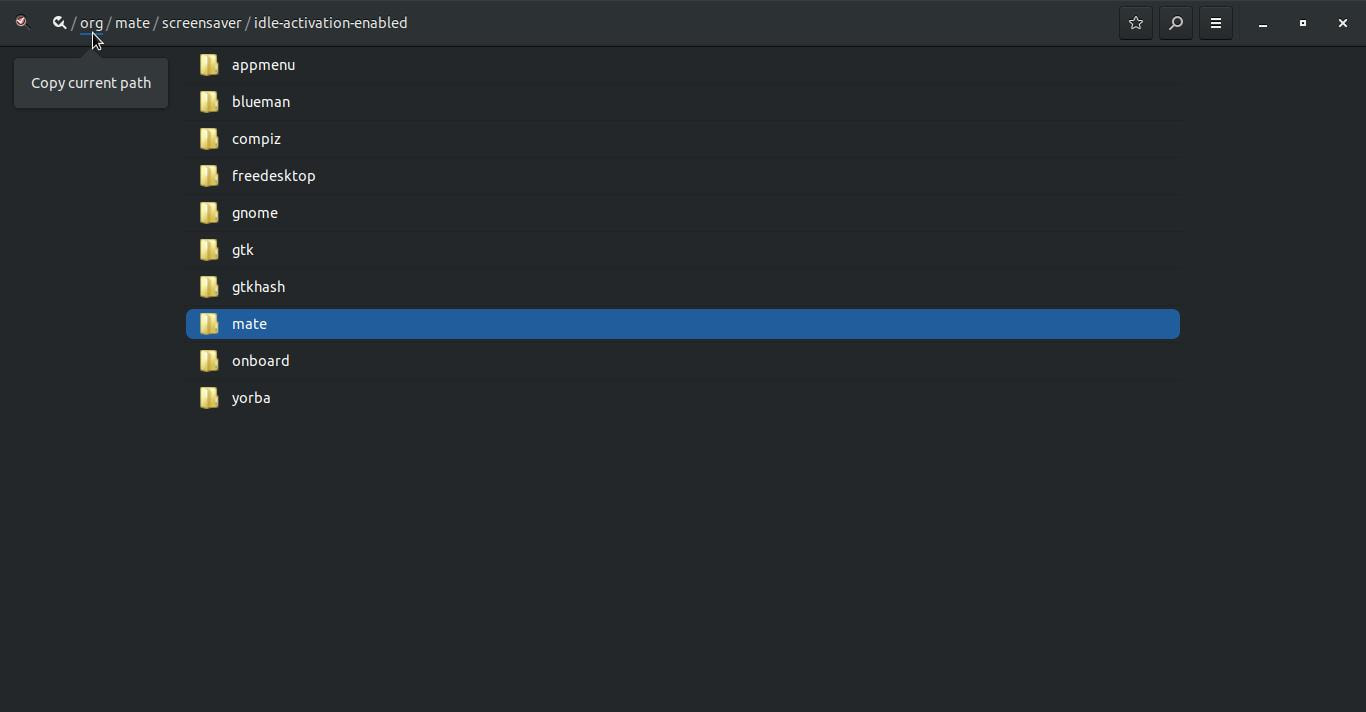
Then scroll down and click on the screensaver folder.
Then make sure that idle-activation-enabled is turned off. If it is not, click the switch to turn it off.
Then close the dconf-editor and Terminal and then restart your computer. When it turns back on, leave it unattended
for around 10 to 15 mintues to see if the blanking returns. Hopefully it won't.
Hopefully you have found a working solution to eliminate the screen blanking on your computer.
Take care!
for around 10 to 15 mintues to see if the blanking returns. Hopefully it won't.
Hopefully you have found a working solution to eliminate the screen blanking on your computer.
Take care!