
Pinta: Effects Menu
The Effects menu contain commands which apply special effects to a selection within an image or to an entire active layer. These commands are found within one of seven sub-menus. The default seven sub-menus that make up the Effects menu are: Artistic, Blurs, Distort, Noise, Photo, Render, and Stylize.
The effects in Pinta are similar to filters used in GIMP; however, there's not as many effects in Pinta compared to the number of filters used in GIMP. You can download and install more effects into Pinta which will sometimes add to the number of sub-menus. In this section, I will cover only the default effects.
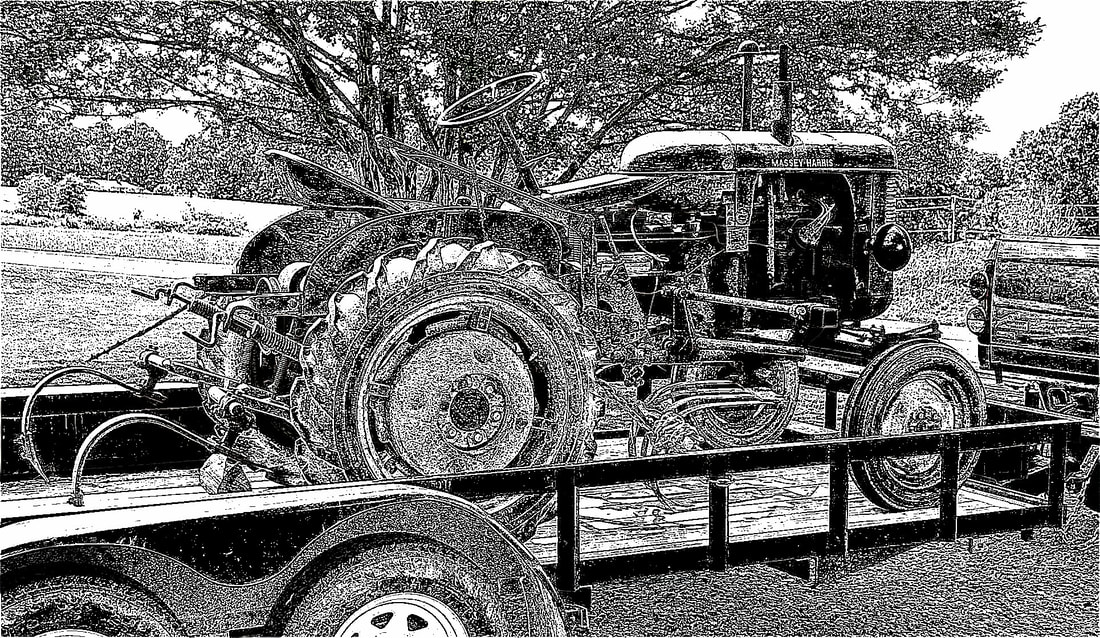
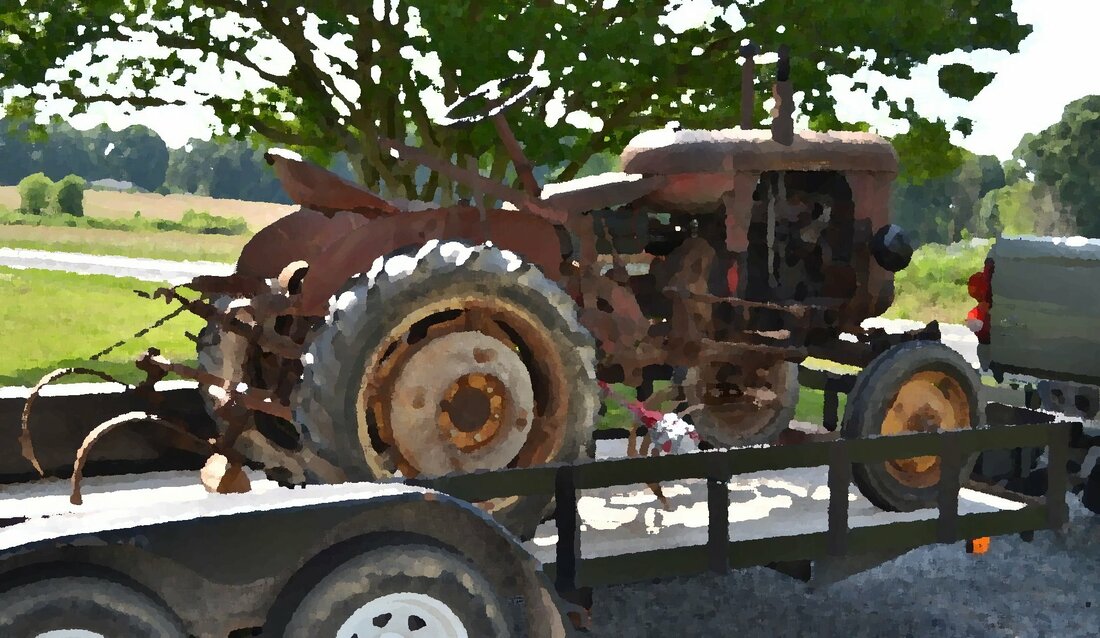
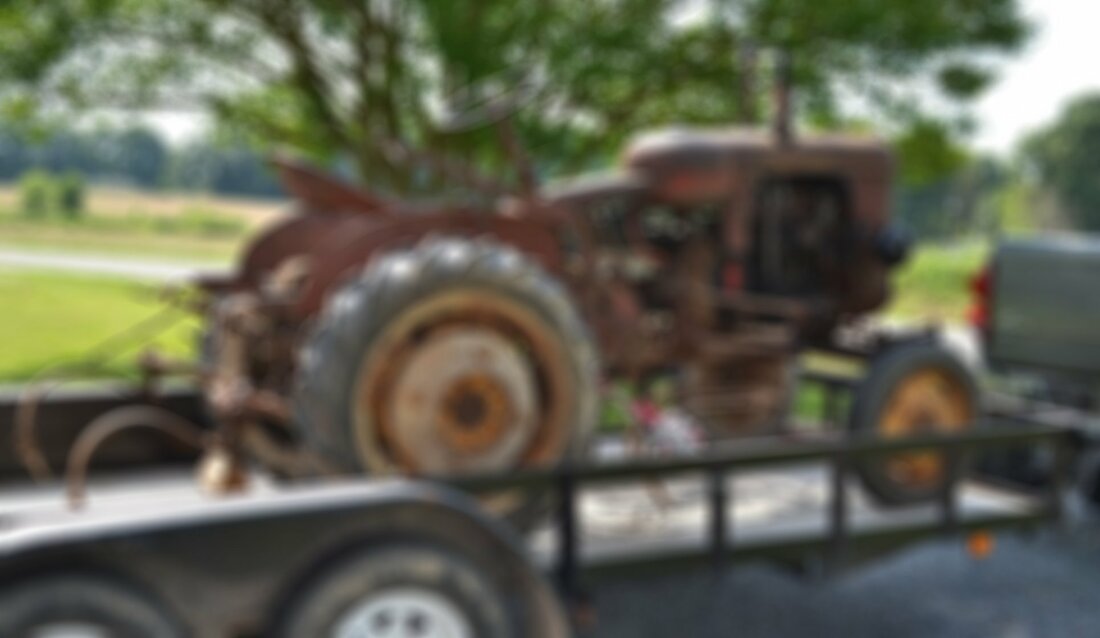
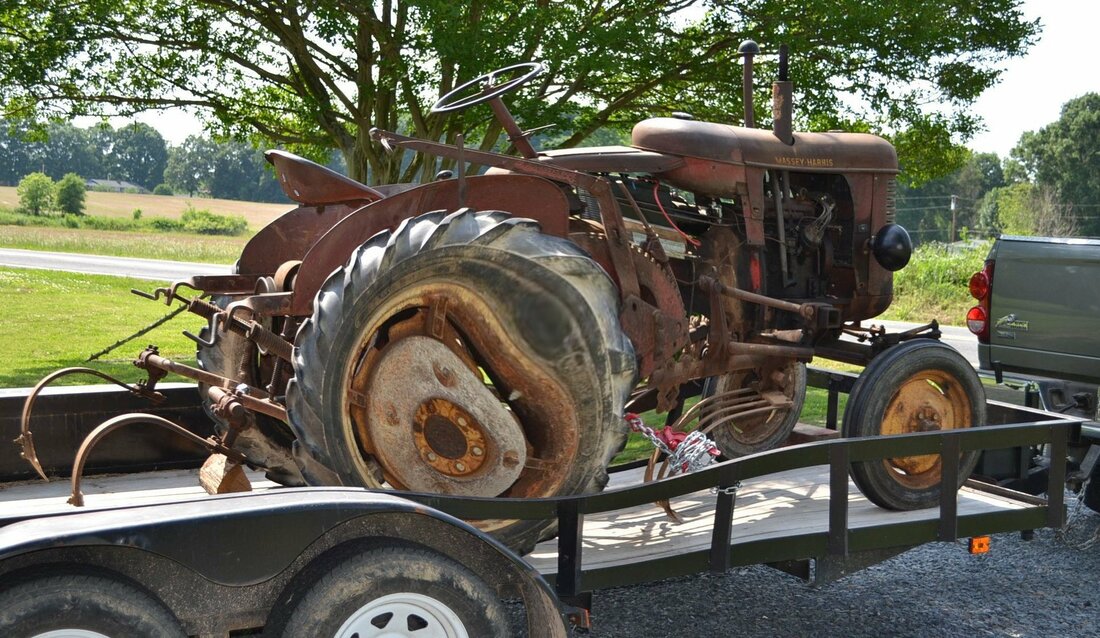
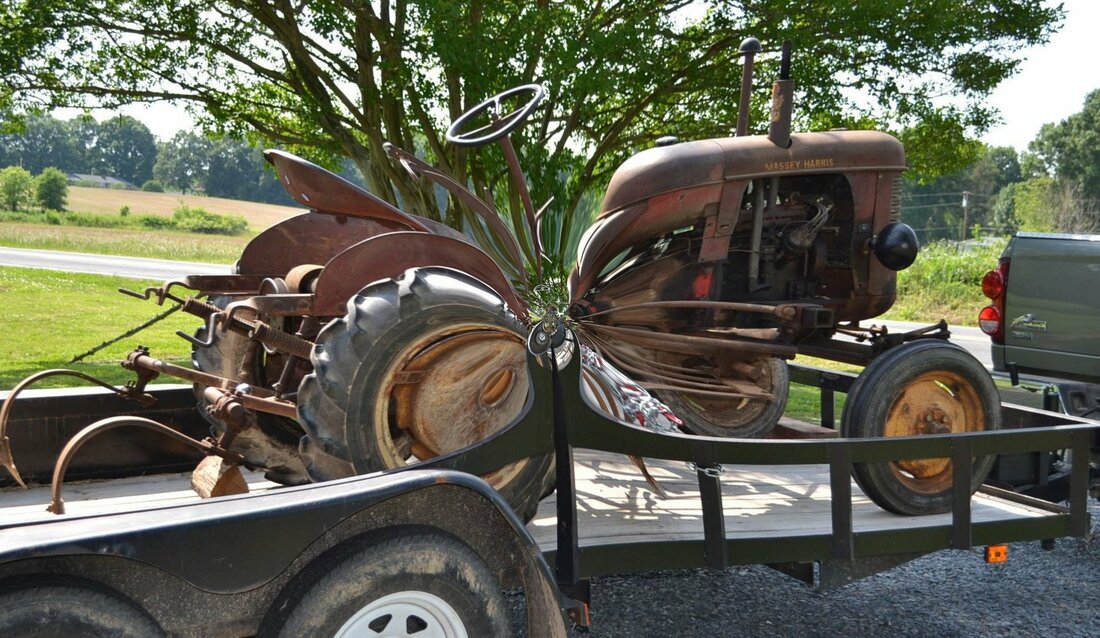
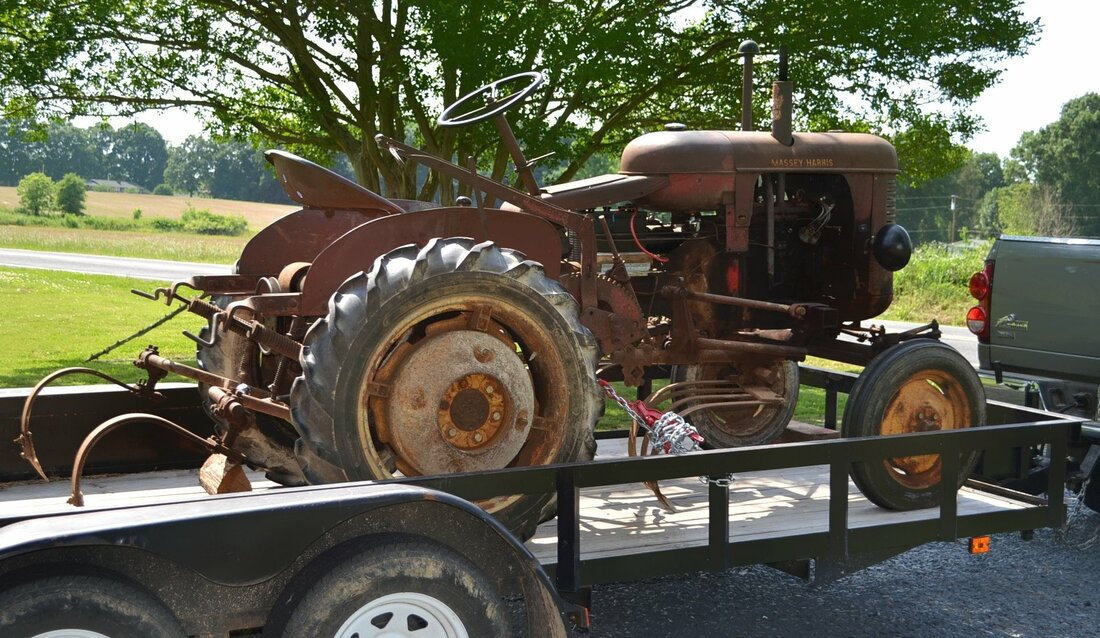
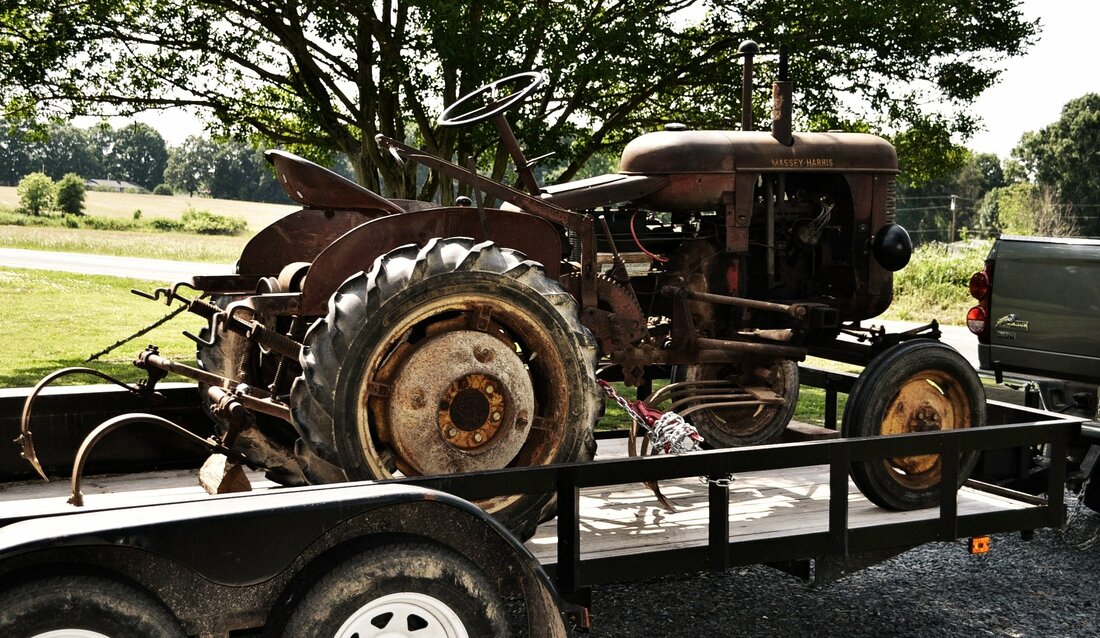
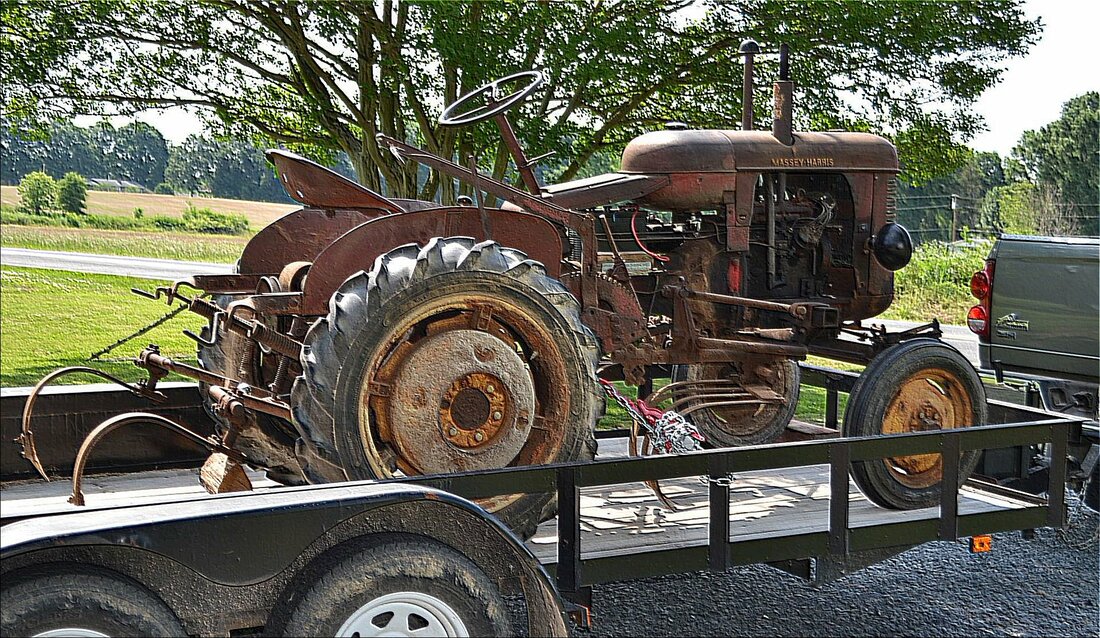
The image below, a picture of my dad's old tractor, will be used to illustrate the commands in the sub-menus of the Effects menu.

The commands or features in each sub-menu that have three dots... will produce a dialog box. Each dialog box will allow you to make additional adhustments.
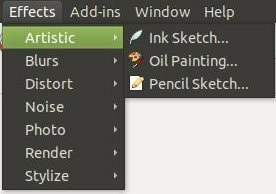
Artistic
This sub-menu contains Ink Sketch..., Oil Painting..., and Pencil Sketch... These effects allow you to turn an image or photo into something that looks like a traditional drawing created by hand.
This sub-menu contains Ink Sketch..., Oil Painting..., and Pencil Sketch... These effects allow you to turn an image or photo into something that looks like a traditional drawing created by hand.
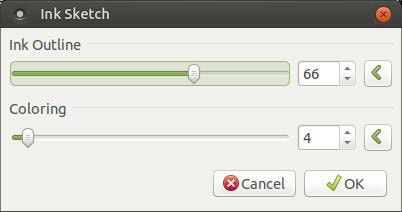
Ink Sketch...
This command will turn a photo or a selected area of a photo into an ink sketch image.
This command will turn a photo or a selected area of a photo into an ink sketch image.
The Ink Sketch command will produce an Ink Sketch dialog box that will allow you to change the Ink Outline and Coloring. By default, both are set in the middle at a value of 50. I increased the ink outline, which made the outline darker and I reduced the color of the image. Ink drawings rarely have color in them unless the artist used colored pens.
Oil Painting...
This command will turn a photo or a selected area of a photo into an oil painting.
This command will turn a photo or a selected area of a photo into an oil painting.
I increased the Brush Size from 3 to 6 and the Coarseness from 50 to 186.

Pencil Sketch...
This command will turn a photo or a selected area of a photo into an photo sketch image.
This command will turn a photo or a selected area of a photo into an photo sketch image.

I increased the Pencil Tip Size from 2 to 18 and the Color Range at 0.

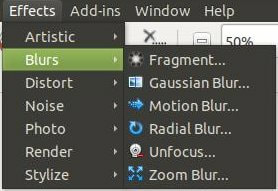
Blurs
This sub-menu contains Fragment..., Gaussian Blur..., Motion Blur..., Radial Blur..., Unfocus..., and Zoom Blur... These features will blur or make your image appear to be out of focus in some way. Some of these features can make an object in an image appear to be moving or in motion.
This sub-menu contains Fragment..., Gaussian Blur..., Motion Blur..., Radial Blur..., Unfocus..., and Zoom Blur... These features will blur or make your image appear to be out of focus in some way. Some of these features can make an object in an image appear to be moving or in motion.
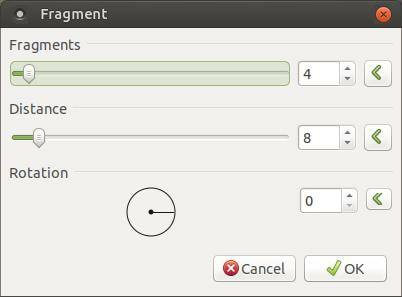
Fragment...
This command creates a blurred image by copying the pixels and then offsetting them. It can be applied to an entire photo or a selected area of a photo. This is a great feature to distort or blur the faces of minors or blur out house numbers or mailing addresses on houses or license tag numbers.
This command creates a blurred image by copying the pixels and then offsetting them. It can be applied to an entire photo or a selected area of a photo. This is a great feature to distort or blur the faces of minors or blur out house numbers or mailing addresses on houses or license tag numbers.
You have the ability to adjust the Fragments, Distance, and Rotation. The settings you see below are the default settings.
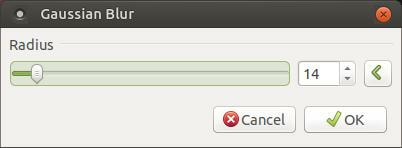
Gaussian Blur...
This command is the most widely used out of all the blur features. This feature makes an image blurry in a very simple and most basic way.
This command is the most widely used out of all the blur features. This feature makes an image blurry in a very simple and most basic way.

The Gaussian Blur dialog box is very simple. To increase the intensity of the blur of an image, drag the slider to the right or increase the number. The default number is set at two.
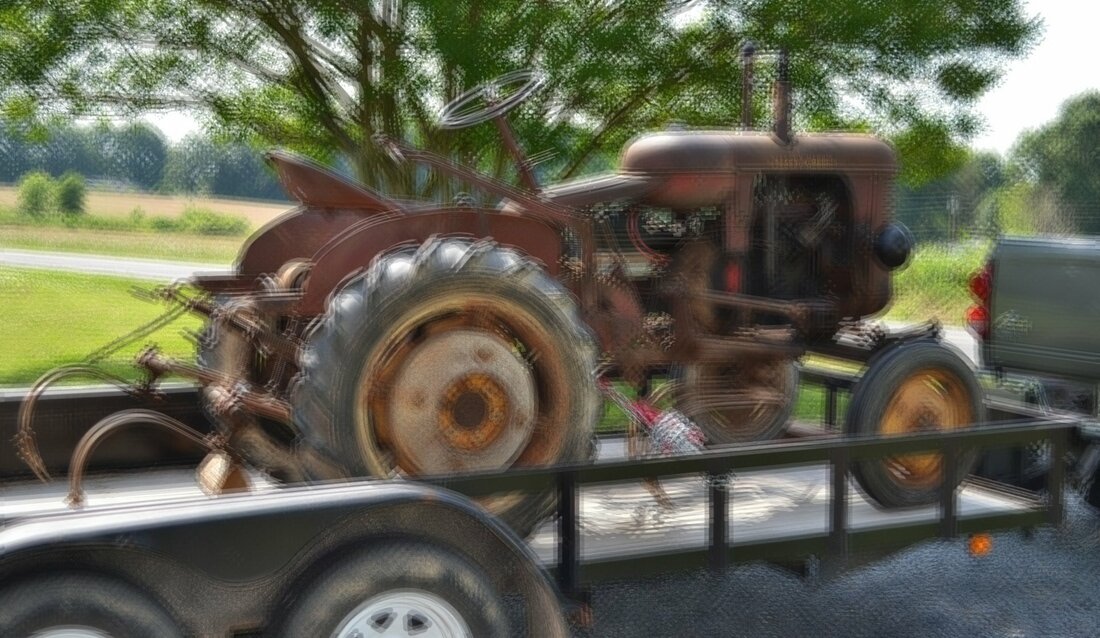
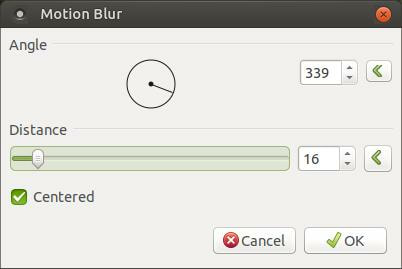
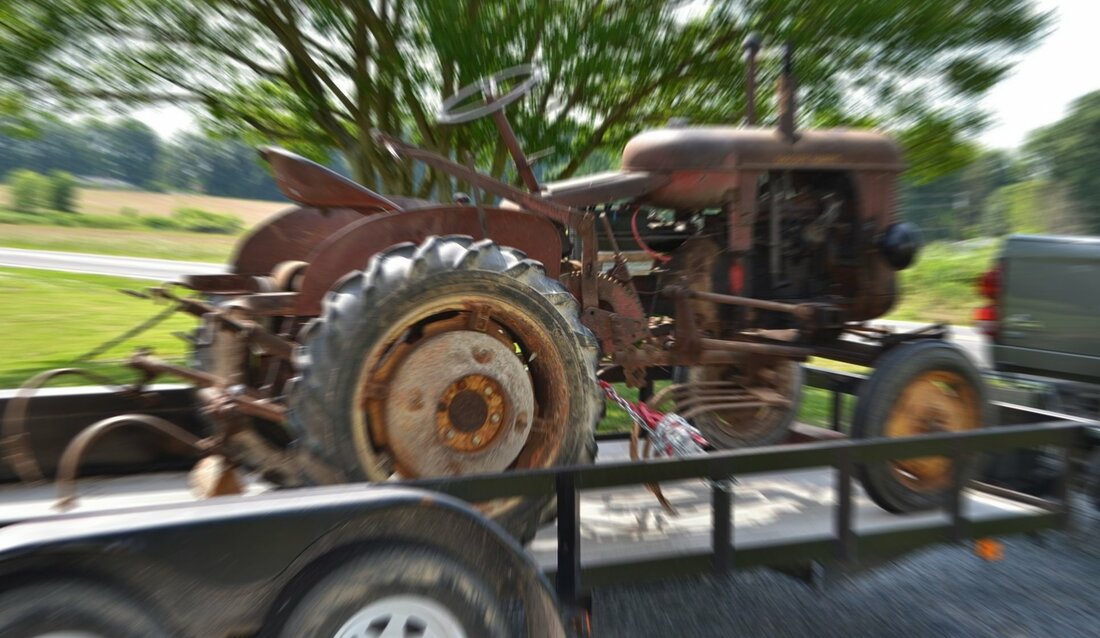
Motion Blur...
This command or filter blurs an image or a selected part of an image in a specific direction, which will create a sense of motion.
This command or filter blurs an image or a selected part of an image in a specific direction, which will create a sense of motion.

In the Motion Blur dialog box, you can control the Angle of your blur, the Distance, and whether or not it occurs from the center of the image. The default settings are Angle: 25, Distance: 10, and the Centered option checked. I made changes to the image above as you can see in the dialog box below.
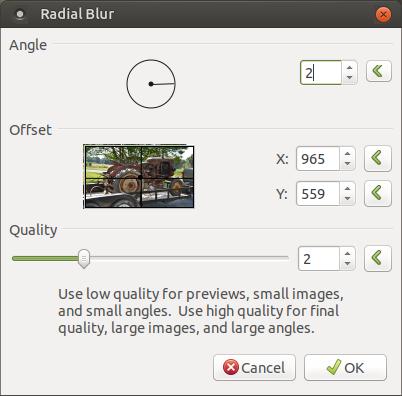
Radial Blur...
This command or filter is a motion blur that creates a circular blur.
This command or filter is a motion blur that creates a circular blur.

The default settings in the Radial Blur is an Angle of 2, Offset X: 965, Y: 559. The Angle option is the primary setting that will affect the blur. A larger Angle value will result in more blurring in a circular direction. Quality value can be applied to an image based on size.
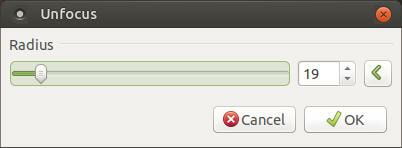
Unfocus...
This command creates a blurred image by making an image appear to be out of focus. This can be applied to an entire image or to a section of an image.
This command creates a blurred image by making an image appear to be out of focus. This can be applied to an entire image or to a section of an image.
The Radius is set to 4 by default in the Unfocus fialog box. I increased it to 19 make the image appear way out of focus.
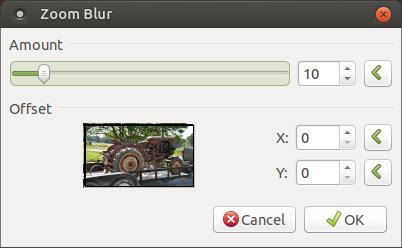
Zoom Blur...
This feature will allow you to zoom into an object and then create a blur around that object. This is great if yor camera doesn't have a zoom feature.
This feature will allow you to zoom into an object and then create a blur around that object. This is great if yor camera doesn't have a zoom feature.
The default settings in the Zoom Blur dialog box are as follows. Amount: 10 and Offset X: 0, Y: 0
Distort
This sub-menu contains Bulge..., Frosted Glass..., Pixelate..., Polar Inversion..., The Reflection..., and Twist... These features will alter your image beyond recognition. These features are great for protecting someone's identity.
This sub-menu contains Bulge..., Frosted Glass..., Pixelate..., Polar Inversion..., The Reflection..., and Twist... These features will alter your image beyond recognition. These features are great for protecting someone's identity.

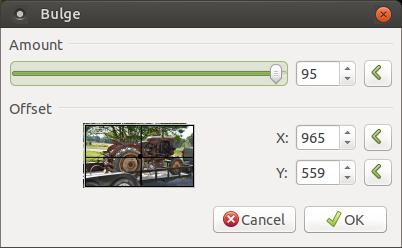
Bulge...
This command distorts an image around a specified point, making the image appear to bulge toward or away from the viewer, depending on the options you select.
This command distorts an image around a specified point, making the image appear to bulge toward or away from the viewer, depending on the options you select.
The default setting in the Bulge dialog box is Amount: 45 with Offset X: 965 & Y: 559. I increased the value to create a more drastic effect.
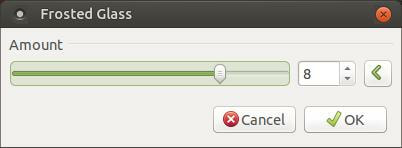
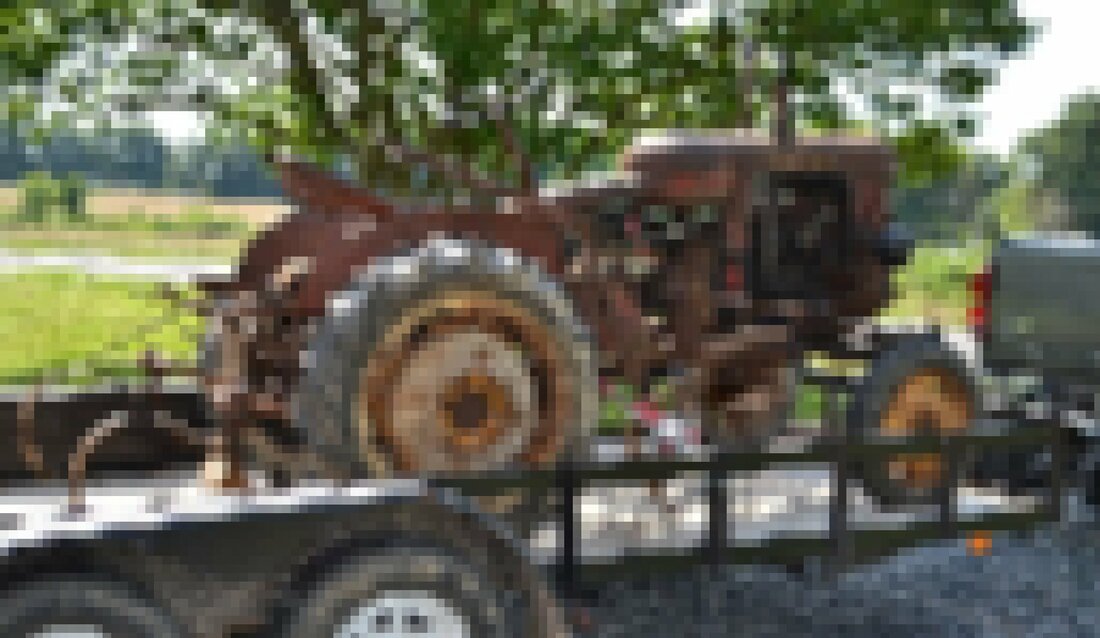
Frosted Glass...
This command will make it appear as if you were looking at the image through a frosted glass.
This command will make it appear as if you were looking at the image through a frosted glass.

The default setting in the Frosted Glass dialog box is Amount set to 1. I increased the value for a greater effect.
Pixelate...
This command will reduce the image details by enlarging and displaying certain pixels of the image. This is one of the most widely used effects for censoring photos and images.
This command will reduce the image details by enlarging and displaying certain pixels of the image. This is one of the most widely used effects for censoring photos and images.
The default Cell Size in the Pixelate dialog box is set at 2. I increased the value to increase the overall effect.

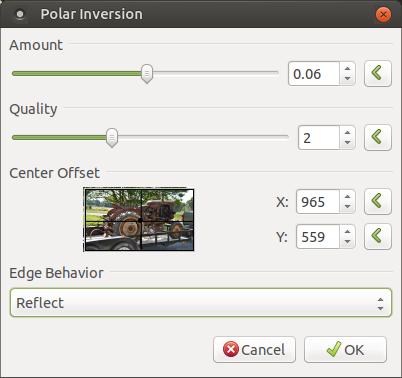
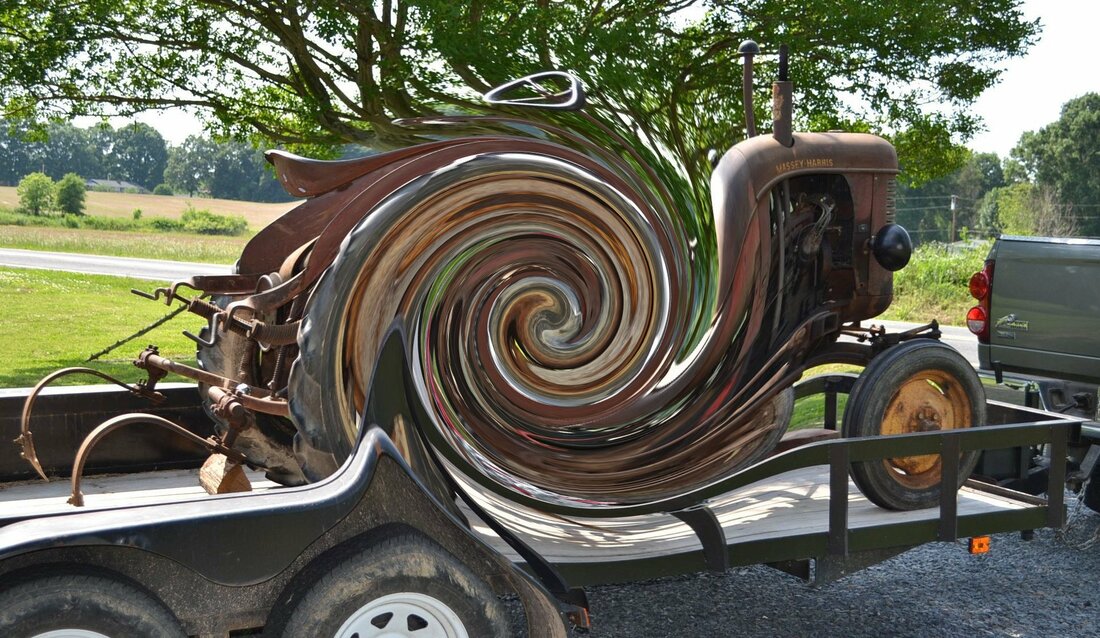
Polar Inversion...
This command results in an image wraps around itself in a repeating pattern. You have the ability to control the Amount or the strength of the effect, the Quality or the amount of detail, the Offset which sets the center point of the effect, and Edge Behavior which defines how the effect behaves as the transformation reaches the edge of the canvas. There are five types of Edge Behaviors: Clamp, Wrap, Reflect, Primary, and Secondary.
This command results in an image wraps around itself in a repeating pattern. You have the ability to control the Amount or the strength of the effect, the Quality or the amount of detail, the Offset which sets the center point of the effect, and Edge Behavior which defines how the effect behaves as the transformation reaches the edge of the canvas. There are five types of Edge Behaviors: Clamp, Wrap, Reflect, Primary, and Secondary.
I increased the Amount to 0.06 to illustrate how the Effect works. The default settings are Amount: 0.00, Quality: 2, Center Offset X: 965 & Y: 559, and an Edge Behavior of Reflect.
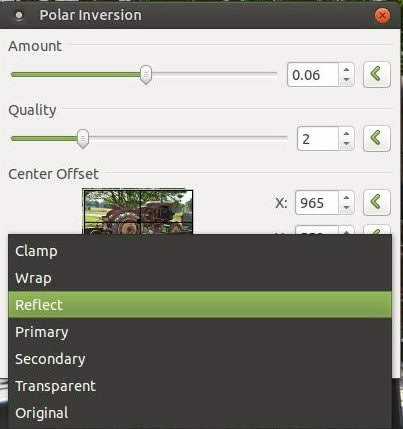
Edge Behavior:
- Clamp wiil fill an area uncovered by the relocation of the original region with solid a color.
- Wrap will repeat the original into an area uncovered by the relocation of the original region.
- Reflect will fill an area uncovered by the relocation of the original region with a mirror image of the original.
- Primary displays the primary color selected from the Color Patette in the uncovered area.
- Seconday displays the secondary color selected from the Color Palette in the uncovered area.
- Transparent will display in the uncovered area as transparent.
- Original will display the content from the original picture in the uncovered area.
Tile Reflection...
This command makes your image appear as if it has mirrored tiles and each tile has a slight curve along it's edge.
This command makes your image appear as if it has mirrored tiles and each tile has a slight curve along it's edge.

The image above was saved using the default settings. You can see the default settings in the Tile Reflection dialog box in the image below. The default settings are as follows, Rotation: 30, Tile Size: 40, and Intensity: 8.

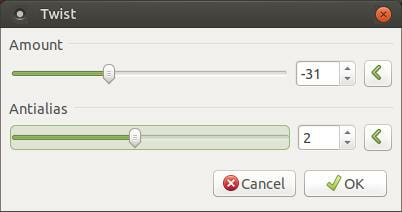
Twist...
This command appears as if you wound or twist the image around a central location.
This command appears as if you wound or twist the image around a central location.
The default settings in the Twist dialog box are as follows Amount: 45 and Antialias: 2. If the number in the Amount area is a positive number then the swirl will appear to go in a counter-clockwise rotation. If the number in the Amount area is a negative number then the swirl will appear to go in a clockwise rotation. Antialias will adjust the smoothness of the swirl.
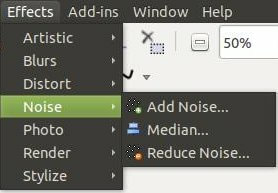
Noise
This sub-menu contains Add Noise..., Median..., and Reduce Noise... The Noise commands are used to add or remove "ditial noise" from an image. Digital noise is a random variation of image density, visible as grain in film and pixel level variations in digital images."Image noise" is the digital equivalent of film grain for analog cameras.
This sub-menu contains Add Noise..., Median..., and Reduce Noise... The Noise commands are used to add or remove "ditial noise" from an image. Digital noise is a random variation of image density, visible as grain in film and pixel level variations in digital images."Image noise" is the digital equivalent of film grain for analog cameras.
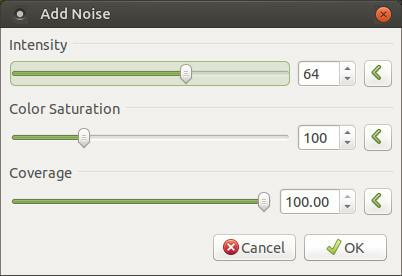
Add Noise...
This command adds random noise to the active layer or selection.
This command adds random noise to the active layer or selection.

Looks like an old newspaper image.
The default settings in the Add Noise dialog box is as follows, Intensity: 64, Color Saturation: 100, and Coverage: 100.00.
Intensity controls the amount of noise that is added to the original image. The greater the number, the greater the amount of noise added to the image. Color Saturation controls the intensity of the color. A lower number creates a monochrome or grey or black and white image and a greater number produces stronger colors. Coverage determins how much of the image will be covered by the effect.
Intensity controls the amount of noise that is added to the original image. The greater the number, the greater the amount of noise added to the image. Color Saturation controls the intensity of the color. A lower number creates a monochrome or grey or black and white image and a greater number produces stronger colors. Coverage determins how much of the image will be covered by the effect.
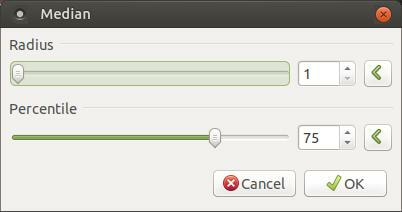
Median...
This command can be used to reduce noise at a very low setting. It appears to blur an image at higher settings.
This command can be used to reduce noise at a very low setting. It appears to blur an image at higher settings.

The default settings of the Median dialog box is as follows, Radius: 10 and Percentile: 50. I reduced the Radius to see if it would reduce any noticeable noise; however, the original image didn't have any noticeable noise. A low Radius setting will remove noise and emphasize more detail. A higher Radius setting will produce more blurring and emphasize less detail. A low Percentile setting will appear to recover more detail of an image and a higher setting will appear to remove more detail.
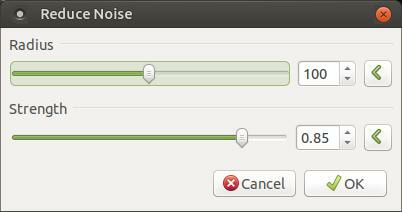
Reduce Noise...
This command attempts to remove ditial noise from an image.
This command attempts to remove ditial noise from an image.
The default settings of the Reduce Noise dialog box is as follows, Radius: 6 and Strength: 0.40. Radius determines how much of the image will be affected. Strength determines how much power the effect has. You should notice that a larger value will reduce more noise.
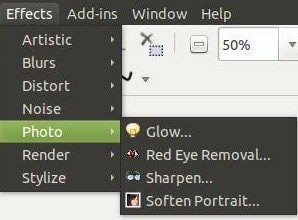
Photo
This sub-menu contains Glow..., Red Eye Removal..., Sharpen..., and Soften Portrait... These four effects are used to modify and enhance digital photos.
This sub-menu contains Glow..., Red Eye Removal..., Sharpen..., and Soften Portrait... These four effects are used to modify and enhance digital photos.
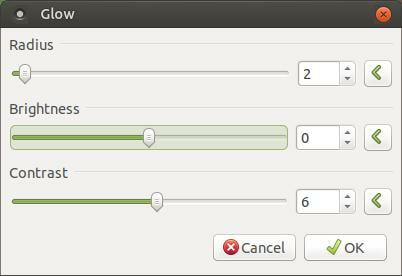
Glow...
This command makes an image appear as if is glowing by brightening the lighter tones and gradually go into the darker tones. It makes the image appear as if someone was shining a light on the object in the image.
This command makes an image appear as if is glowing by brightening the lighter tones and gradually go into the darker tones. It makes the image appear as if someone was shining a light on the object in the image.

The default settings within the Glow dialog box is as follows, Radius: 6, Brightness: 10, and Contrast: 10. I made changes to the default settings to emphasize the effect. Radius determines the strenght of the effect. Brightness controls how bright or dim the image will appear. The greater the number, the brighter the image. Contrast is the difference in the luminance or color that makes an object distinguishable.
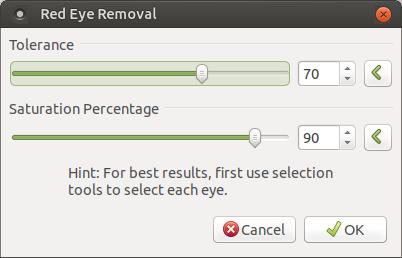
Red Eye Removal...
This command recolors the red portion of the eyes in a photograph.
This command recolors the red portion of the eyes in a photograph.

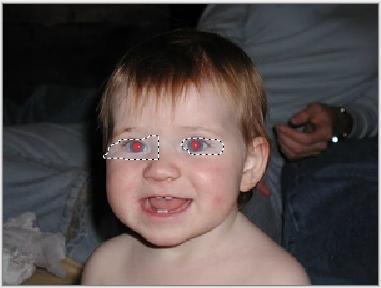
Red Eyes
Below you will notice the default settings for the Red Eye Removal dialog box. It has a Tolerance of 70 and a Saturation Percentage of 90. It also has a great hint, "Hint: For best results, first use selection tools to select each eye."
So, I pressed down and held the Control (Ctrl) key while using the Lasso Select feature to select each eye.
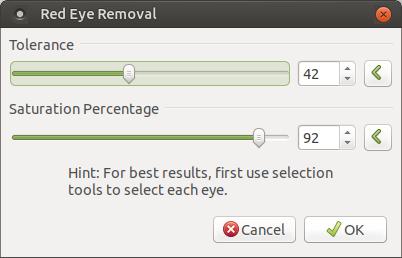
Then I adjusted the Tolerance to 42 and the Saturation Percentage to 92. The Tolerance determines how much color in the eyes will be replaced and image enhancement brightness and contrast. Saturation Percentage sets the intensity of color in the image.
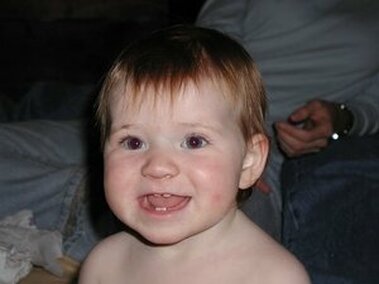
The end results was looked nice. I probably could have gotten better results by doing a better job selecting each eye and spent more time tweaking the settings in the Red Eye Removal dialog box.
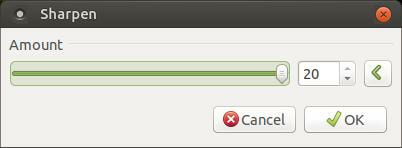
Sharpen...
This command reduces the softness of a photo or image. It enhances the details within an image.
This command reduces the softness of a photo or image. It enhances the details within an image.

Before
|

After
|
The default setting in the Sharpen dialog box is Amount: 2. Amount controls the strength of the effect. I increased the setting to 20 to show maximum amount of sharpness.
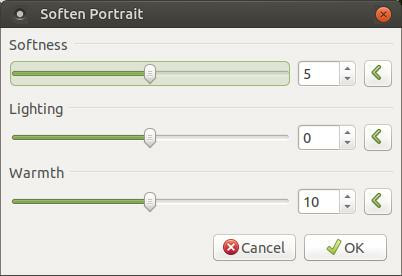
Soften Portrait...
This command is used to soften images by adding a glow and/or soften skin.
This command is used to soften images by adding a glow and/or soften skin.

Before
|
After
|
The image below displays the default settings in the Soften Portrait dialog box. The default settings are Softness: 5, Lighting: 0, and Warmth: 10. Softness is the overall strength of the effect. Lighting changes the intensity of the illumination. Warmth changes the color of the lighting.
Render
This sub-menu contains Clouds..., Julia Fractal..., and Mandelbrot Fractal... Effects within the Render sub-menu will typically replace all color information in the active layer or selection.
This sub-menu contains Clouds..., Julia Fractal..., and Mandelbrot Fractal... Effects within the Render sub-menu will typically replace all color information in the active layer or selection.
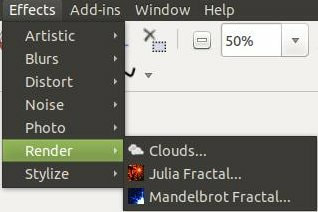
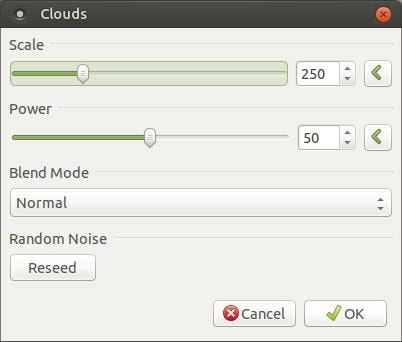
Clouds...
This command is used to generate a cloud effect over the entire image or selection. It uses the Primary and Secondary colors to create the cloud effect.
This command is used to generate a cloud effect over the entire image or selection. It uses the Primary and Secondary colors to create the cloud effect.
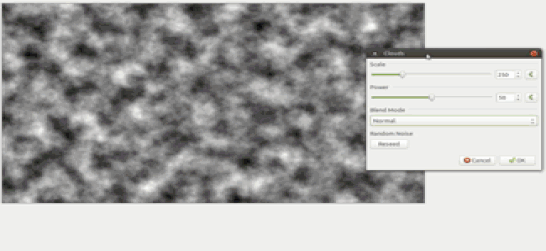
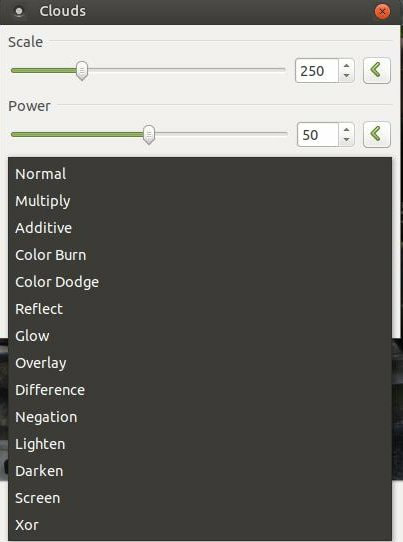
Below is an image that shows the default settings within the Clouds dialog box. Here's a list of the default settings, Scale: 250, Power: 50, Blend Mode: Normal, and Random Noise: Reseed. Scale sets the cloud size. Power is a measure of how coarse the clouds will be. Blend Mode determines how the clouds will blend into the original image.
There is a total of 14 Blend Modes: Normal, Multiply, Additive, Color Burn, Color Dodge, Reflect, Glow, Overlay, Difference, Negation, Lighten, Darken, Screen, and Xor.
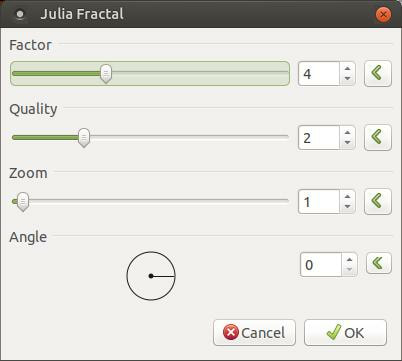
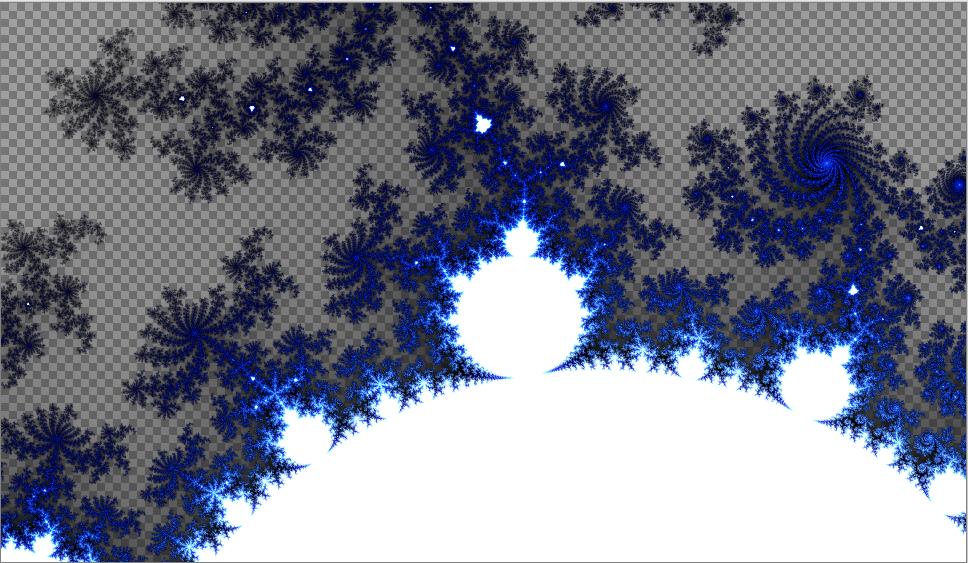
Julia Fractal...
This command is used to render a Julia fractal onto the layer or selection. This is done mathematically by using a function such as f(z)=z2+c. This says: map the complex number z onto its square, and then add a constant number to it. To generate a Julia fractal, we have to apply this formula repeatedly, feeding the result back into f every time.
This command is used to render a Julia fractal onto the layer or selection. This is done mathematically by using a function such as f(z)=z2+c. This says: map the complex number z onto its square, and then add a constant number to it. To generate a Julia fractal, we have to apply this formula repeatedly, feeding the result back into f every time.
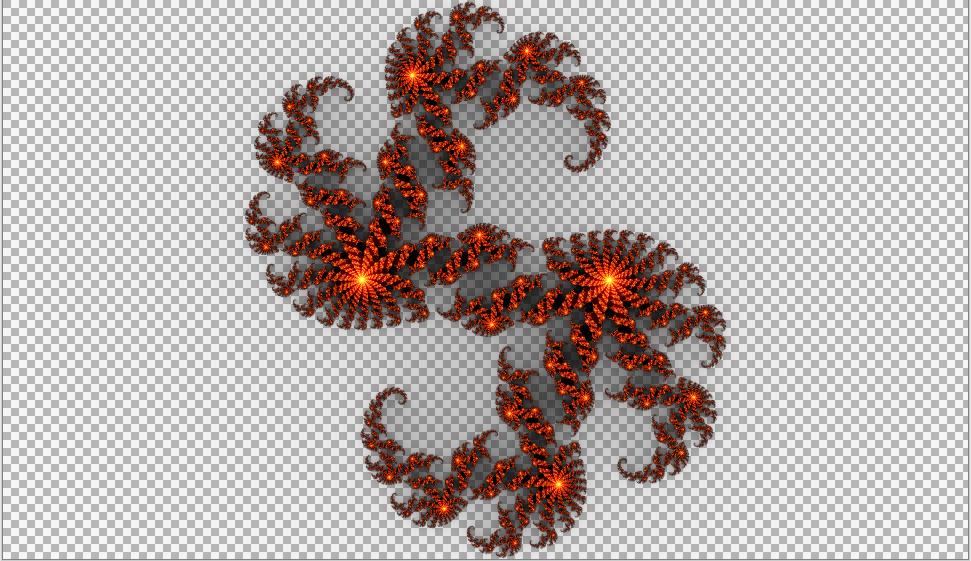
The default settings for the Julia Fractal dialog box is as follows, Factor: 4, Quality: 2, Zoom: 1, and Angle: 0. Factor detemines the color saturation. Quality defines the amount of detail. Zoom is the scaling factor. Angle rotates the fractal around the center of the image.
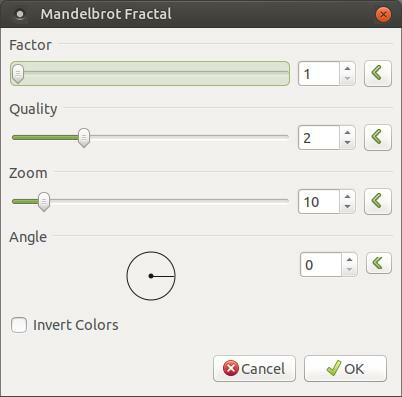
Mandelbrot Fractal...
This command is used to render the Mandelbrot fractal to the layer or selection.
This command is used to render the Mandelbrot fractal to the layer or selection.
The default settings in the Mandelbrot Fractal is as follows, Factor: 1, Quality: 2, Zoom: 10, Angle:0, and Invert Colors is not selected. Factor detemines the color saturation. Quality defines the amount of detail. Zoom is the scaling factor. Angle rotates the fractal around the center of the image. Invert Colors will swap colors for their opposite color on the color wheel.
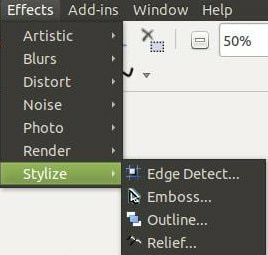
Stylize
This sub-menu contains Edge Detect..., Emboss..., Outline..., and Relief... These features are great for emphasizing edges.
This sub-menu contains Edge Detect..., Emboss..., Outline..., and Relief... These features are great for emphasizing edges.
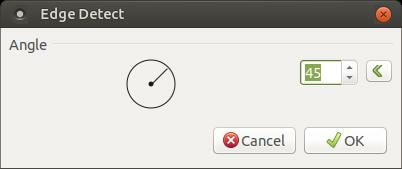
Edge Detect...
This command is used to emphasize the edges within an image. It makes the image appear as if a bright light is shining on the object in the picture at an an angle.
This command is used to emphasize the edges within an image. It makes the image appear as if a bright light is shining on the object in the picture at an an angle.
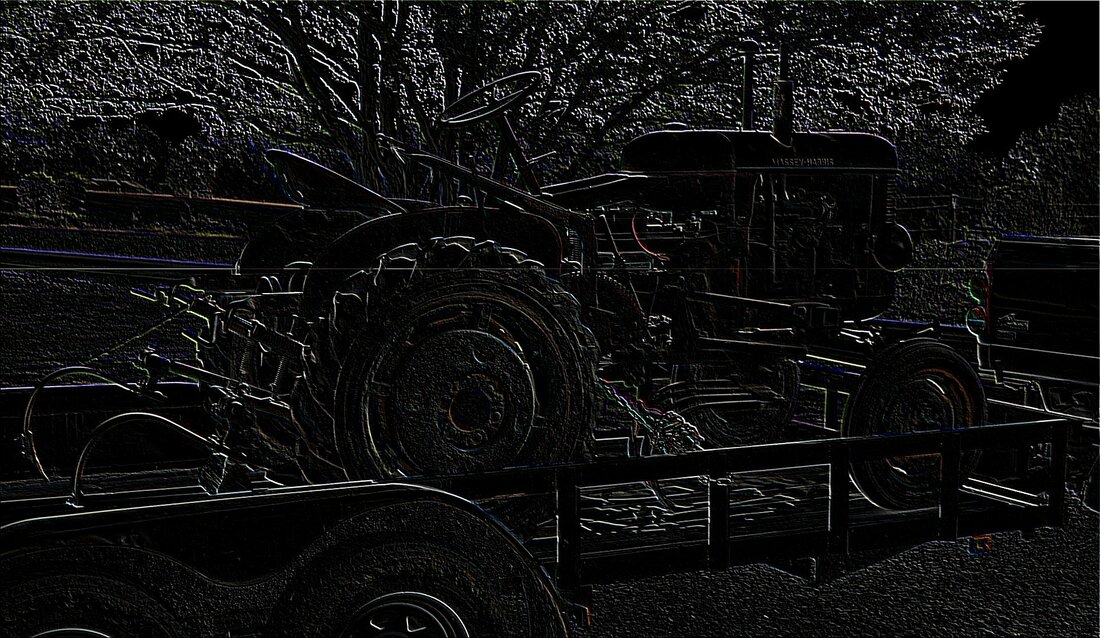
The default settings in the Edge Detect dialog box is as follows, Angle:45. The Angle sets the apparent direction of the illuminating light.
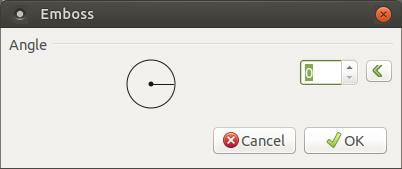
Emboss...
This command is used to create a black and white image using light and dark contrast to give the appearance of directional lighting and associated shadowing.
This command is used to create a black and white image using light and dark contrast to give the appearance of directional lighting and associated shadowing.
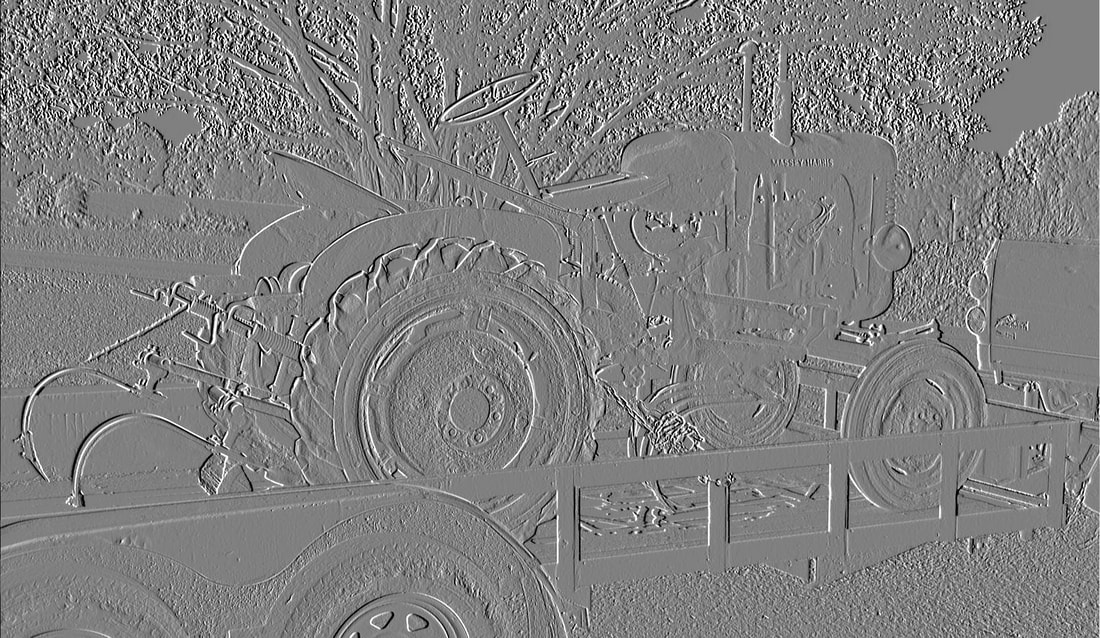
The default settings within the Emboss dialog box is as follows, Angle: 0. The Angle sets the apparent direction of the illuminating light.
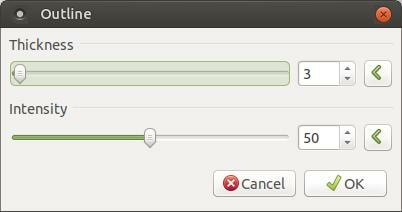
Outline...
This command is used to enhance the edges of an image.
This command is used to enhance the edges of an image.
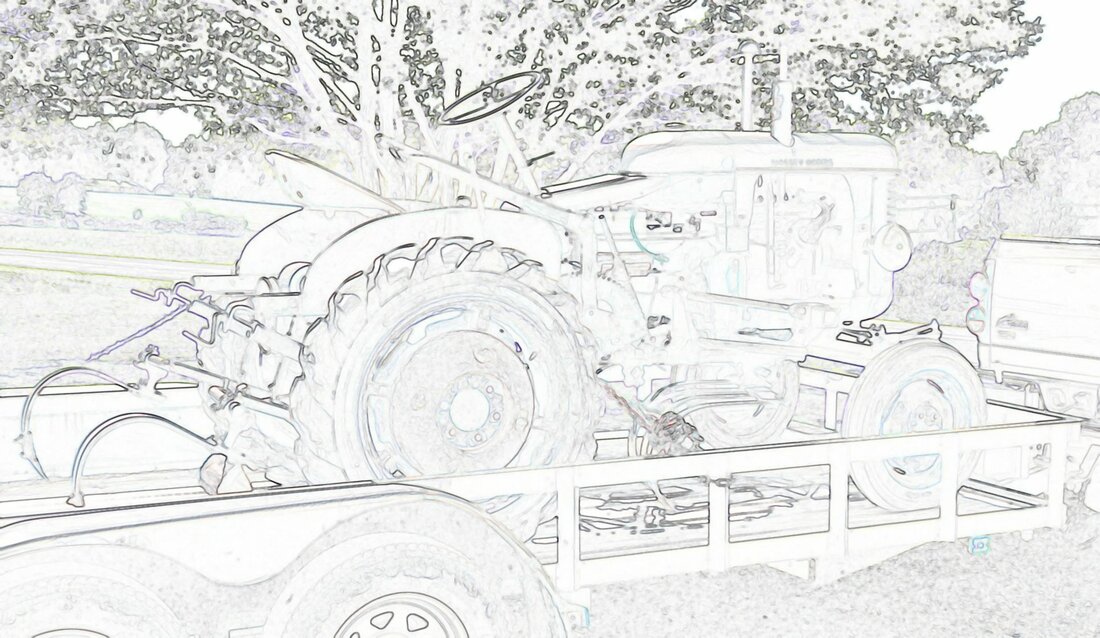
The default settings within the Outline dialog box is as follows, Thickness: 3 and Intensity: 50. Thickness defines how wide or thick the outlines are. Intensity describes the strength of the effect.
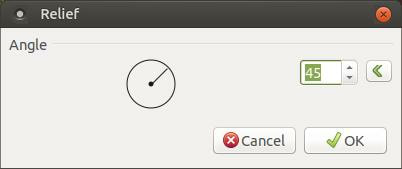
Relief...
This command is used empasize the edges of an image by blending the results back into the image.
This command is used empasize the edges of an image by blending the results back into the image.
The default settings within the Relief dialog box is as follows, Angle: 45. The Angle sets the apparent direction of the illuminating light.
These are all of the default Effects in Pinta. You can use the Add-in Manager to install additional Effects into the program.
I hope this has been a good reference guide to helping you understand the different effects and how they alter your original image.
Take care!
I hope this has been a good reference guide to helping you understand the different effects and how they alter your original image.
Take care!
May 4, 2019
