
GParted
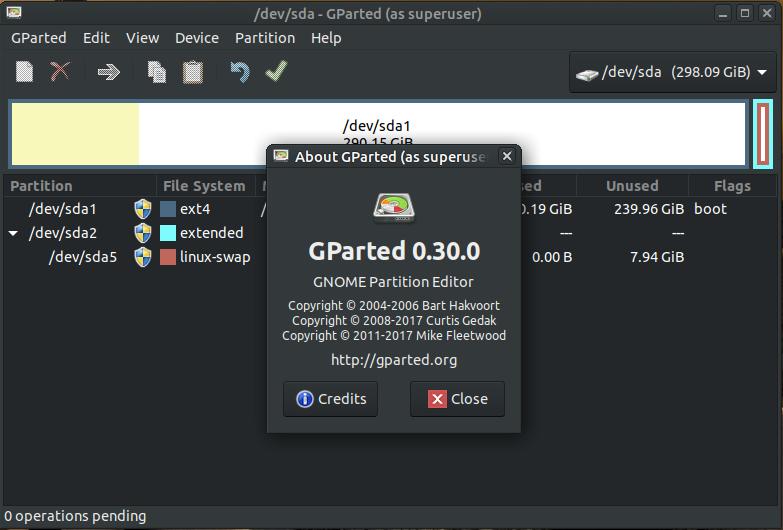
GParted is a free partition editor for graphically managing your disk partitions and it allows you to format your disks.
GParted allows you to graphically resize, copy, and move partions without any data loss. Any storage device such as a hard disk, USB drive, or SD card must be partitioned before you can use it. If you purchase a new hard drive, it must be partitioned with at least one partion but it can contain multiple partitions. You must setup a partition before you can install your operating sysetm.
Think of a new hard drive as a building. You can build a building, such as a storage shed, that contains only outside walls and inside those walls is one large storage space or you can create walls inside the building to give you seperate storage spaces. This analogy is similiar to the way partitioning your storage device works. You can create one large partition to be used with one operating system or you can create seperate partitions on the storage device so that you can use more than one operating system.
You can use GParted to create a partition on a blank storage device. Once the storage device is partitioned, it must be formatted with a file system. When you format a disk, you are prepairing it so that files can be written to and read from the device. As a general rule of thumb, Microsoft Windows use the NTFS file system, removable storage devices (such a USB Flash Drive) use the FAT32 file system, Mac computers use the HFS+ file system, and Linux systems generally use the ext4 file system.
How to Install GParted:
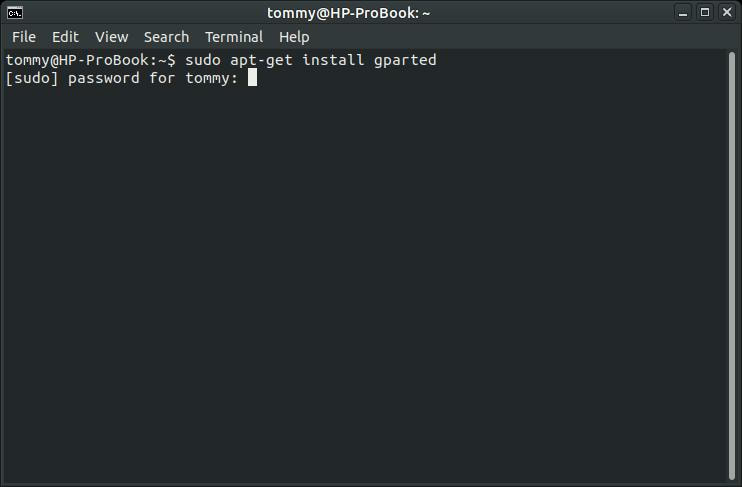
1. Open the Terminal (Shortcut: Ctrl + Alt + T)
2. Type the following command: sudo apt-get install gparted
3. Press Enter or Return and type in your password
Illustrated Instructions
1. Open the Terminal (Shortcut: Ctrl + Alt + T)
2. Type the following command: sudo apt-get install gparted
3. Press Enter or Return and type in your password
Illustrated Instructions
Working with a Single Partition
When you purchase a SD card or USB Flash drive, it usually has only one partition on it. One partition on these type of devices will allow you to treat them as a single storage unit. If you decided to create multiple partitions on a USB Flash drive, it would appear to your system as multiple drives when you plug it in. So it is more practical to leave these portable storage units as single storage unit.
When you buy a SD card or USB Flash drive, you usually take it out of the package and plug it in your device and start using it to store your files. You don't normally think about creating a partition on it or formatting it. As I mentioned earlier, portable storage devices usually come preformatted using a FAT32 file system. When your portable device, such as your USB Flash drive, is formatted with the FAT32 file system, you will be able to read and write to the device from virtually any device that supports USB drives. Most operating systems contain utilities that can quickly format your USB Flash drive with the FAT32 file system.
One of the best ways to wipe off or clean off a USB Flash drive is to format it. In the steps below, I will describe how to format your USB Flash drive using GParted.
How to Format a USB Flash Drive using GParted
Insert the USB Flash drive you want to format. Be sure to backup anything important on the drive because formatting it will wipe everything off. Then follow these steps:
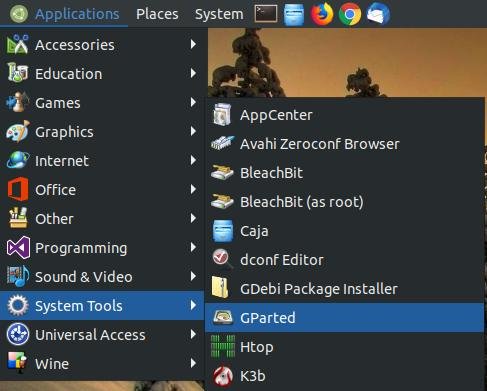
1. Start Gparted - In Ubuntu MATE 18.04 LTS, click on the Applications menu, highlight System
Tools, and then click on GParted.
Insert the USB Flash drive you want to format. Be sure to backup anything important on the drive because formatting it will wipe everything off. Then follow these steps:
1. Start Gparted - In Ubuntu MATE 18.04 LTS, click on the Applications menu, highlight System
Tools, and then click on GParted.
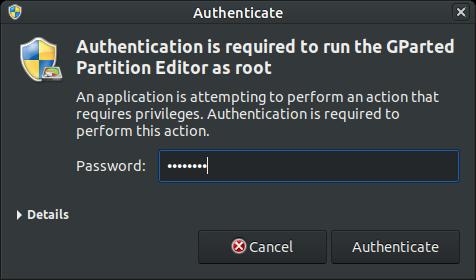
2. Enter your Password.
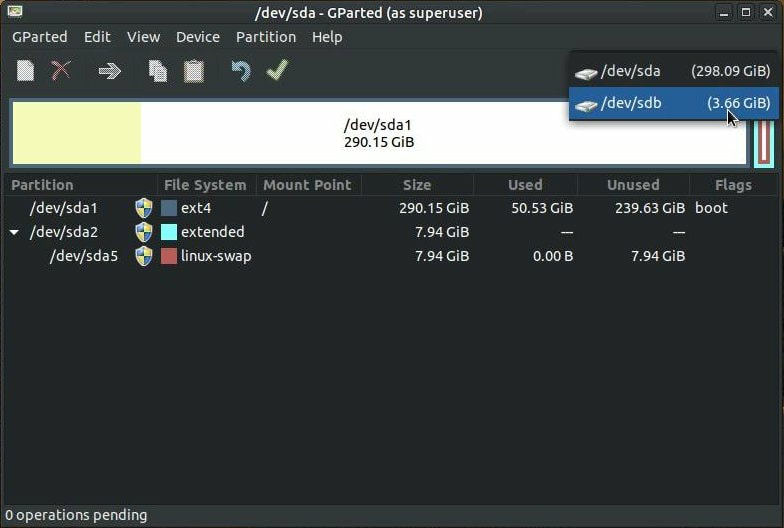
3. Click the drop down arrow in the upper right hand corner of the screen.
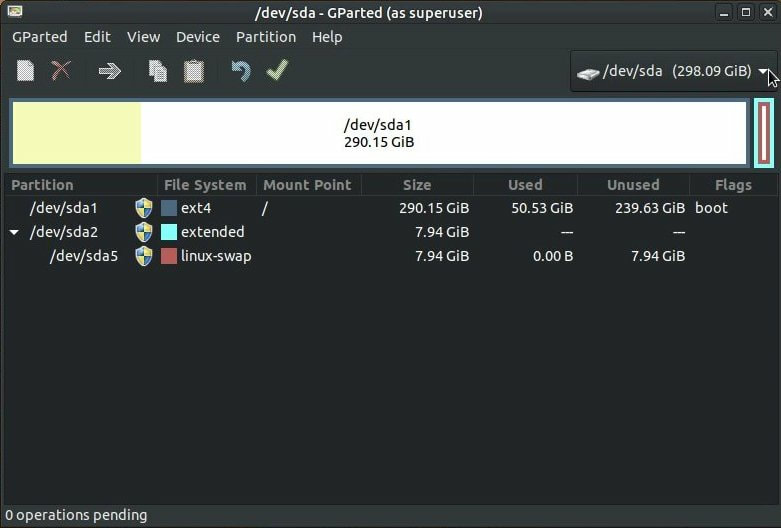
4. Select your USB Flash drive from the drop down list.
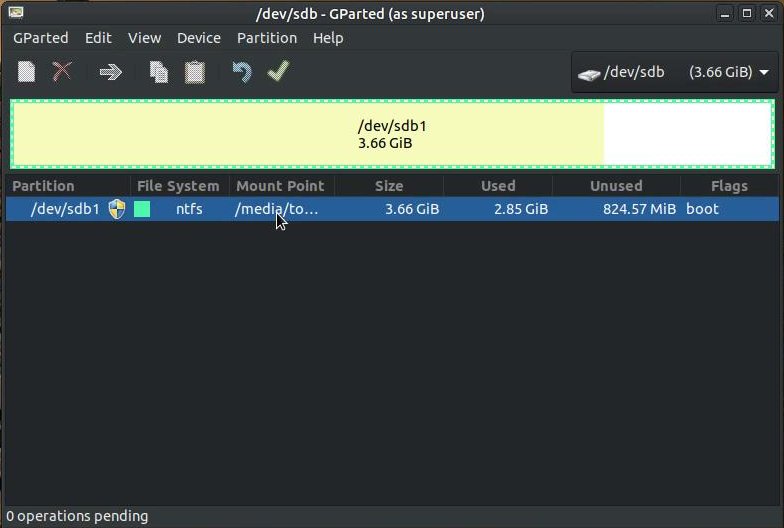
5. Click on the USB Flash drive to select it.
6. Right-click the selected USB Flash drive to create a pop-up menu and then click the Unmount option.

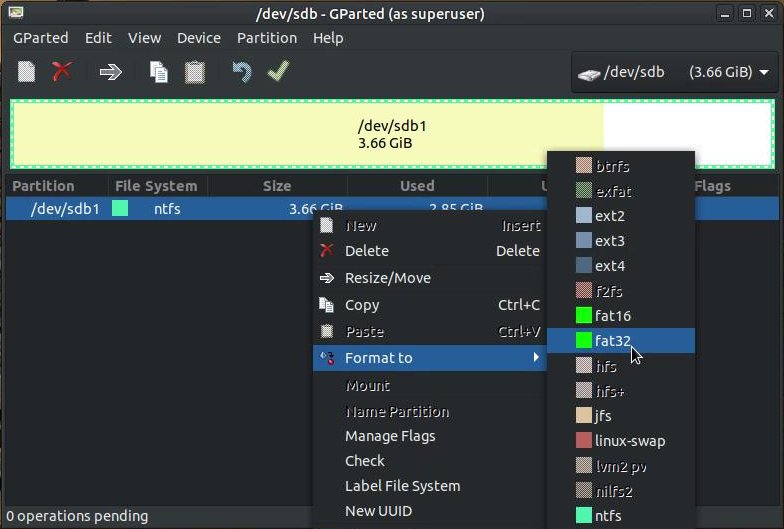
7. Right-click the selected USB Flash drive again to create another pop-up menu. Then highlight the Format
to option and click on fat32.
to option and click on fat32.
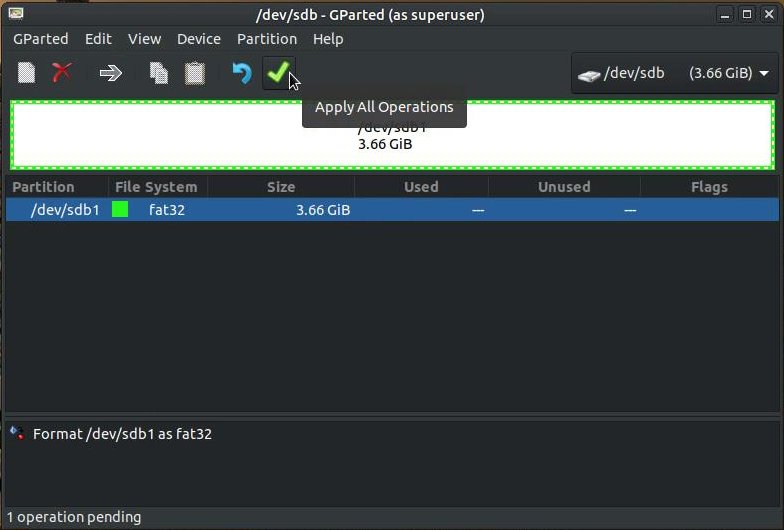
8. Click the green arrow, the Apply All Operations option, to start the format process.
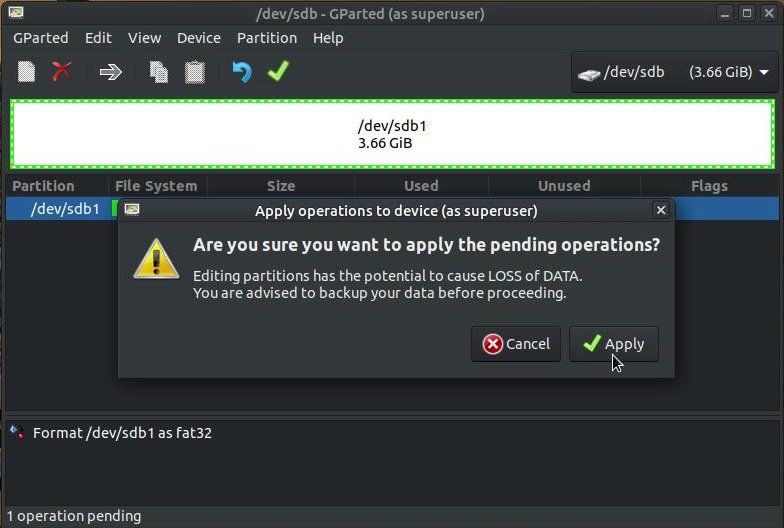
9. An Apply operations to device (as superuser) dialog box will pop-up to make sure you want to format
the device and remind you that you will lose any data on the drive. Click the Apply button to start the format
process.
the device and remind you that you will lose any data on the drive. Click the Apply button to start the format
process.
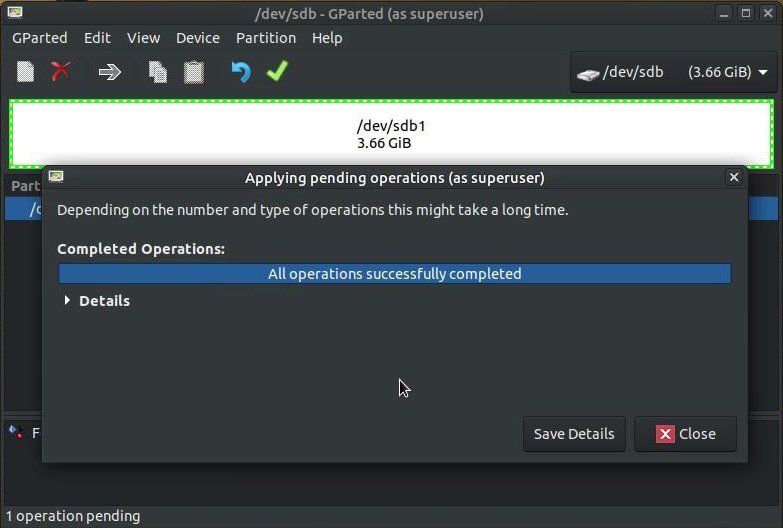
10. You can click the Close button when the process is completed.
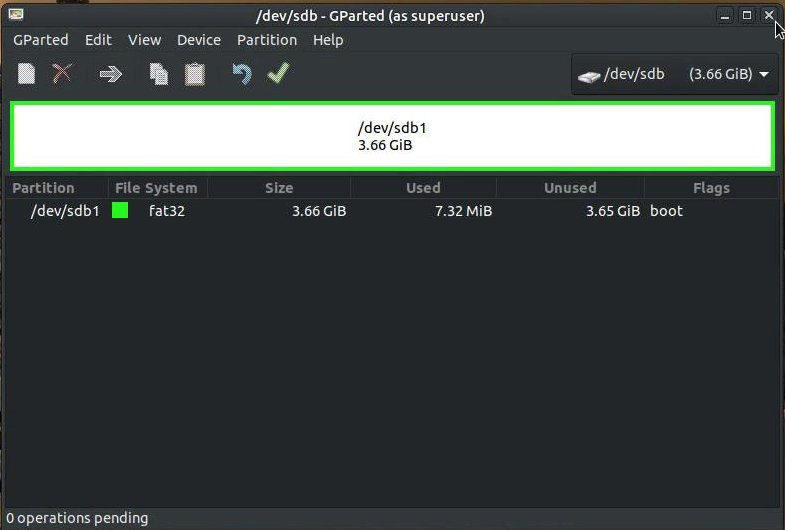
11. You can now close the GParted dialog box and start using your newly formatted USB Flash drive.
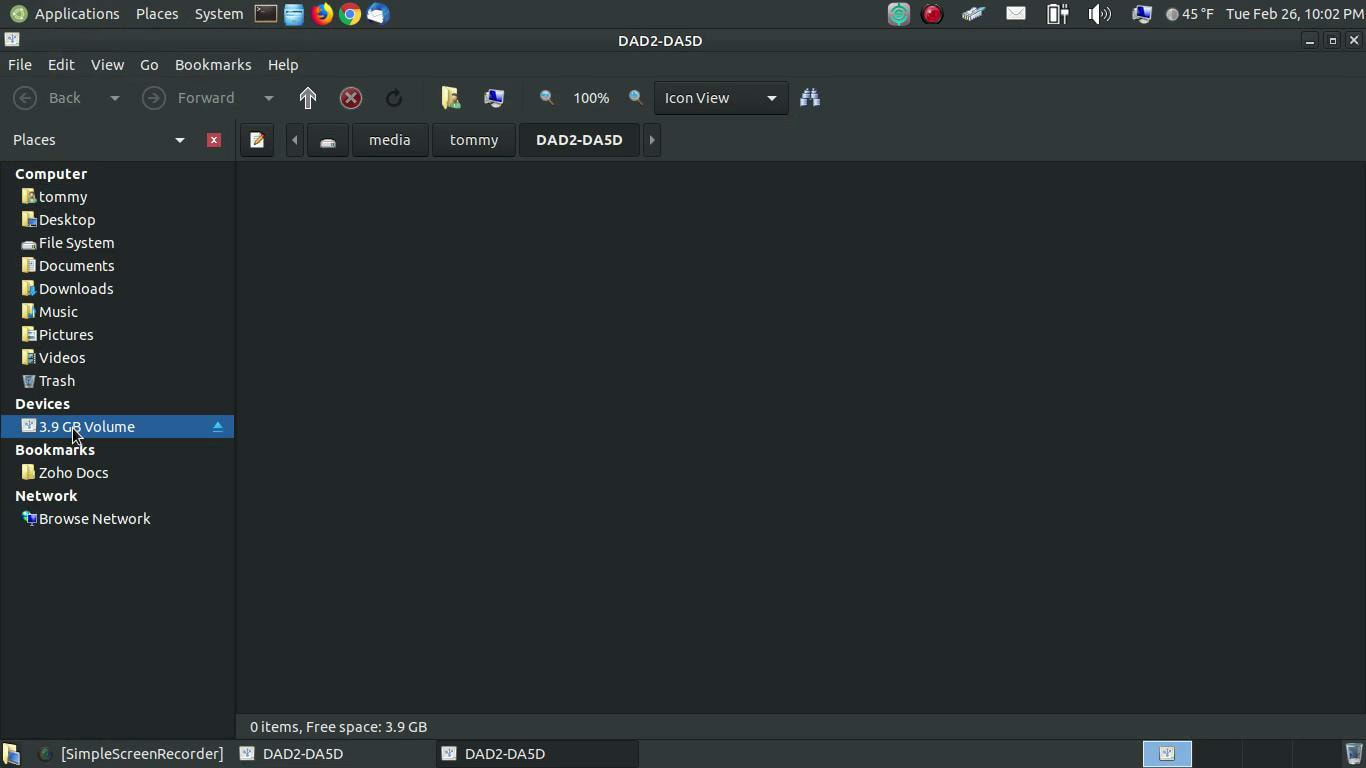
As you can see in my Caja file manager, my USB Flash drive has nothing on it. It is ready to be used.
I hope this helped you format your USB Flash Drive or Thumb drive.
Take care!
Take care!
