
Pinta
If you recently switched from Microsoft Windows to Linux, then you probably wonder if there's a graphic editor that is similar to Paint.NET. Well you're in luck, because Pinta is a free and open source graphic creator and editor that was inspired by Paint.NET. Pinta is cross-platform, so if you're thinking about switching to Linux or Ubuntu MATE, you might want to download and install it on your Windows system to see if you like it. Pinta also supports Mac OS X users as well. You can download and install Pinta at https://pkgs.org/download/pinta
Pinta is light and doesn't have a steep learning curve that you have with Gimp. However, don't let the learning curve keep you from trying Gimp. Gimp is a decent alternative for Photoshop. This section focuses on Pinta as an alternative to Paint.NET.
Pinta is light and doesn't have a steep learning curve that you have with Gimp. However, don't let the learning curve keep you from trying Gimp. Gimp is a decent alternative for Photoshop. This section focuses on Pinta as an alternative to Paint.NET.
How to Install Pinta:
Recommended for Ubuntu/Ubuntu MATE 18.04 or older
1. Open the Terminal (Shortcut: Ctrl + Alt + T)
2. Type the following command: sudo apt-get update
3. Press Enter or Return and type in your password
4. Type the following command: sudo apt-get install pinta
5. Press Enter or Return
You may also download and install the program via the .deb file: pinta_1.6-2_all.deb
Recommended for Ubuntu/Ubuntu MATE 20.04 or newer
(It is strongly recommended to also ensure that Mono 6.10 or higher is installed on your system (run `mono --version` to check), as earlier 6.x versions can produce random crashes. You can install the latest Mono version from https://www.mono-project.com/download/stable/#download-lin)
1. Open the Terminal (Shortcut: Ctrl + Alt + T)
2. Type the following command: sudo apt-get update
3. Press Enter or Return and type in your password
4. Type the following command: sudo add-apt-repository ppa:pinta-maintainers/pinta-stable
5. Type the following command: sudo apt-get install pinta
6. Press Enter or Return
If you installed the latest version of Mono, you may get the following message: "Skipping acquire of configured file 'main/binary-i386/Packages' as repository 'http://apt.postgresql.org/pub/repos/apt focal-pgdg InRelease' doesn't support architecture 'i386'"

This is not an error, but it can become annoying if you update and upgrade software using your Terminal. It's easy to get rid of. (I use gedit text editor, but you can replace it with your favorite text editor or install gedit by entering sudo apt install gedit)
1. Open the Terminal (Shortcut: Ctrl + Alt + T)
2. Type the following command: sudo grep -i postgresql /etc/apt/sources.list.d/mono-official-stable.list
3. Type the following command: sudo -H gedit /etc/apt/sources.list.d/mono-official-stable.list
4. Change the line: deb https://download.mono-project.com/repo/ubuntu stable-focal main
5. To read: deb [arch=amd64] https://download.mono-project.com/repo/ubuntu stable-focal main
6. Press the Save button in gedit and exit.
6. Type the following command: sudo apt-get update
7. Type the following command: sudo apt-get upgrade
You should no longer see that message.
How to Uninstall Pinta:
1. Open the Terminal (Shortcut: Ctrl + Alt + T)
2. Type the following command: sudo apt-get remove pinta
3. Type the following command: sudo apt-get autoremove
4. Type the following command: sudo add-apt-repository --remove ppa:pinta-maintainers/pinta-stable
1. Open the Terminal (Shortcut: Ctrl + Alt + T)
2. Type the following command: sudo apt-get remove pinta
3. Type the following command: sudo apt-get autoremove
4. Type the following command: sudo add-apt-repository --remove ppa:pinta-maintainers/pinta-stable
Illustrated Instructions:
1. Open the Terminal (Shortcut: Ctrl + Alt + T)
2. Type the following command: sudo apt-get update
3. Press Enter or Return and type in your password
1. Open the Terminal (Shortcut: Ctrl + Alt + T)
2. Type the following command: sudo apt-get update
3. Press Enter or Return and type in your password

4. Type the following command: sudo apt-get install pinta
5. Type Y and press Enter or Return
5. Type Y and press Enter or Return
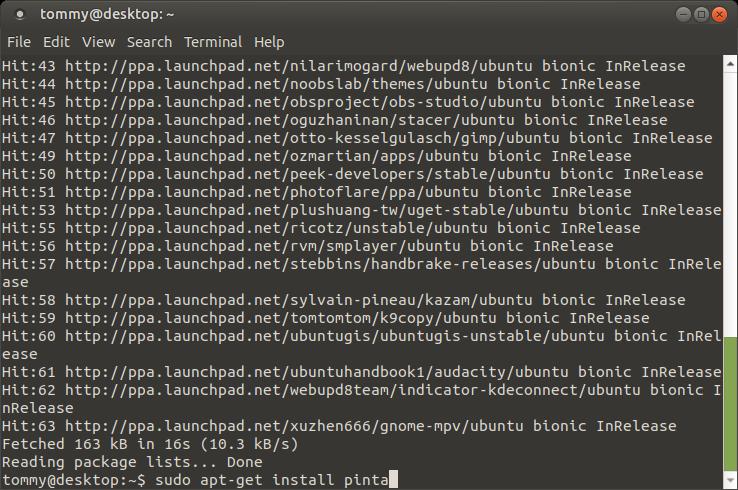
It doesn't take long to download and install Pinta. After it completes, you can close your Terminal and find Pinta in your Graphics menu.
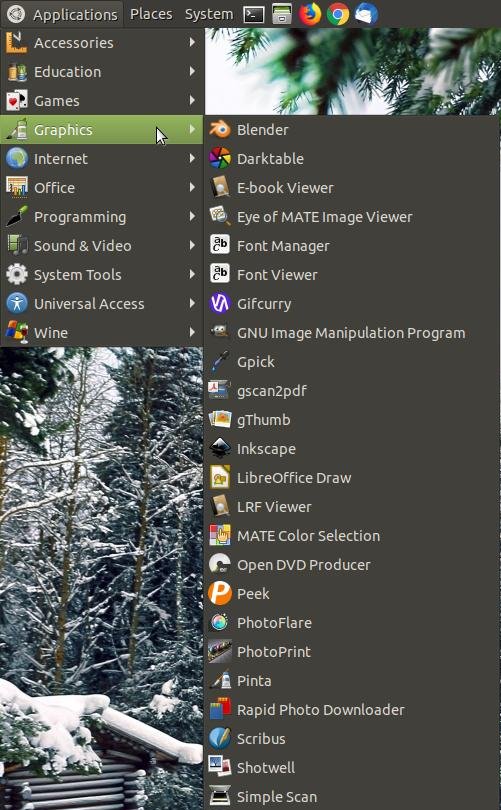
Click on the Applications menu, highlight Graphics, and then click on the Pinta icon.
Click on the Applications menu, highlight Graphics, and then click on the Pinta icon.
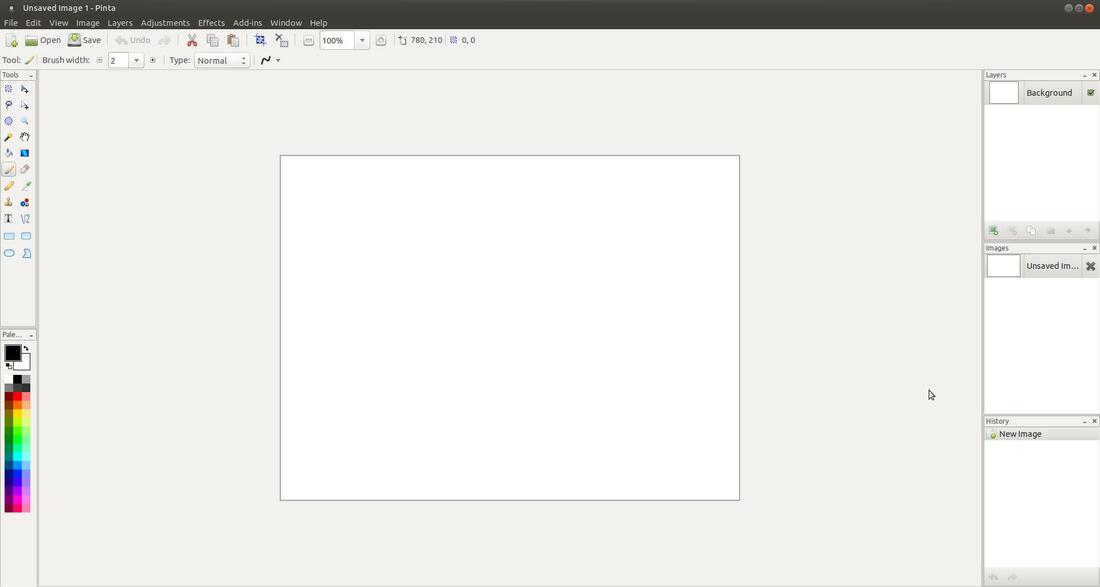
In a few moments, your Pinta program will load.
Features in Pinta 1.6:
- Redesigned shape tools:
- The Line tool now supports drawing curves and arrows
- Shapes remain editable after being drawn
- All shape tools now support drawing dashed lines
- All selection tools now support the Union, Exclude, Xor, and Intersection modes
- New community add-in repository - add-ins can be installed through the Add-in Manager dialog (via the Add-ins menu)
- Redesigned New Image dialog, which includes presets, orientation and background options, and a thumbnail preview of the image.
- The toolbox and color palette have a flexible layout and can expand horizontally, making them significantly more usable on small screens.
- When launching Pinta from the command line, the standard --version and --help options are now supported.
Getting Started with Pinta
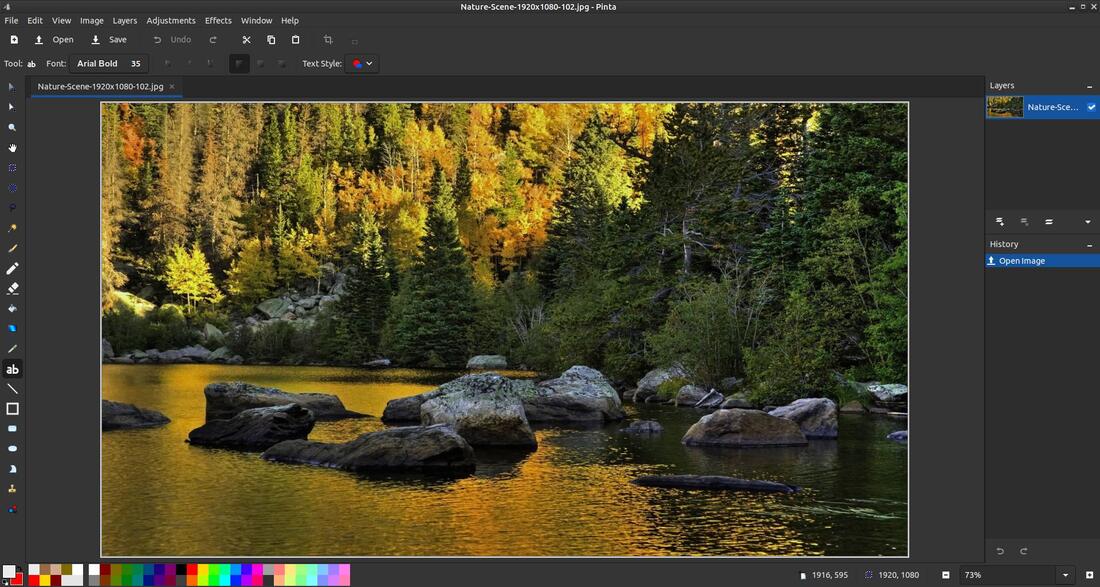
Pinta 1.6 has a nice user interface. When the window first loads, you'll notice it has an uncluttered layout that is similar to MS Paint and Adobe Photoshop. It has more advanced features compared to MS Paint, but it's not as robust as Adobe Photoshop.
Pinta 1.6 has a nice user interface. When the window first loads, you'll notice it has an uncluttered layout that is similar to MS Paint and Adobe Photoshop. It has more advanced features compared to MS Paint, but it's not as robust as Adobe Photoshop.
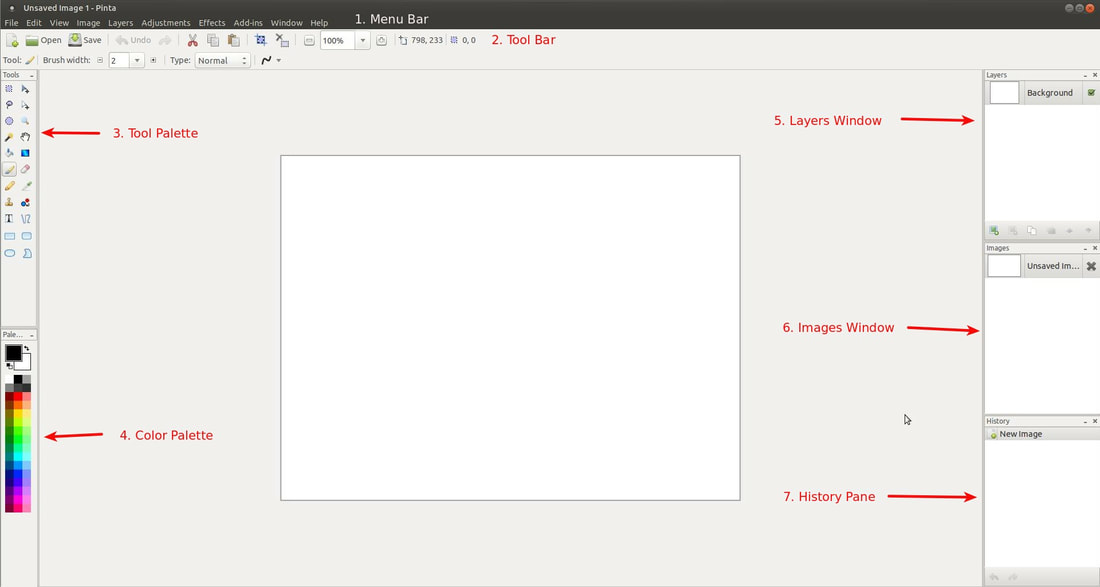
Parts of the Pinta Window:
1. Menu Bar - is located at the top, below the Title bar, and it contains drop-down menus.
2. Toolbar - is located under the Menu bar. It contains buttons and other elements which can be used to
perform quickly some of the more common operations. (a.k.a. Tool Bar)
3. Tool Palette - is located in the upper left under the Toolbar. It contains a group of icons or buttons
grouped together that provide you with a quick way to select commonly used functions by pointing
and clicking.
4. Color Palette - is located in the lower left under the Tool Palette. This provides you with quick access
to the available colors.
5. Layers Window - is located in the upper right corner under the Toolbar. It displays the number of
Windows and the active window. Layers in Pinta can be transparent, translucent, or opaque.
6. Images Window - displays the opened images that you can use as part of your layers.
7. History Pane - displays a list of commands or operations performed.
Here's a quick look through the menus.
The Tool Palette
The Tool Palette contains all of the basic tools you need to manipulate or edit an image. Below is a brief description of each tool.
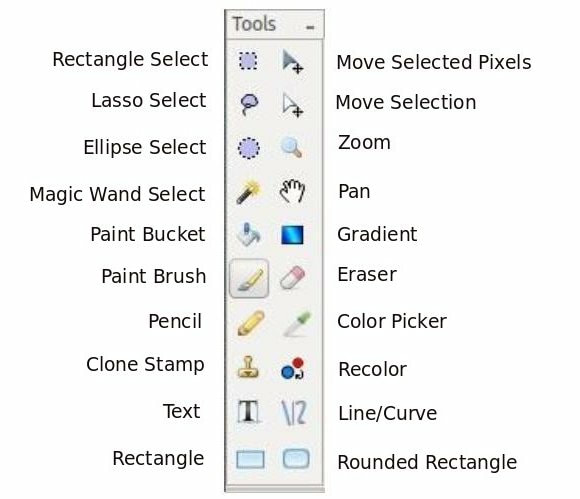
Rectangle Select - This tool is used to select portions of the picture. This tool selects rectangle sections only. When a portion of a picture is selected tools that are used will only work in the selected area. If a square selection is needed hold the shift key when selecting the area, this will make a square selection.
Move Selected Pixels - This tool is used to move, rotate and scale a selected section of the photo, or to move layers of the image made in Pinta.
Lasso Select - This tool is used to hand select which sections of the image you want selected. This is done by selecting this tool and the drawing around the portion of the image you want selected while holding down the left mouse button.
Move Selection - This tool is used to modify the size, rotation, and scale of what you are selecting. For example if you used to Rectangle Selection and made the rectangle too small for the area you wanted to select you can use this tool to resize and move the selection to where you want it to be.
Ellipse Select - This tool works in much the same way as the Rectangle Select except it select elliptical sections (like the rectangle tool if you hold shift down it will select a circle region instead of an ellipse).
Zoom - This tool is used to view the image being worked on more closely. After selecting this tool click on the section of the image you wish to view more closely.
Magic Wand Select - The magic wand tool is used to select sections of the image that are similar. This tool can be adjusted to grab more or less of the image that resembles where it was used.
Pan - This tool is used to move around in the image when the image is larger than the screen. To use this tool click in an area (the best area to select is somewhere in the middle of the picture) then hold down the left mouse button and move the cursor. The image will move as if you grabbed the image where you clicked and pushed or pulled the image in the direction that you moved the cursor.
Paint Bucket - This tool is used to fill areas of similar color with another solid color.
Gradient - This tool is used to gradients in colors as well as image fading between images.
Paint Brush - This tool is used to free hand markings on the image. These markings can be made in the selected color and in a verity of sizes.
Eraser - This tool is used to remove parts of an image or layer. When used on an image, or bottom layer it will leave a transparent background. When used on a layer other than the bottom one this will leave a hole in the layer that will show the underlying layer.
Pencil - This tool is used to make free hand markings that are 1 pixel in size.
Color Picker - This tool is used to select a color from the image you are working on.
Clone Stamp - This tool is used to select a section of the picture that will be replicated into another section. This can be useful for eliminating troublesome sections that has multiple colors, patters, or textures as it will replicate those section as place them in the image.
Recolor - This tool used to replace the one color with another.
Text - This tool is used to add text to the image. This tool has the options to change the font with any font loaded on your computer as well as the font color.
Line/Curve - This tool is used to create either straight or curved lines. In the options toolbar (located under the menu bar, is a selection for adding arrows to the begging or end of the line being created.
Rectangle - This tool is used to create rectangles that can be either outlines, or filled shapes.
Rounded Rectangle - This tool is similar to the rectangle tool except it creates rectangles with rounded corners.
Quick Edits
Crop - Use the Rectangle Select Tool and select an area by dragging the mouse and then click on the Image menu and select Crop to Selection or use the shortcut keys Shift+Control+X.
Crop - Use the Rectangle Select Tool and select an area by dragging the mouse and then click on the Image menu and select Crop to Selection or use the shortcut keys Shift+Control+X.
Zoom - You can zoom in by pressing and holding down the Control button while scrolling up with the mouse wheel or you can zoom out by scrolling dow. If you don't use a mouse then you can use shortcut keys. To zoom in press Control and + (Ctrl++) on your keyboard and to zoom out press Control and - (Ctrl+-) on your keyboard. Short cut keys Control and 0 (Ctrl+0) allow you to view an image at Normal Size and Control and B (Ctrl+B) allow you to view an image at Best Fit. Pressing the F11 key puts you in Fullscreen view.
Pixelate - You can blur parts of your digital photos by using the Pixelate Effect. This gives you the ability to censor or maintain the anonymity of the subject(s) in your picture. To pielate an object you must first select it using Rectangle Select, Lasso Select, or Ellipse Select and then click on the Effects menu, highlight Distort, and click-on Pixelate... When the Pixelate dialog box appears, you can increase or decrease the cell size. Increasing the cell size adds more blur to an object. This is great for teachers to protect the anonymity of students in their class. You can also use it to distort your mailing address, telephone number, IP address, automobile's license tag number, and more.
Children Playing Outside (Public Domain)
Screenshot - Pinta has a built in screenshot tool that allows you to capture your desktop image. You can then edit your captured image. To capture your desktop, click on the File menu and then click on the New Screenshot... command. When the Take Screenshot dialog box appears, you can enter a number in the "Delay before taking a screenshot (seconds)." This will allow you to delay taking the screenshot so that you can minimize Pinta so that it will not appear the the screenshot image. This works great for creating thumbnail images for your YouTube videos.

"Pinta itself does not have a built in printing prompt, meaning that you cannot print directly from Pinta." I highly recommend Photoprint for all your printing needs.
Pinta 2.0.2
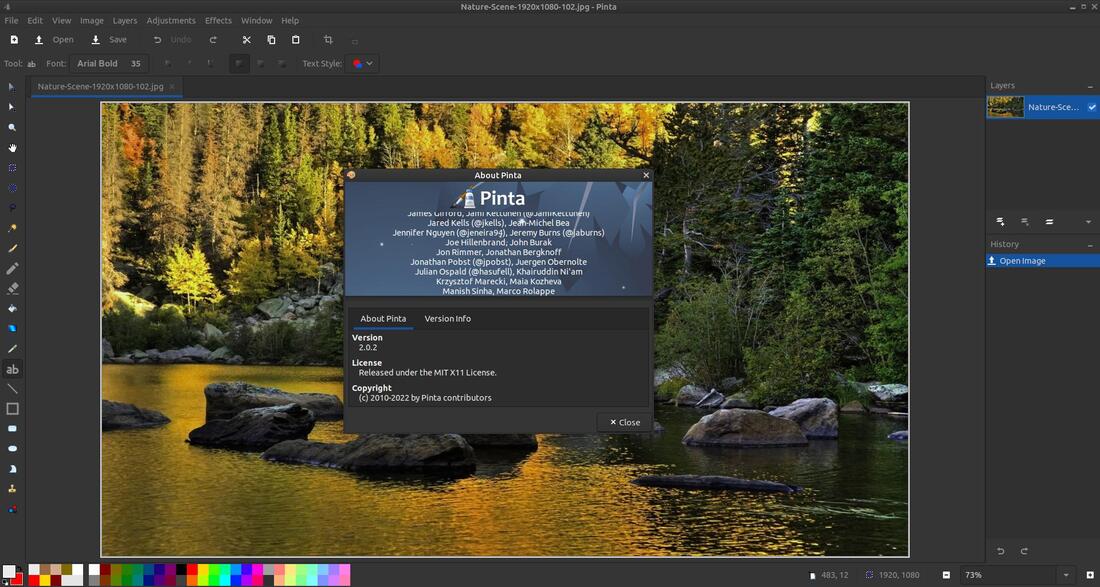
Pinta 2.0.2
Feb 6, 2019
