
Vivaldi Browser
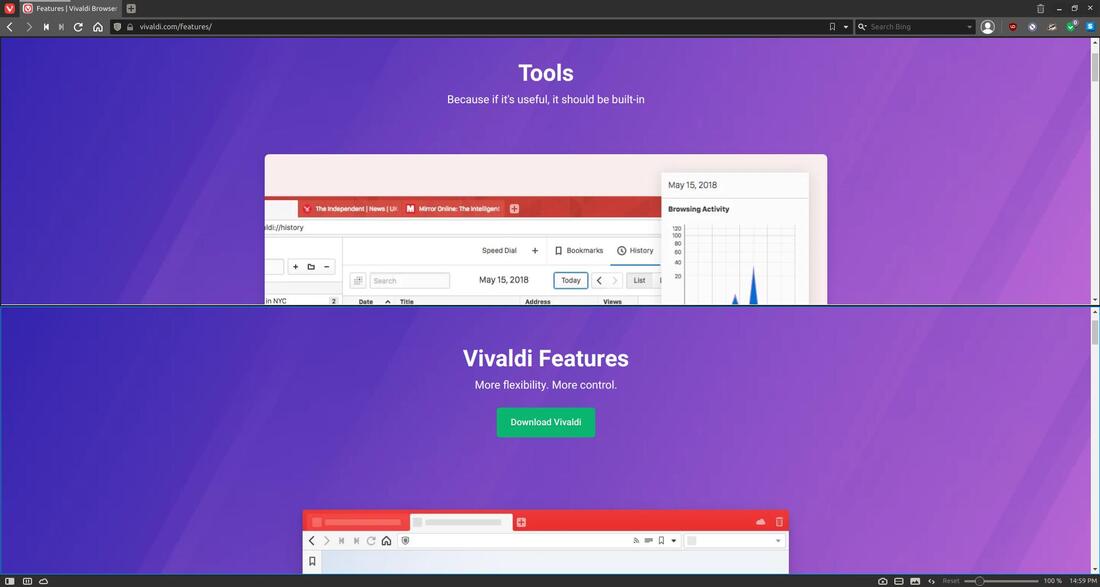
Vivaldi is a web browser that is fast, private and secure. It has an integrated ad blocker that blocks ads and trackers.
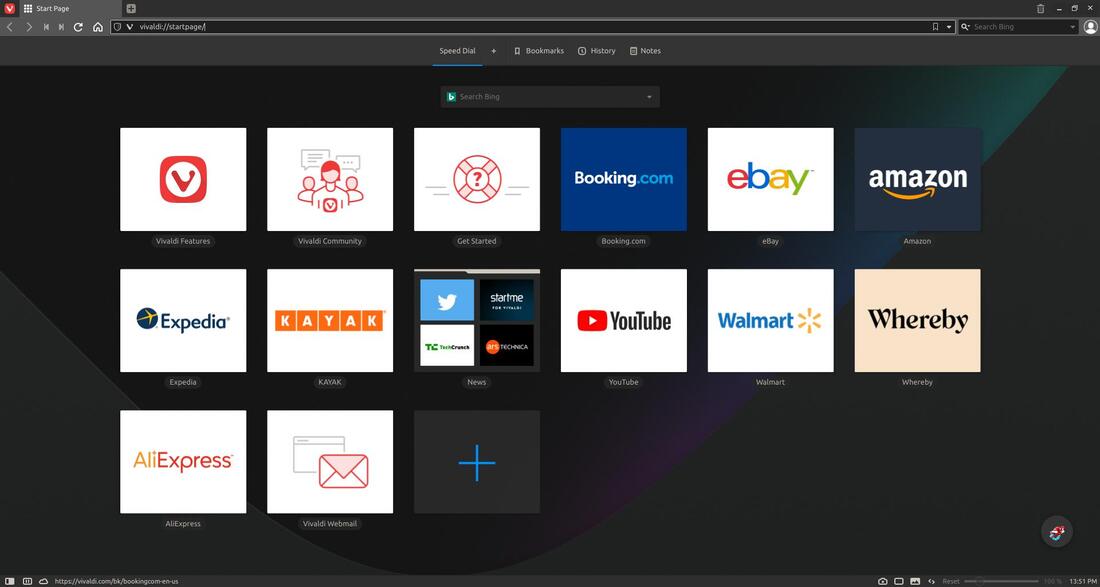
Vivaldi comes with Speed Dials that allow you to quickly access your favorite websites from the Start Page. Vivaldi also allows you to play HTML5 “proprietary” (H.264 video & AAC audio) audio and video. Since Vivaldi is built using the Chromium web browser, extensions available in the Chrome Web Store can also be installed in Vivaldi.
How to Install Vivaldi:
Method 1:
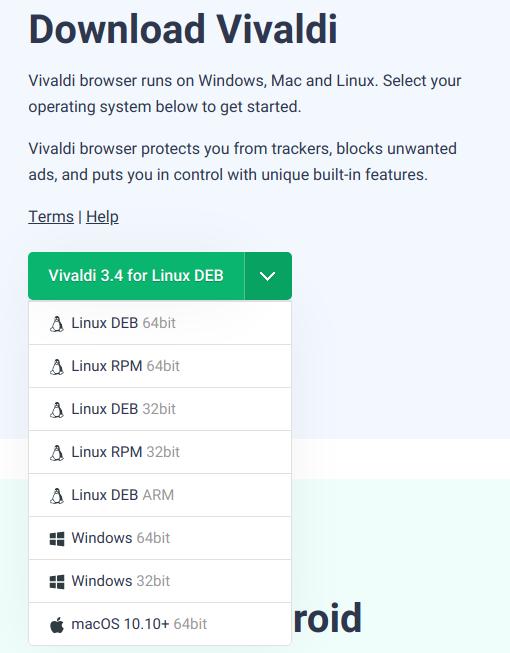
You can go to the Download section of the Vivaldi website and download the installation file for your operating system.
Method 1:
You can go to the Download section of the Vivaldi website and download the installation file for your operating system.
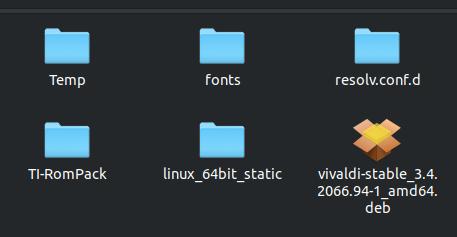
I downloading the Linux DEB 64bit file for my Ubuntu MATE 18.04.5 LTS. Double-click the file that you downloaded to start the installation process. (Install GDebi in Ubuntu based distributions: sudo apt install gdebi)
The file should open in your Package Installer. Click the Install Package button to start the installation process.
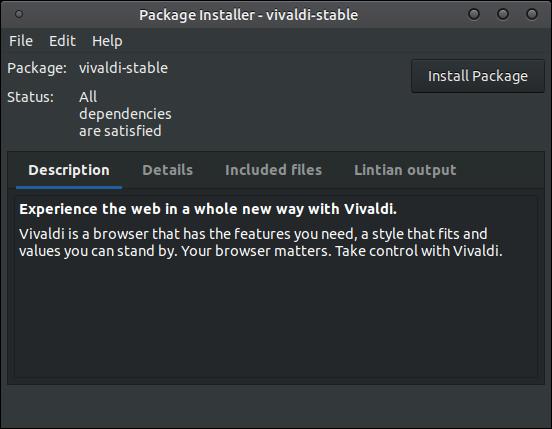
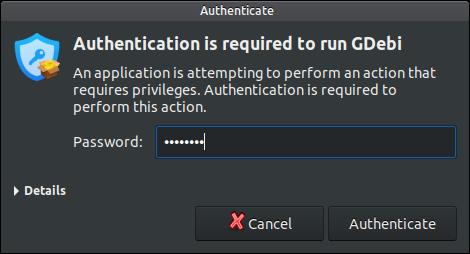
Enter your password when the Authentication dialog box appears. Then click the Authenticate button.
Do not shut the Package Installer until you see the two buttons Reinstall Package and Remove Package buttons.

Method 2:
Import the public key (to allow for verification of the APT repository) – triple-click to select the entire line
wget -qO- https://repo.vivaldi.com/archive/linux_signing_key.pub | gpg --dearmor | sudo dd of=/usr/share/keyrings/vivaldi-browser.gpg
Add the repository – triple-click to select the entire line
echo "deb [signed-by=/usr/share/keyrings/vivaldi-browser.gpg arch=$(dpkg --print-architecture)] https://repo.vivaldi.com/archive/deb/ stable main" | sudo dd of=/etc/apt/sources.list.d/vivaldi-archive.list
Install Vivaldi
sudo apt update && sudo apt install vivaldi-stable
How to Uninstall Vivaldi:
1. Open the Terminal (Shortcut: Ctrl + Alt + T)
2. Type the following: sudo apt remove vivaldi-stable
1. Open the Terminal (Shortcut: Ctrl + Alt + T)
2. Type the following: sudo apt remove vivaldi-stable
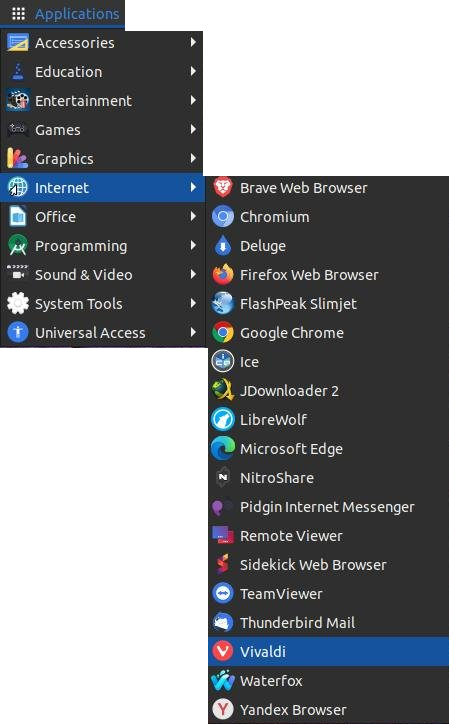
You should see the Vivaldi icon in your menu within the Internet submenu.
Built in Ad & Tracker Blocker
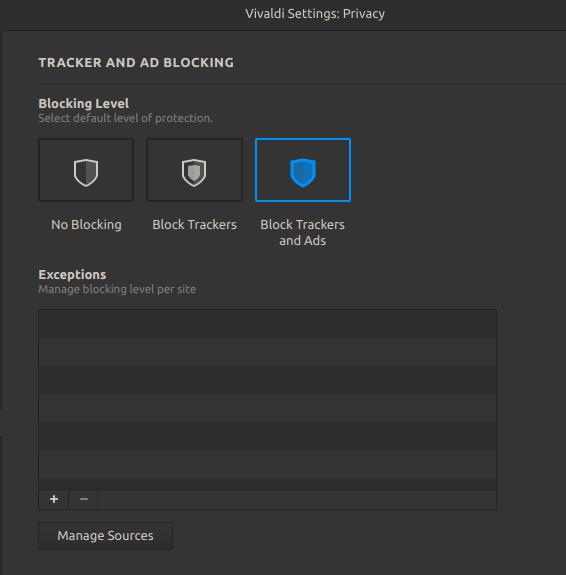
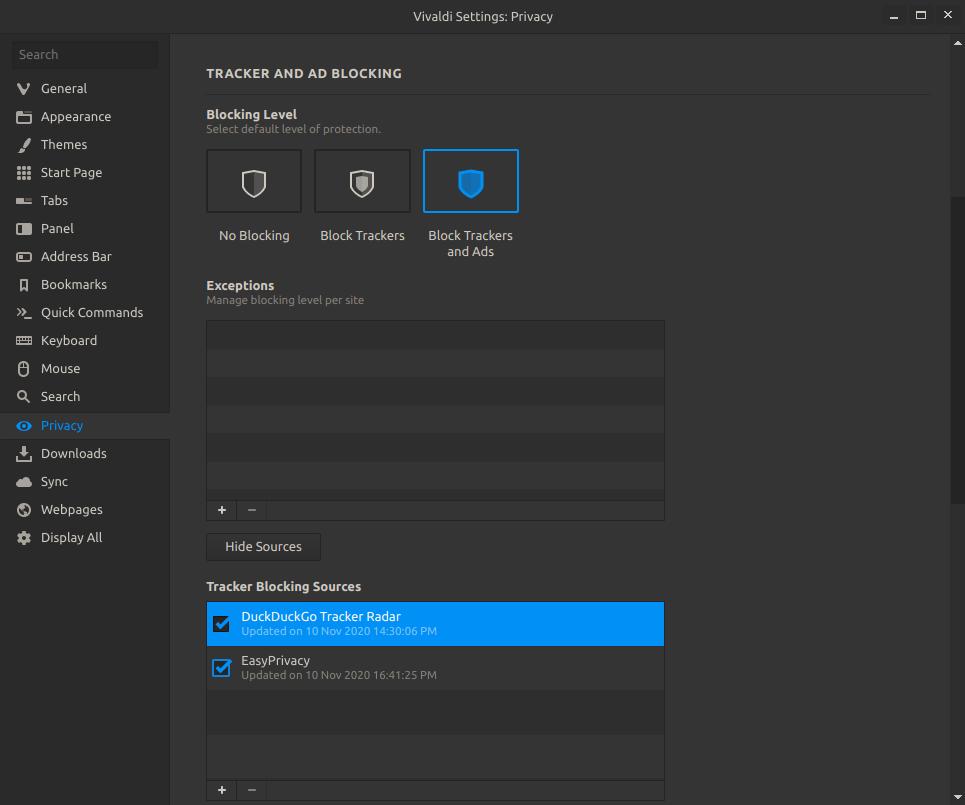
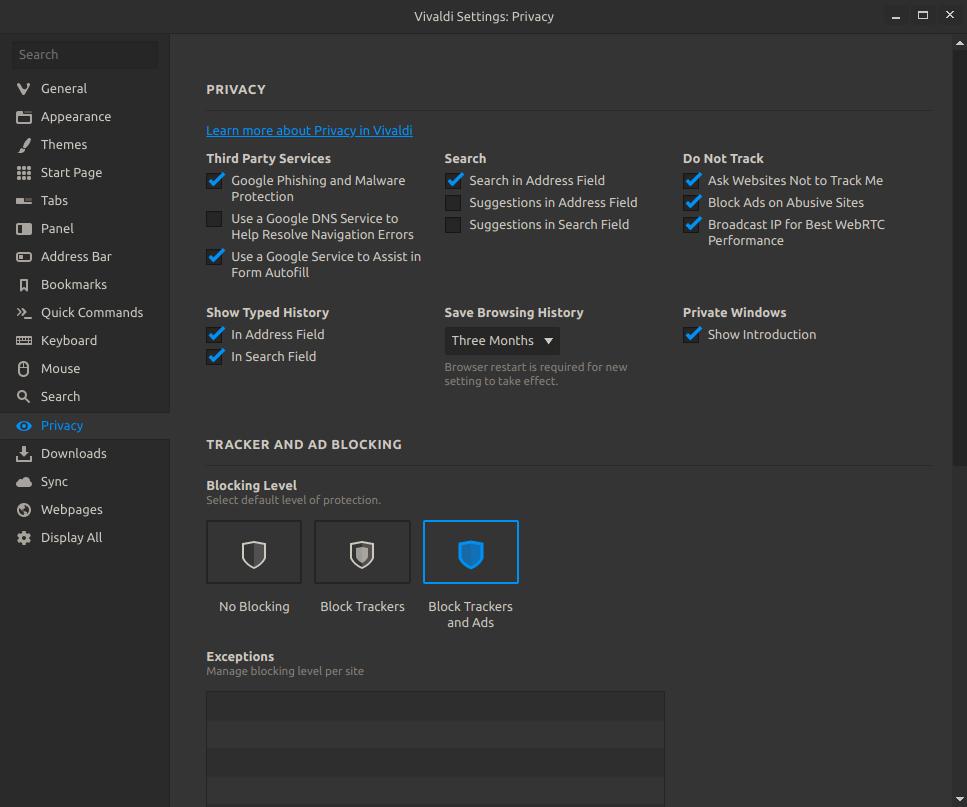
Vivaldi has a built-in ad blocker that blocks those annoying ads that increase load times and use your Internet data. A great ad blocker is a must for if you have a limited data plan. Vivaldi also has a tracker blocker that prevents most web trackers from monitoring your surfing habits and collecting your personal data. You can click on the small shield icon on the left side of your address bar to see or change your blocking level. By default, Vivaldi blocks trackers and ads; however, you can select No Blocking to allow ads and trackers or select Block Trackers to allow ads and just block trackers or leave Block Trackers and Ads (Default) to continue to block ads and trackers.
Vivaldi has a built-in ad blocker that blocks those annoying ads that increase load times and use your Internet data. A great ad blocker is a must for if you have a limited data plan. Vivaldi also has a tracker blocker that prevents most web trackers from monitoring your surfing habits and collecting your personal data. You can click on the small shield icon on the left side of your address bar to see or change your blocking level. By default, Vivaldi blocks trackers and ads; however, you can select No Blocking to allow ads and trackers or select Block Trackers to allow ads and just block trackers or leave Block Trackers and Ads (Default) to continue to block ads and trackers.

You can click the Manage Default Settings button to bring up your Vivaldi Settings: Privacy dialog box. You can change your Blocking Level, add or remove Exceptions, and Manage Sources.
If you click the Manage Sources button it will display your Tracker Blocking Sources or blocking lists. By default you should see two options in your list: DuckDuckGo Tracker Radar and EasyPrivacy. The DuckDuckGo Tracker Radar will be enabled or selected. You can also enable or select EasyPrivacy for additional protection.
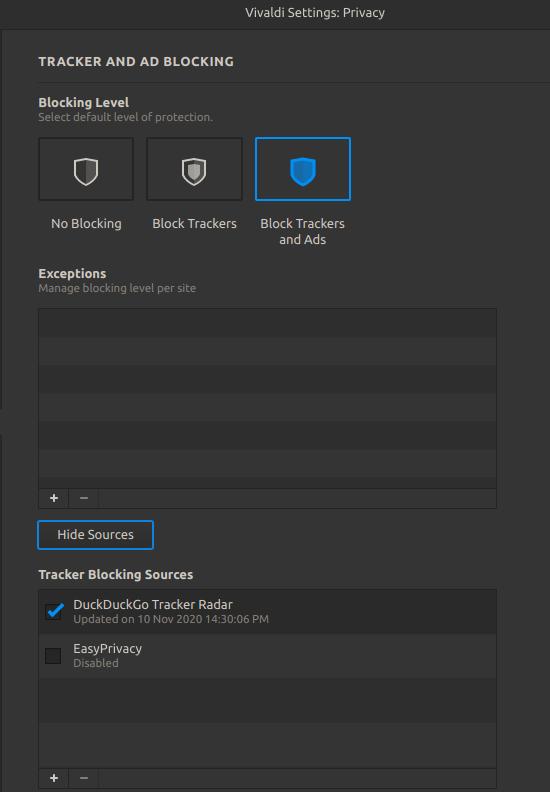
You can select EasyPrivacy under Tracker Blocking Sources to add an extra layer of protection to help prevent you from from being tracked online. "EasyPrivacy is an optional supplementary filter list that completely removes all forms of tracking from the internet, including web bugs, tracking scripts and information collectors, thereby protecting your personal data."
Extensions
Vivaldi is built using the Chromium web browser project; therefore, extensions available in the Chrome web store can also be installed on Vivaldi. Extensions increase the functionalty and allow you to further customize your Vivaldi web browser. For more information on using and managing extensions, check out Vivaldi's Help section on Using Extensions.
You can install your preferred adblocker and pop-up blocker if you want from the Chrome Web Store. Here's some recommended extensions:
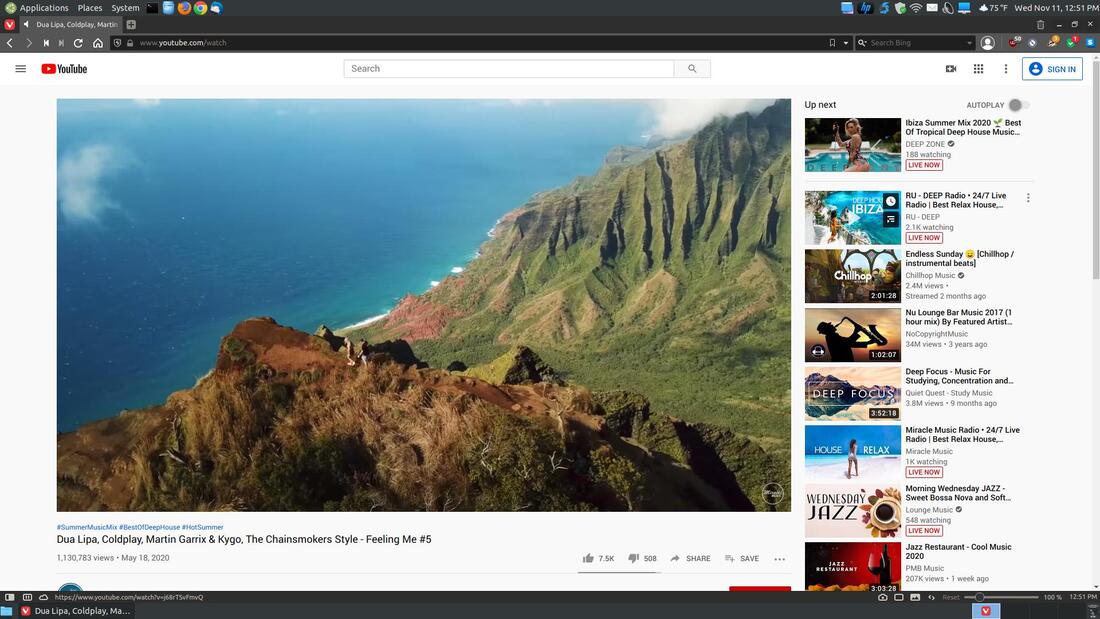
I installed uBlock Origin, Poper Blocker, Privacy Badger, TrafficLight, HTTPS Everywhere, Bitwarden, SponsorBlock, and Malwarebytes Browser Guard in Vivaldi.

I no longer see the Skip Ad button on YouTube videos.
Tab Stacks
Tab Stacks are group of browser tabs in one tab. Using Tab Stacks helps you stay organized while you surf online and helps reduce clutter at the top of your browser. In my example below, you only see one tab when I have five open tabs. At the top of the tab you can see a flat line for each tab within the group.
Tab Stacks are group of browser tabs in one tab. Using Tab Stacks helps you stay organized while you surf online and helps reduce clutter at the top of your browser. In my example below, you only see one tab when I have five open tabs. At the top of the tab you can see a flat line for each tab within the group.

Notice that my browser displays only one tab when I currently have five open tabs.
You can hover your mouse pointer over your tab to display a thumbnail of each open tab.
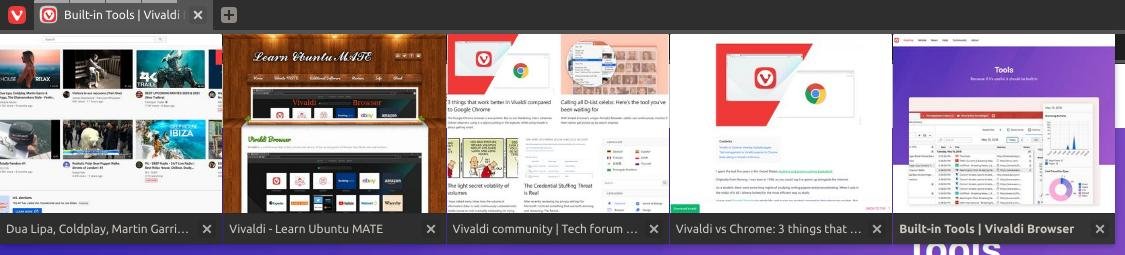
Here's what the entire browser looks like when you hover your mouse pointer over the browser tab.
Click a thumbnail image to change tabs.
You can drag a thumbnail image back to your titlebar to remove it from your Tab Stack. For more infomation on Tab Stacks click the link Creating Tab Stacks.
View Tabs in a Split Screen
Vivaldi has a feature called Tab Tiling which allows you to create split views of a Tab Stack.
Vivaldi has a feature called Tab Tiling which allows you to create split views of a Tab Stack.
Tile Vertically
Select the Tab Stack you want to create a split screen and then click the Page Tiling icon in the lower right corner of the browser. Page tiling allows you to tile the current tab selection, Tab Stack, or last active tile. You will be presented with four options: Tile vertically, Tile horizontally, Tile to grid, and Untile pages.
Tile Horizontally
Status Bar
Vivaldi's Status Bar is located at the bottom of the browser's window.
Vivaldi's Status Bar is located at the bottom of the browser's window.

The features and descriptions are:
- Show Panel is located in the lower far left which allows you to show or hide the panel.
- Take a Break Mode can be toggled on/off
- Sync settings is the cloud icon
- Page info will display the current status of the web page. For example: "Establishing secure connection”
If you hover over links on web pages, the URL behind the link will be displayed on the Status Bar. - Capture Page take a screenshot of the web page.
- Page tiling allows you to view multiple tabs side by side in the same window.
- Toggle images allows you to choose whether images are to be visible in web pages or not or if only cached images are to be shown. You can also decide whether to loop animations, play them just once or never.
- Page actions provides web-page specific features.
- Page zoom allows you to set the page zoom by using the Page zoom slider. Switch to range buttons in Settings > Appearance > Window Appearance > Use Buttons in Range Controls.
- Status Bar Clock allows you to start countdowns, set alarms or just check the time.
Show Panel
This feature is located in the lower far left which allows you to show or hide the panel. It works like a toggle switch. Click it once to to display the panel and click it again to hide the panel.
This feature is located in the lower far left which allows you to show or hide the panel. It works like a toggle switch. Click it once to to display the panel and click it again to hide the panel.
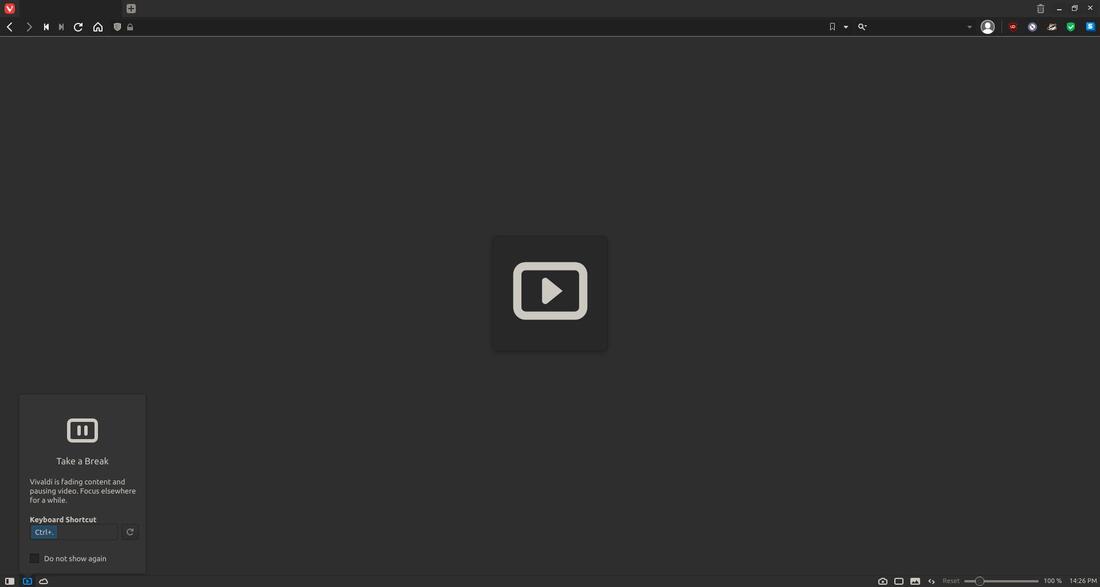
Break Mode
Clicking the Take a Break icon in the lower left will allow you to pause the Internet and focus on something else until you’re ready to return. Enabling Break Mode mutes and stops HTML5 audio and videos, hides all Tabs, Panels and other content leaving the screen clean. This feature works like a toggle switch. Click it once to to go into Break Mode and click it again to return to your normal browsing.
Clicking the Take a Break icon in the lower left will allow you to pause the Internet and focus on something else until you’re ready to return. Enabling Break Mode mutes and stops HTML5 audio and videos, hides all Tabs, Panels and other content leaving the screen clean. This feature works like a toggle switch. Click it once to to go into Break Mode and click it again to return to your normal browsing.
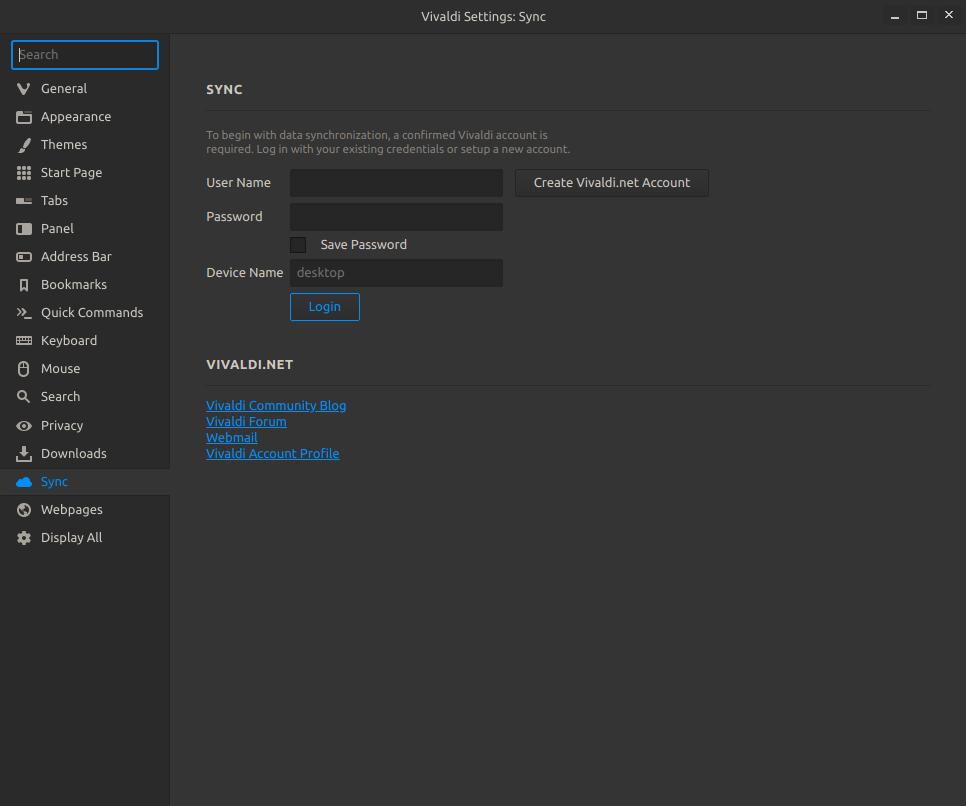
Sync
With the Sync or Synchronization feature you can synchronize your Vivaldi browser data, such as bookmarks, settings, history across multiple devices. You'll need to have a Vivaldi account to use this feature. For more information please check out Vivaldi Help: Sync.
With the Sync or Synchronization feature you can synchronize your Vivaldi browser data, such as bookmarks, settings, history across multiple devices. You'll need to have a Vivaldi account to use this feature. For more information please check out Vivaldi Help: Sync.
Page Info
Page info will display the current status of the web page. For example: "Establishing secure connection”
If you hover over links on web pages, the URL behind the link will be displayed on the Status Bar.
Page info will display the current status of the web page. For example: "Establishing secure connection”
If you hover over links on web pages, the URL behind the link will be displayed on the Status Bar.

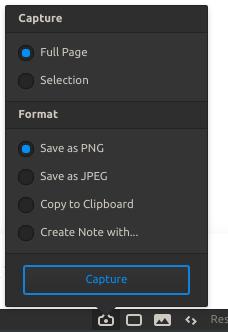
Capture Page
Capture Page will take a screenshot of the current web page. The capture tool lets you capture either a Full Page screenshot, or a Selection of the screen that you define.
Capture Page will take a screenshot of the current web page. The capture tool lets you capture either a Full Page screenshot, or a Selection of the screen that you define.
Page Tiling
Page tiling allows you to view multiple tabs side by side in the same window. It will split your tabs within your Tab Stack.
Page tiling allows you to view multiple tabs side by side in the same window. It will split your tabs within your Tab Stack.
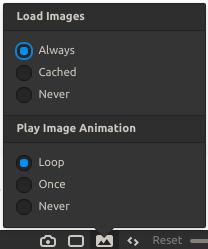
Toggle Images
Toggle images allows you to choose whether images are to be visible in web pages or not or if only cached images are to be shown. You can also decide whether to loop animations, play them just once or never.
Toggle images allows you to choose whether images are to be visible in web pages or not or if only cached images are to be shown. You can also decide whether to loop animations, play them just once or never.
Page Actions
Page actions provides web-page specific features. There's a list of custom filters that modify the look of a webpage.
Available Page Actions:
Page actions provides web-page specific features. There's a list of custom filters that modify the look of a webpage.
Available Page Actions:
- CSS Debugger – outlines various element types for a simple CSS inspection
- Filter Black and White – turns the page into black and white
- Filter Grayscale – changes the page’s colors to grayscale
- Filter Intensity – adds saturation and contrast to the images on the site
- Filter Invert – flips the page colors (i.e. turns white to black)
- Filter Obscure – hides the content by blurring the page when the mouse cursor is moved outside of the window
- Filter Sepia – changes the page’s color scheme to reddish-brown
- Fonts Monospace – forces the text to be displayed in a monospace font. You can change the used font in Settings > Webpages > Fonts > Monospace
- Highlight Focus – displays a box around the focused content
- Highlight Hover – displays a box around the content the mouse cursor is hovering over
- Inline Access Keys – shows the available keyboard shortcuts to interact with the website’s key features
- Page Minimap - places a miniature map of the current webpage that is often placed in the right corner
- Reader View – enables Vivaldi’s reader mode (if applicable)
- Skewed Images – tilts images at an angle
- Transform 3D – distorts the whole page on hover
- Transition Forced – makes transitions more prominent
- Transition Removed – disables transitions

Page Zoom
Here's an example of using the Page zoom feature by moving the slider. This is a great feature for those websites that use small fonts or for people that are farsighted.
Here's an example of using the Page zoom feature by moving the slider. This is a great feature for those websites that use small fonts or for people that are farsighted.
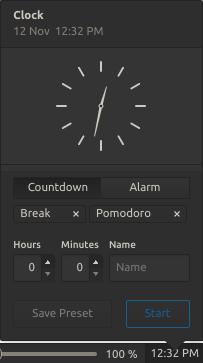
Status Bar Clock
The bottom right corner of the browser on the Status Bar is the Clock or Status Bar Clock. It tells the current time and it allows you to set reminders.
The bottom right corner of the browser on the Status Bar is the Clock or Status Bar Clock. It tells the current time and it allows you to set reminders.
Left-Click Clock
|
Right-Click Clock
|
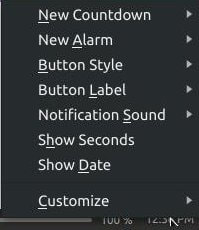
Customize the Clock
You can customize your clock by right-cking it and select an option via the pop-up menu. Here's a list of your menu options:
* New Countdown - is a countdown clock to remind you of certain events.
Break is a timer allows you to set up customizable breaks and will remind you to take them.
Pomodoro is a timer designed to make you concentrate on one task at a time. (Example:
Kitchen Timer)
* New Alarm - is a feature designed to alert you of a specified time.
Lunch is a feature that allows you to set a time to remind you when it is lunch time.
Meeting is a feature that allows you to set a time to remind you when you have a meeting.
* Button Style - is a feature that allows you to change the appearance of you clock.
Image and Text will allow you to display a clock icon and text (numbers & letters).
Image Only allows you to display a clock icon for the clock.
Text Only allows you to display text or numbers & letters for the clock (Default).
* Button Label - is the name or information displayed when an alram is set.
Show Name will display the name of the device.
Time Only will display only the time.
* Notification Sound - allows you to set the sound you hear for notifications.
None will produce no sound.
Ding will produce a ringing sound.
Rooster will produce a rooster crowing sound ("cock-a-doodle-doo").
Tada will produce a Ta-dah! sound meaning "that there."
* Show Seconds - allows you to display seconds on the clock.
* Show Date - allows you to display the day and month to the right of your clock.
* Customize - is a feature to allow you to modify your clock on the Status Bar.
Remove From Toolbar will remove the clock from the Status Bar.
Reset Toolbar to Default will restore the clock back to its original state.
User Profiles
User profiles allow multiple “users” to share one Vivaldi installation, without requiring you to log in to a different operating system user account, or maintain multiple Standalone installations.
User profiles allow multiple “users” to share one Vivaldi installation, without requiring you to log in to a different operating system user account, or maintain multiple Standalone installations.
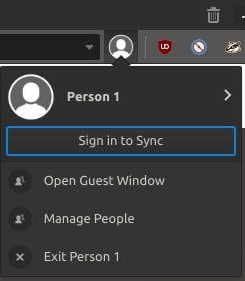
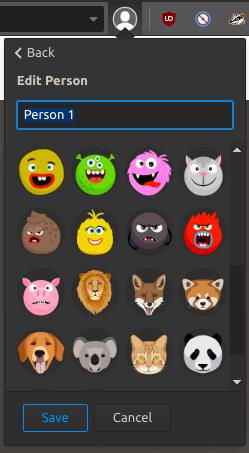
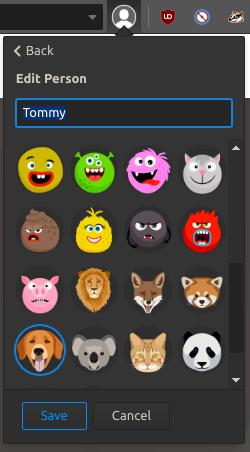
Click Person 1 will allow you to name a user profile and select an icon. I replaced Person 1 to my name and I selected a dog as my profile icon.
|
|
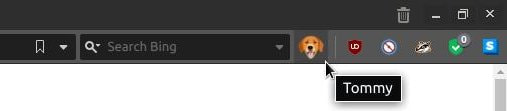
You will see your new icon to the right of your search bar.

You will see your profile name if you hover your mouse pointer over the profile icon.
Menus
You can access Vivaldi Menus by clicking on the V icon in the upper left corner. You can navigate through the menus: File, Edit, View, Bookmarks, Tools, Window, and Help.
You can access Vivaldi Menus by clicking on the V icon in the upper left corner. You can navigate through the menus: File, Edit, View, Bookmarks, Tools, Window, and Help.
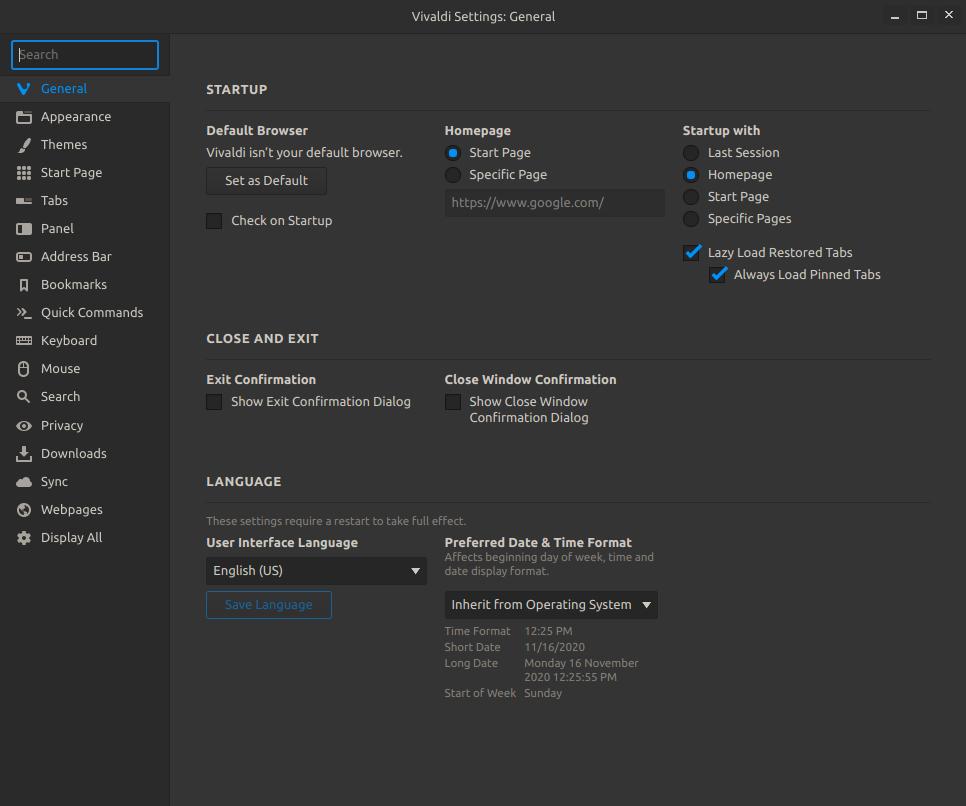
Vivaldi Settings
You can access Vivaldi Settings by clicking on the Show Panel icon in the lower left corner of the browser. Then click the gear or Settings icon. The Vivaldi Settings dialog box will appear.
You can access Vivaldi Settings by clicking on the Show Panel icon in the lower left corner of the browser. Then click the gear or Settings icon. The Vivaldi Settings dialog box will appear.

You will see a Search and seventeen tabs on the left of the dialog box. You can search for the setting you want by entering it in the search box.
General
The first tab in the list is the General tab. You can change your start page, how the browser behaves when you exit the program, user interface language, and preferred date and time.
General
The first tab in the list is the General tab. You can change your start page, how the browser behaves when you exit the program, user interface language, and preferred date and time.
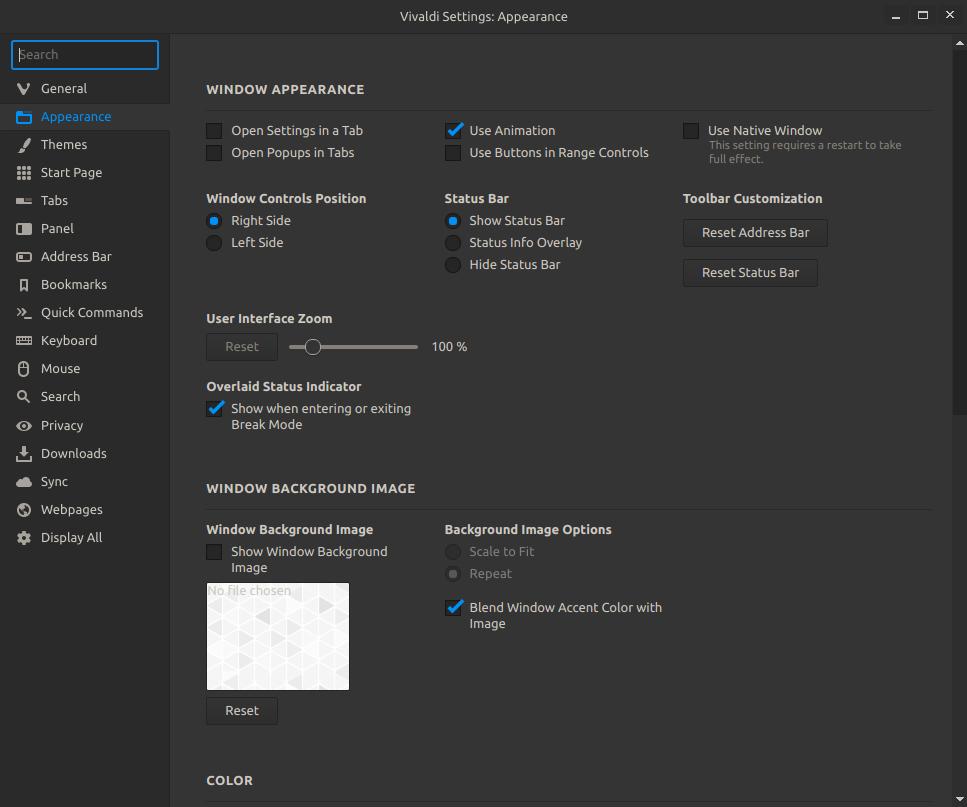
Appearance
The Appearance tab allows you to customize the way the browser looks and behaves.
The Appearance tab allows you to customize the way the browser looks and behaves.
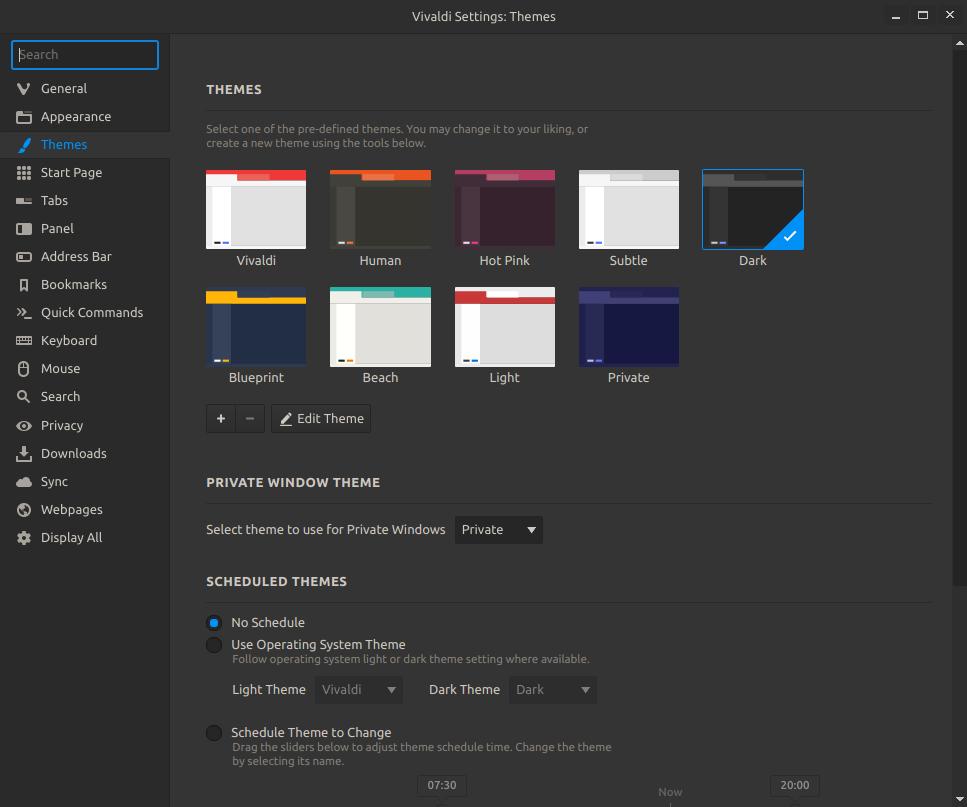
Themes
The Themes tab allows you to select a preset package containing graphical appearance and functionality details.
The Themes tab allows you to select a preset package containing graphical appearance and functionality details.
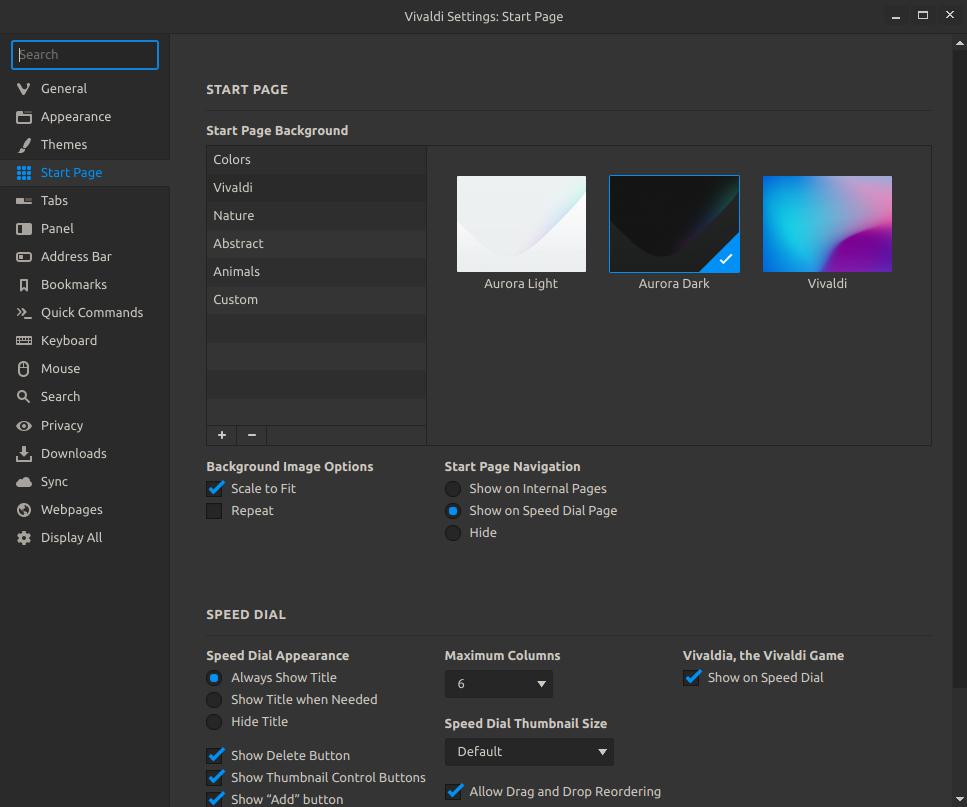
Start Page
The Start Page tab allows you to configure the appearance of you start page, opening, or main page.
The Start Page tab allows you to configure the appearance of you start page, opening, or main page.
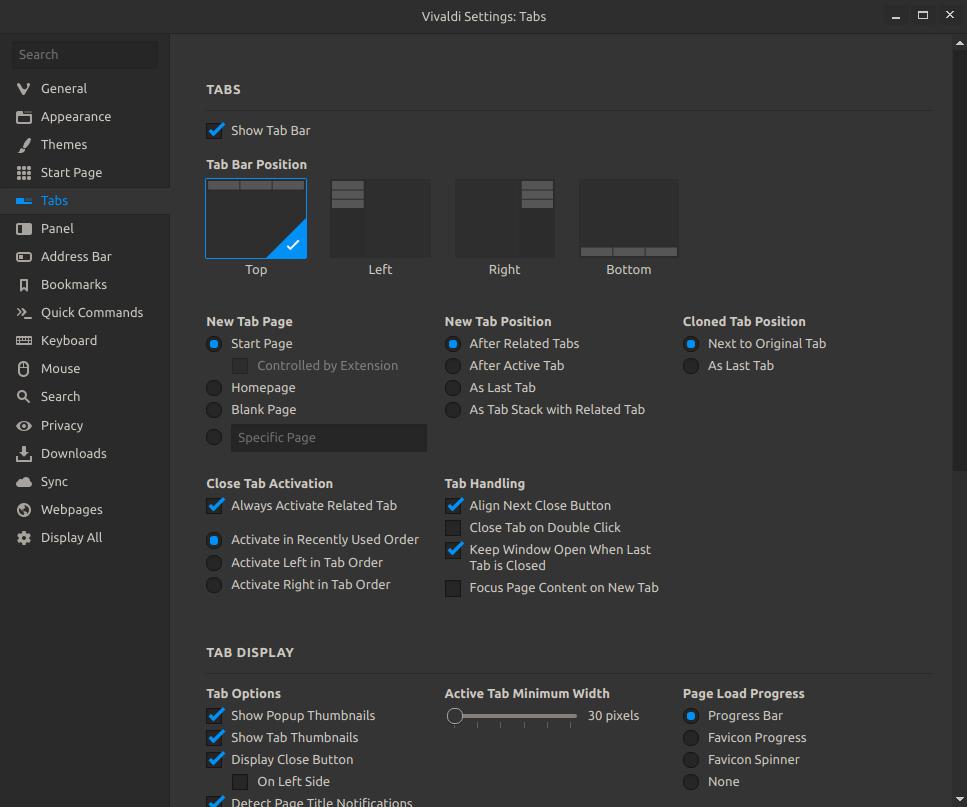
Tabs
The Tabs tab allows you to customize the way your new tab looks and behaves.
The Tabs tab allows you to customize the way your new tab looks and behaves.
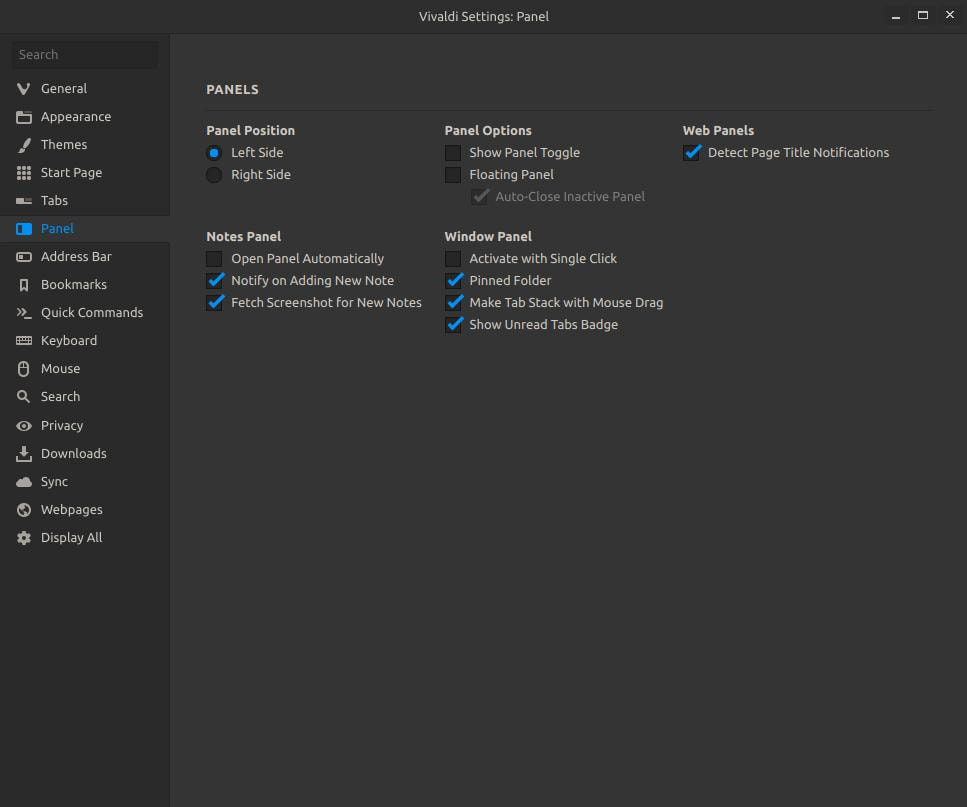
Panel
The Panel tab allows you to customize the way your panel looks and behaves.
The Panel tab allows you to customize the way your panel looks and behaves.
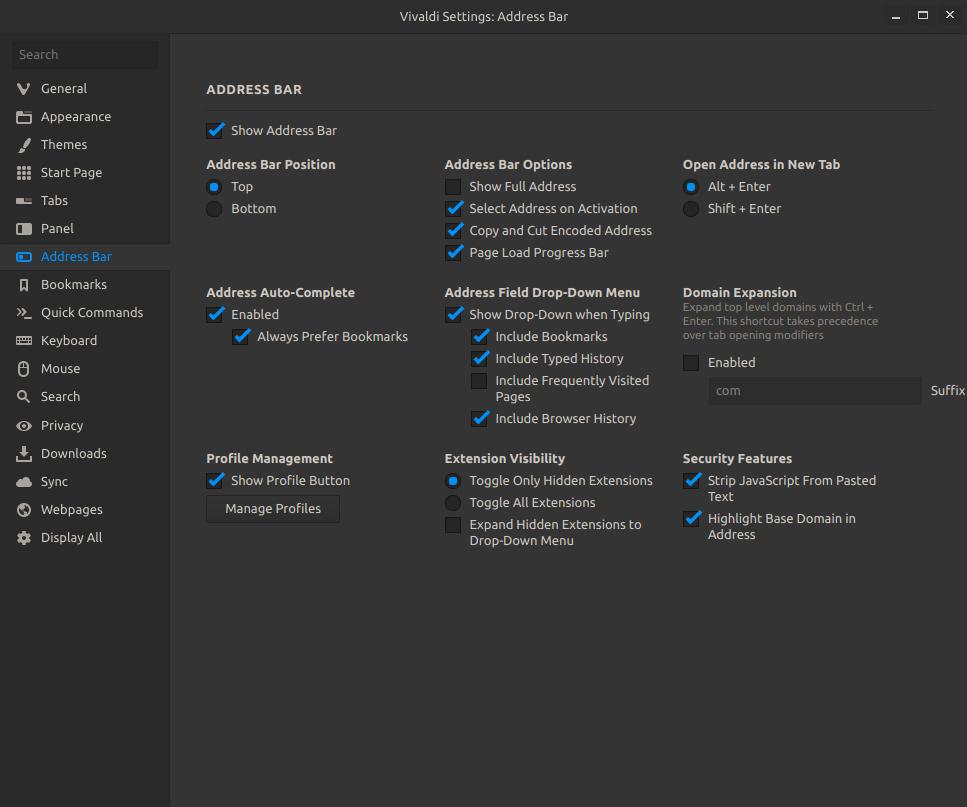
Address Bar
The Address Bar tab allows you to configure the way your address bar looks and behaves.
The Address Bar tab allows you to configure the way your address bar looks and behaves.
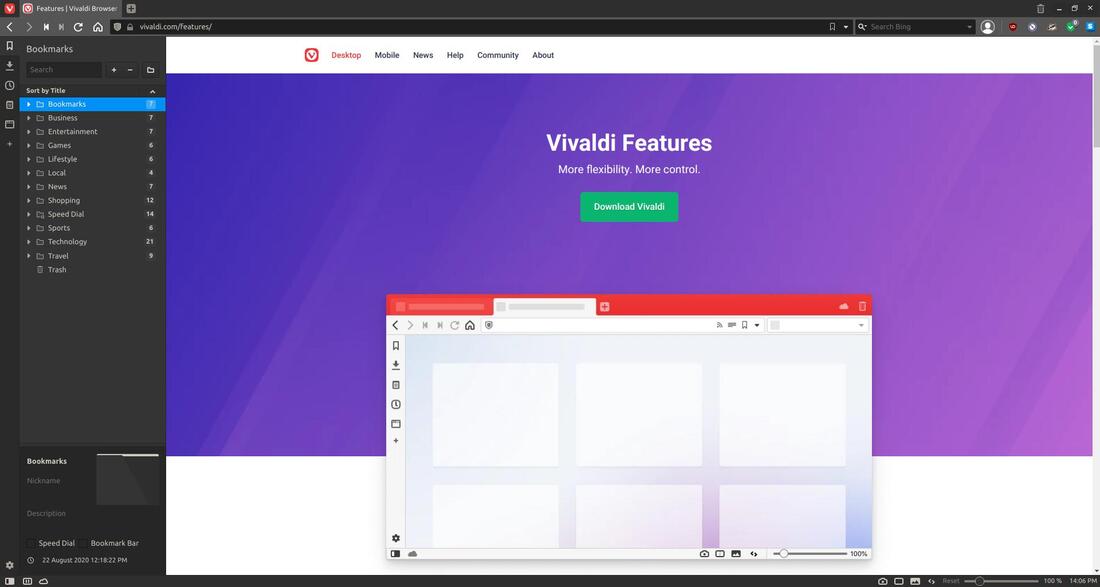
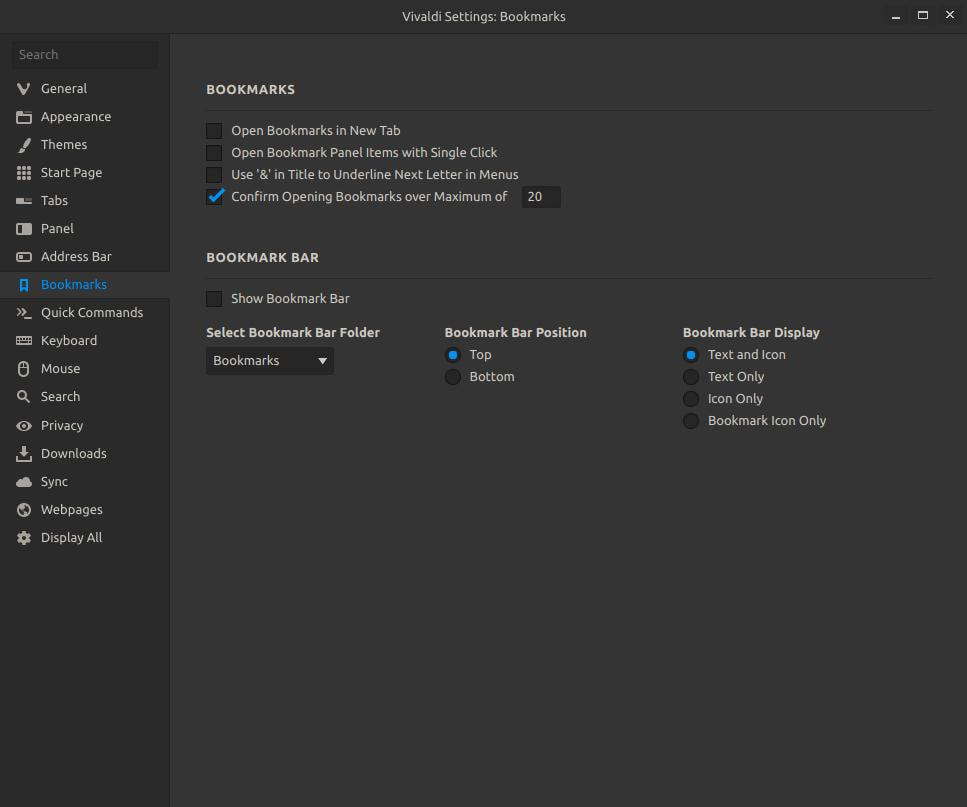
Bookmarks
The Bookmarks tab allows you to configure the way your bookmark bar looks and behaves.
The Bookmarks tab allows you to configure the way your bookmark bar looks and behaves.
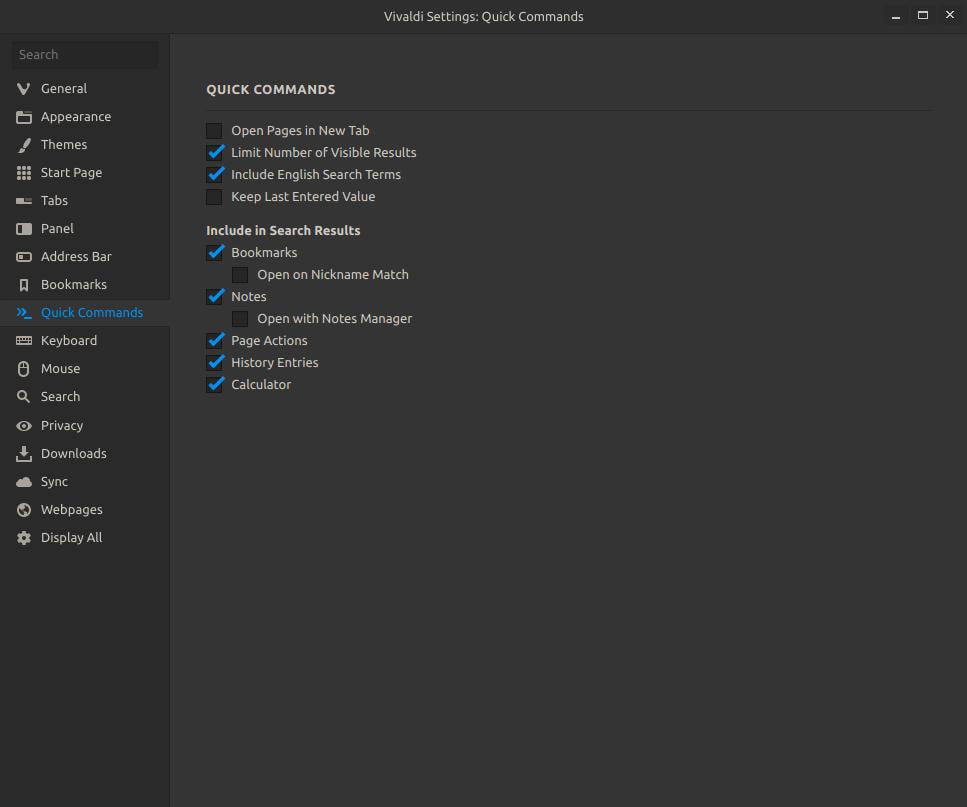
Quick Commands
The Quick Commands tab allows you to customize the way your quick commands behave and the way your search results looks.
The Quick Commands tab allows you to customize the way your quick commands behave and the way your search results looks.
Keyboard
The Keyboard tab allows you customize your keyboard settings and configure your keyboard shortcuts.
The Keyboard tab allows you customize your keyboard settings and configure your keyboard shortcuts.

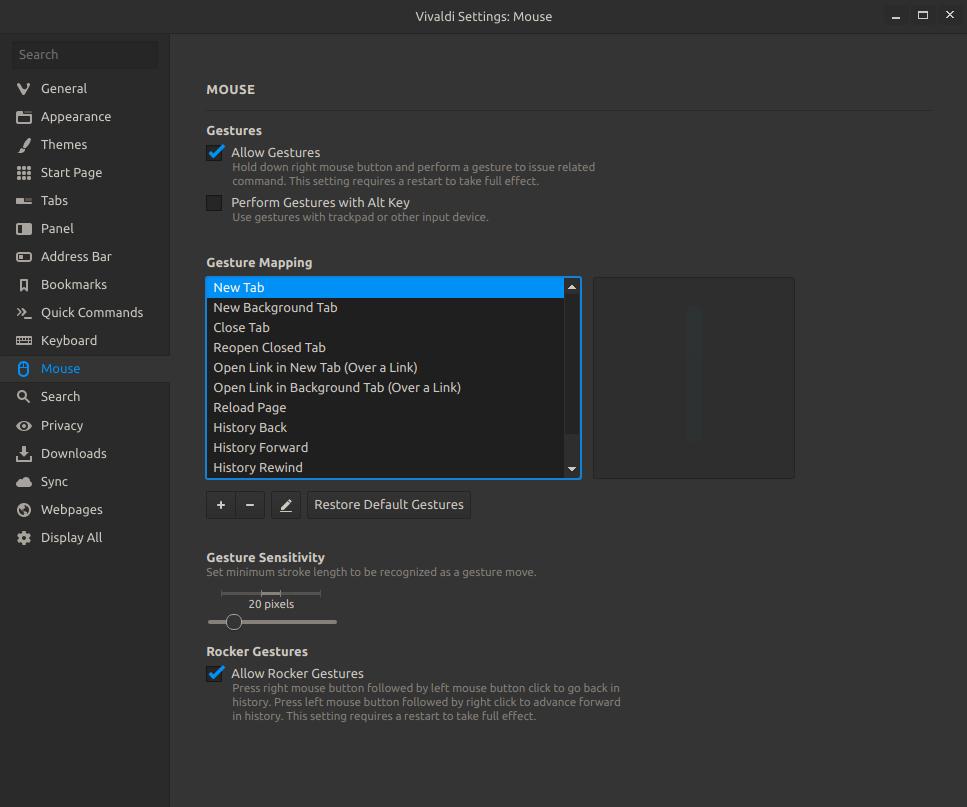
Mouse
The Mouse tab allows you to customize the way your mouse behaves.
The Mouse tab allows you to customize the way your mouse behaves.
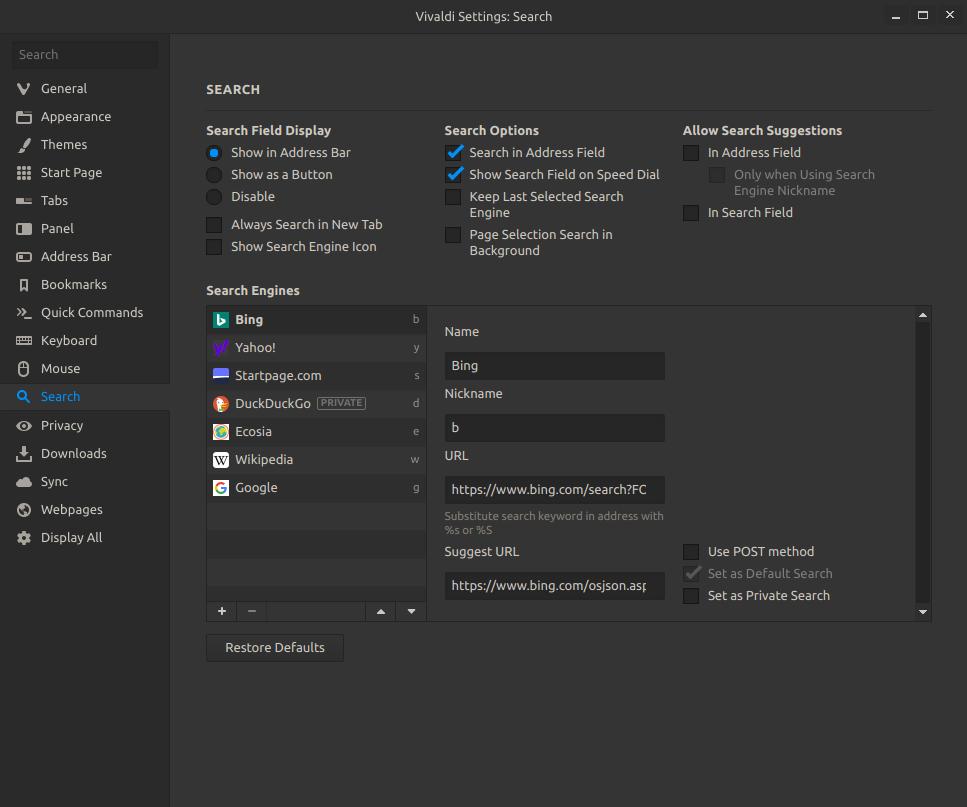
Search
The Search tab allows you to configure the way your search results are displayed and it allows you to select your favorite search engine.
The Search tab allows you to configure the way your search results are displayed and it allows you to select your favorite search engine.
Privacy
The Privacy tab allows you to customize how your online data is protected.
The Privacy tab allows you to customize how your online data is protected.
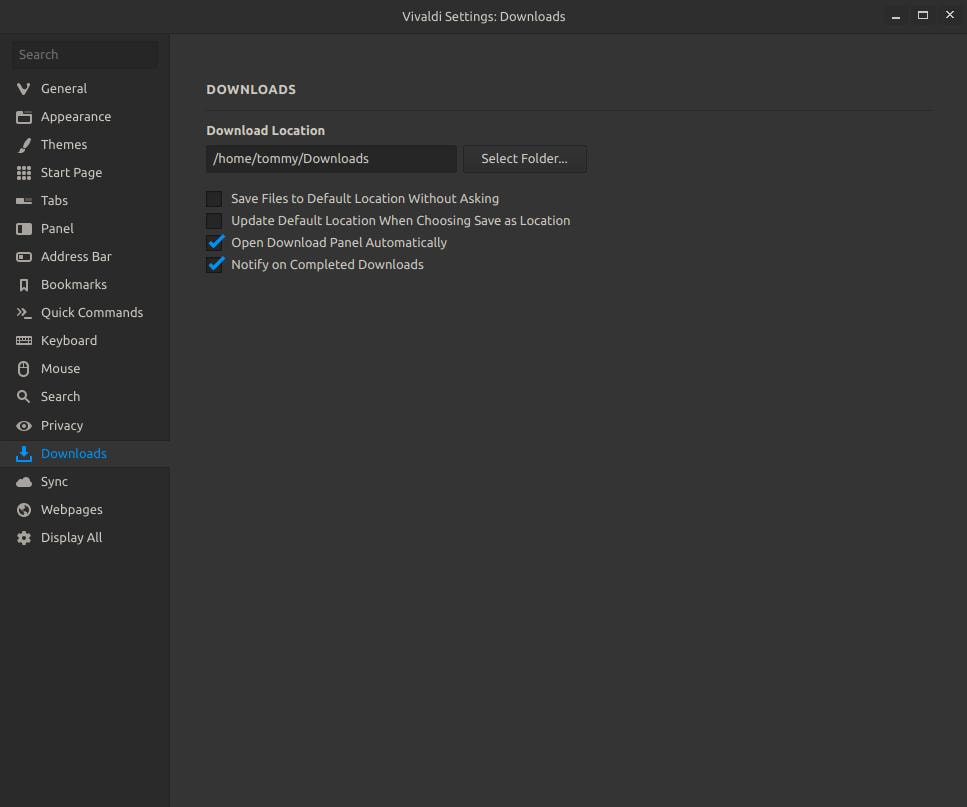
Downloads
The Downloads tab allows you to configure the default location or folder of your downloaded files.
The Downloads tab allows you to configure the default location or folder of your downloaded files.
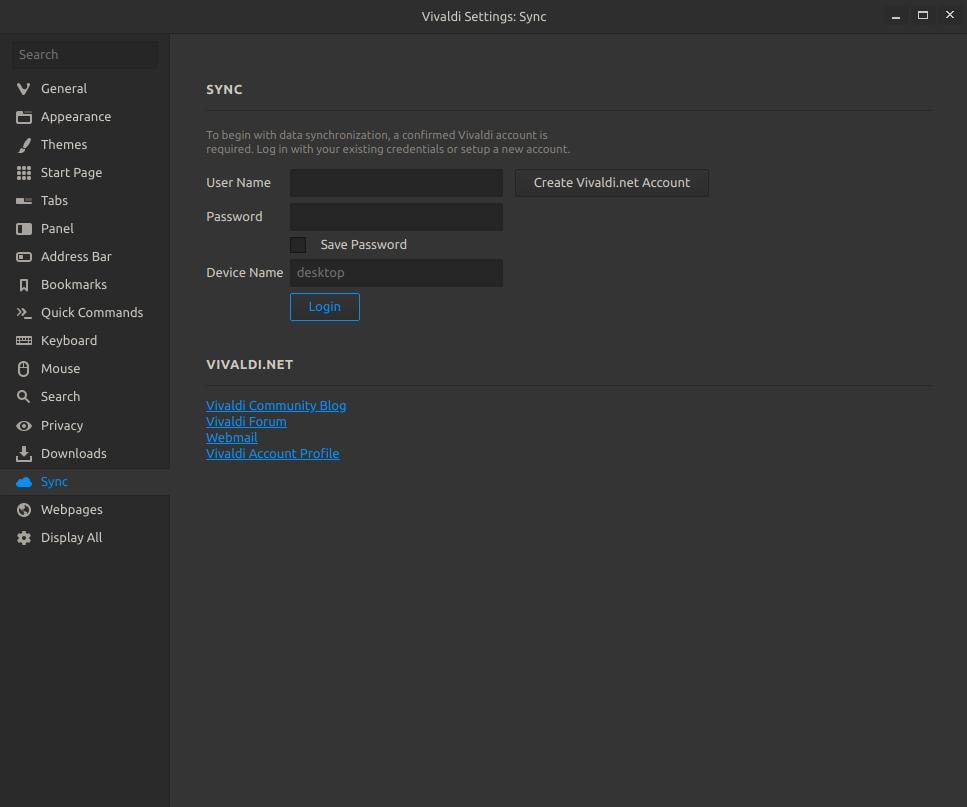
Sync
The Sync tab allows you to syncronize your browser's settings and data by connecting to your Vivaldi account.
The Sync tab allows you to syncronize your browser's settings and data by connecting to your Vivaldi account.
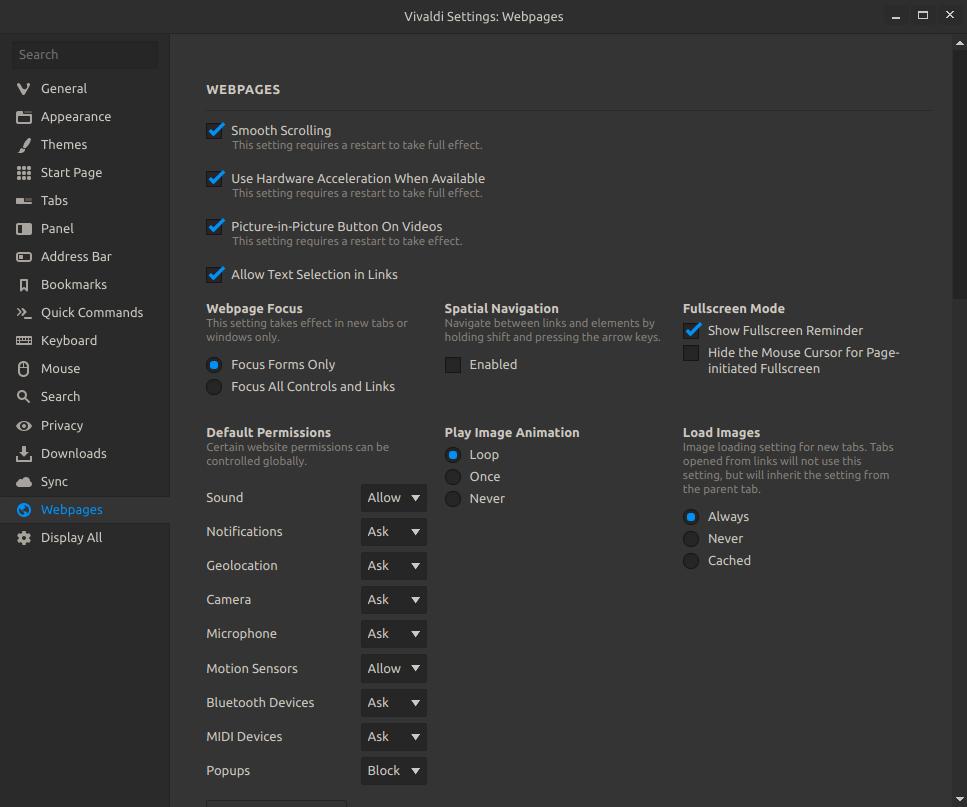
Webpages
The Webpages tab allows you to configure the way your webpages load and behave as you surf the Internet.
The Webpages tab allows you to configure the way your webpages load and behave as you surf the Internet.
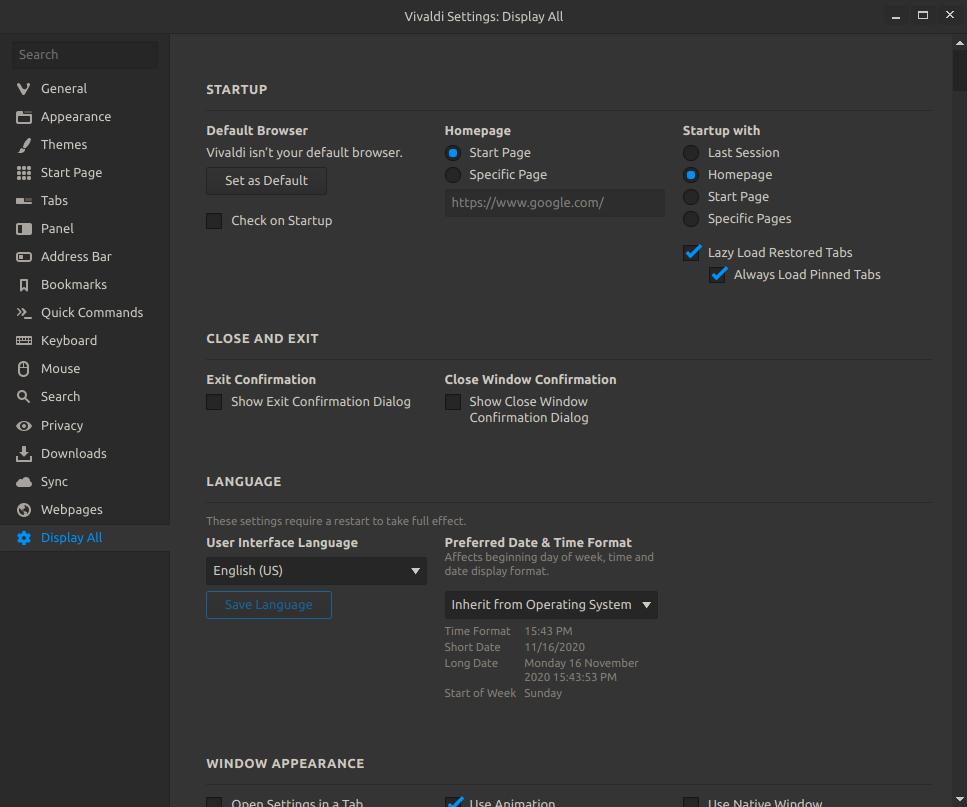
Display All
The Display All tab allows you to display all settings at once. You can use your scroll bar to scroll up or down.
The Display All tab allows you to display all settings at once. You can use your scroll bar to scroll up or down.
Vivaldi is packed with a lot of features and it is still very quick and responsive. It is highly configurable so you can customize it to look the way you want it to and behave the way you prefer.
Streaming Services
If you use streaming services then you may need to unblock or whitelist your streaming site.
If you use streaming services then you may need to unblock or whitelist your streaming site.
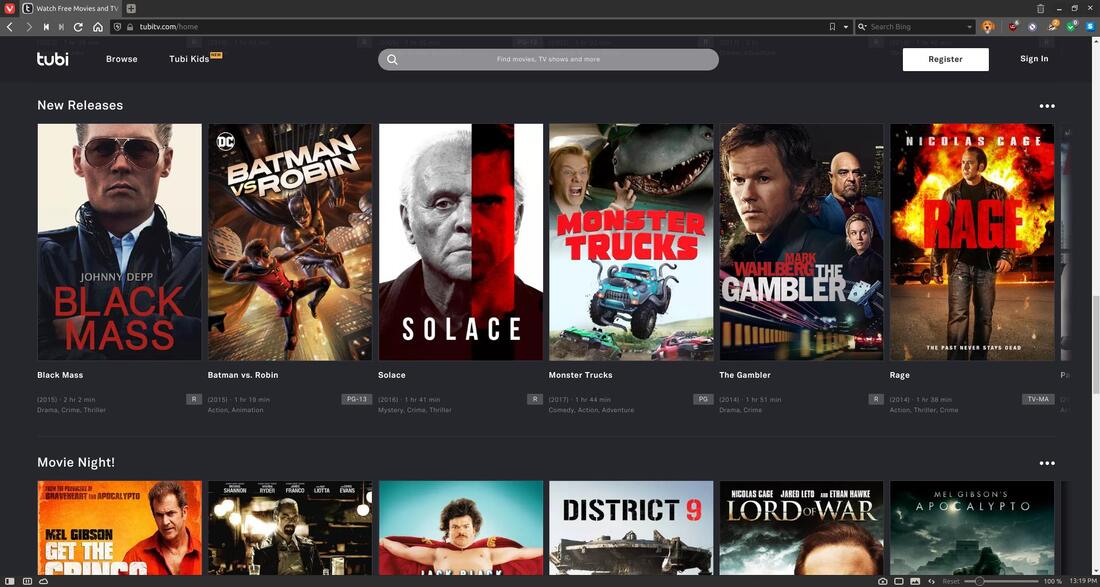
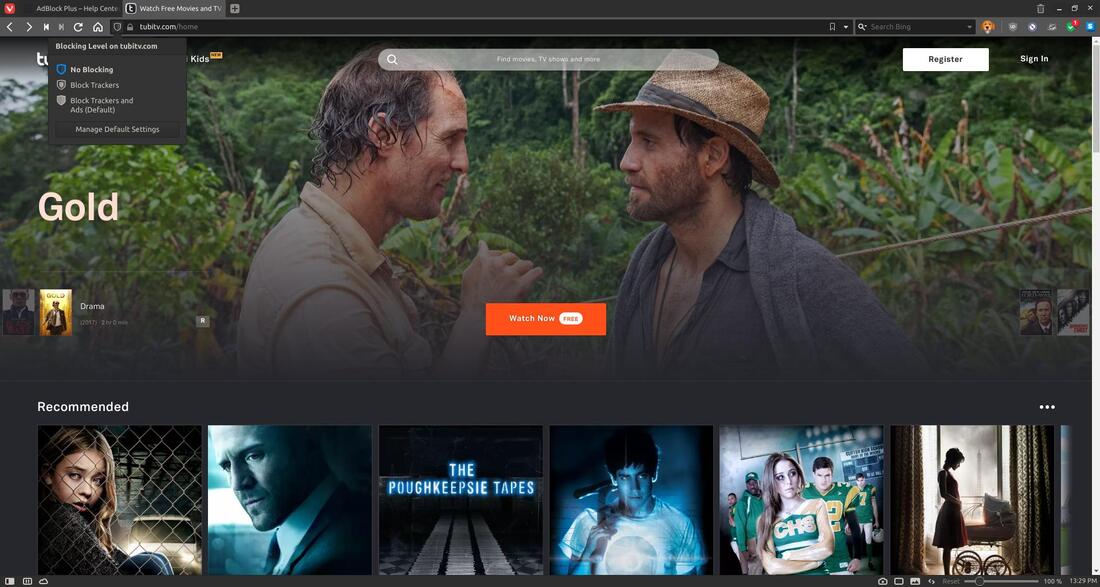
Click the shield icon to the right of the Home icon and select "No Blocking."
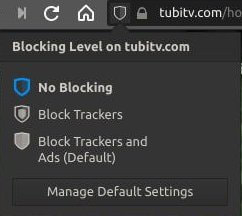
I had to unblock https://tubitv.com/ in order to watch their free streaming service.
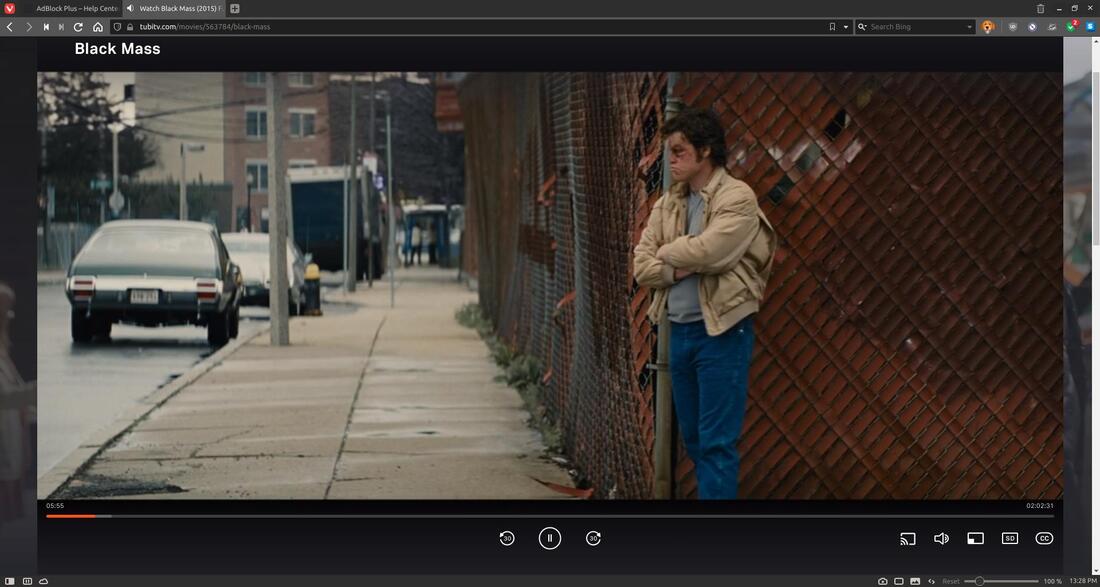
It works great once you allow it play in the browser.
Overall, I think Vivaldi is a great browser.
Nov 19, 2020
